

Showing posts with label Turkey Bow. Show all posts
Showing posts with label Turkey Bow. Show all posts

Turkey Bow
Hey guys! I'm over at Mashed Potatoes and Crafts sharing my turkey bow from last year! Go check it out and give Rachelle some love!

Two Nursery Tutorials and a Thanksgiving Bow
After a huge response I have decided to just go ahead and post all of the tutorials for the nursery. Most of them will be simple because I don't think I was super genius in how I did things but I hope I can inspire you with what I have done. I am going to do two tutorials today and the rest next week including the recovering of the swing cushion which was voted the highest. Don't think I forgot about Thanksgiving being tomorrow though. At the end of the post I'll post an additional quick festive tutorial.
I just had to sew the left side because I used the existing seams of the pillow.
2. With a fabric pencil I drew a circle and started sewing the petals around the perimeter. Start the the knot in the back and come up through the hole in the 2 petals stacked, lace on a bead, and come back through the hole. I did this three times per petal. Move toward the middle and fill in where needed.
 3. I used a zig zag stitch to sew the stem on. Then I sewed up the side leaving a small opening to stuff it. I stuffed it and hand stitched the rest of the edge.
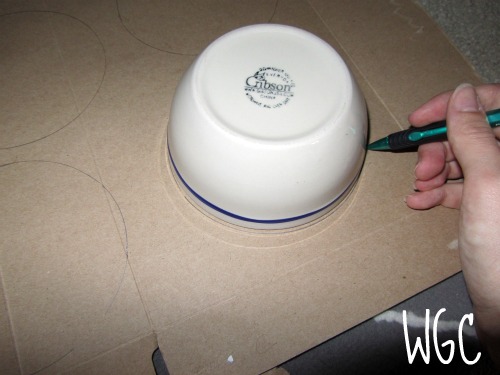
1. I used some paper to draw a template using a cereal bowl. I used a smaller circle for the inner circle. I folded the paper into 4ths and cut out a section. I traced the cereal bowl onto the cardboard and used the template for the inner circle and cut out.
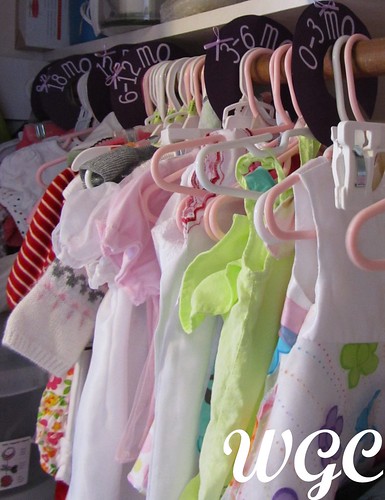
 2. I used the template and cut paper out just bigger. I cut out two for each divider. I had 0-3 Months, 3-6 Months, 6-12 Months, 12 Months, 18th Months, and 24 Months. There were six dividers so I cut out 12 paper circles.
3. I cut out the letters with my cricut and glued each one on along with a pretty little bow.
Thanksgiving Bow:
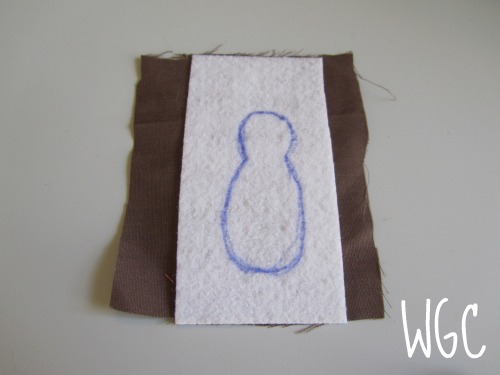
1. I cut out the shape of the turkey body out of interfacing. I cut the fabric just bigger than the body and glued it on the front. I then cut slits around the edge of the body so it would lay flat while I glued it around the edge.


2. I cut the ribbon in pink 1x 3.5" orange 2 x 3.5" and 2 x 2.5" and yellow 2 x 3.5" and 2 x 2.5" lengths. I looped them and hot glued them.
3. I glued them onto the back of the turkey with the small loops in the middle of the large loops.
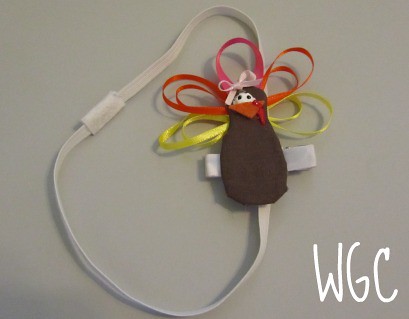
4. I glued on the small orange beak, made a waddle with red paint and the eyes with white and black paint. I made a loop with the interfacing on the back so it can be put on the interchangeable clip and onto a headband because she still doesn't have anything more than a fuzzy head :) After all this I smeared the eye so I put a bow on the Turkey because she's a girl.
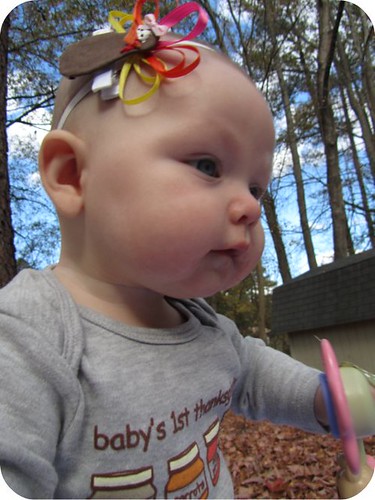
Here is her whole Thanksgiving Day outfit: Isn't she a cutie!? Her onsie is courtesy of her Aunt Jaime.She was being a total stinker and wasn't smiling.

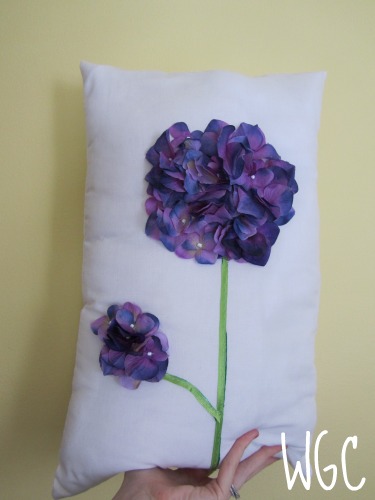
Hydrangea Pillow
Needed:
Silk flower
Seed Beads
Green Ribbon
Old Pillow Case
Filler
1. I used an old pillow case and sewed a small pillow out of it. The dimensions of the pillow are 12" x 19.5". At this point only cut the side wait to sew it. Take the petals off of the stem of the hydrangea.I just had to sew the left side because I used the existing seams of the pillow.
2. With a fabric pencil I drew a circle and started sewing the petals around the perimeter. Start the the knot in the back and come up through the hole in the 2 petals stacked, lace on a bead, and come back through the hole. I did this three times per petal. Move toward the middle and fill in where needed.

Fabric Dividers
Needed:
Cardboard (I used a cereal box)
Scrapbooking Paper
Letters
Ribbon
1. I used some paper to draw a template using a cereal bowl. I used a smaller circle for the inner circle. I folded the paper into 4ths and cut out a section. I traced the cereal bowl onto the cardboard and used the template for the inner circle and cut out.
3. I cut out the letters with my cricut and glued each one on along with a pretty little bow.
Thanksgiving Bow:
Needed:
Ribbons (I used pink, yellow, and orange. 3.5" of the pink and 12" of the orange and yellow)
Stiff Interfacing
Brown Fabric
Fabric Paint
Small orange felt beak
1. I cut out the shape of the turkey body out of interfacing. I cut the fabric just bigger than the body and glued it on the front. I then cut slits around the edge of the body so it would lay flat while I glued it around the edge.

2. I cut the ribbon in pink 1x 3.5" orange 2 x 3.5" and 2 x 2.5" and yellow 2 x 3.5" and 2 x 2.5" lengths. I looped them and hot glued them.
3. I glued them onto the back of the turkey with the small loops in the middle of the large loops.
4. I glued on the small orange beak, made a waddle with red paint and the eyes with white and black paint. I made a loop with the interfacing on the back so it can be put on the interchangeable clip and onto a headband because she still doesn't have anything more than a fuzzy head :) After all this I smeared the eye so I put a bow on the Turkey because she's a girl.
Here is her whole Thanksgiving Day outfit: Isn't she a cutie!? Her onsie is courtesy of her Aunt Jaime.She was being a total stinker and wasn't smiling.
Subscribe to:
Posts
(
Atom
)