Showing posts with label tips. Show all posts

Why I quit clipping coupons--and spend even less on groceries!

Yes, you read that headline right. I don’t coupon, and typically I pay $30-50 a week for groceries for a family of six—three meals a day (including lunches for my kids). I know that a lot of bloggers will tell you how wonderful couponing is, and it’s true that you can save a lot of money. I've done couponing in the past—I tried the Grocery Game for 12 weeks and did save money . . . when it worked. But here are the reasons why couponing just didn’t work for us.


Local grocery store sales schedules don’t cooperate

First of all, when I tried the Grocery Game years ago, they included some of the larger (more expensive) grocery stores. Now they only list deals for chains like Walgreens, RiteAid, and Walmart. When they did list actual grocery stores, the deal list came out on Sundays, and the deals ended on Tuesday. To get deals, that means I absolutely hdd to go shopping on Monday or Tuesday. If I’m busy or sick, too bad. Plus . . .

By the time I could shop, the shelves were picked clean

That wouldn’t be quite as bad except for the fact that, when I finally did get to go out armed with the best coupon/deal/sale combinations, there was nothing left. No, I don’t mean “Oh, my favorite flavor of this is gone, so I’ll have to settle for my second favorite” gone.

I mean the shelves with the sale items were completely empty. The end-of-aisle displays and island displays were gone. There was no more stock in the back. And the next shipment wouldn’t be in for days—till after the sale ended. “Gone” gone. No rainchecks.

Granted, this only happened with the absolute best sales, but it usually happened by Friday night (sometimes as early as 9 PM on day one of the sale, though!). The premise behind the Grocery Game is that sales run in 12 week cycles. If they’re so predictable, why not time the new lists so I can go at the beginning of the sales, before everything is picked over? And, really, are there that many good coupons in the coming week that waiting until the next Sunday’s paper justifies missing most of the good sales?

Frankly, I don’t need this stuff

To paraphrase Jurassic Park, couponing keeps you so preoccupied with whether or not you can, you didn’t stop to think if you should. You can get 50,000 razors for pennies apiece, but what are you going to do with them?

If you really want to save money, don't buy stuff you don't need. At all. Ever.

It’s just food

I know, I know, food is a little bit important in sustaining life. Right. But the things that coupons come for most of the time will not form part of a complete meal. For example, in this week’s paper, I found coupons for:
  • Fruit snacks
  • Cinnamon rolls, biscuits
  • Cereal
  • Desserts
  • Snack cakes
  • Chips
  • Candy
  • Frozen pizza and pizza-type things
  • Spaghetti-Os
Actual meals in there? Breakfast, biscuits as a side with dinner, freezer pizza and canned spaghetti (which I don’t even like). Healthy.

It’s mostly just food—food I probably didn’t need anyway. Again, even if I can get $50 worth of snack food for $0.50, once again, it doesn’t mean I should. It’s $0.50 I don’t really need to spend (and it’s never just $0.50) and it’s probably 50 pounds I don’t need to gain.

Granted, many couponing programs do note when there’s a good sale on fruit and meat, but I can figure that out myself.

I’m just not convinced

I know that it’s so easy to come home from couponing with a huge amount listed on the receipt as your “Amount Saved.” The rewards seem very tangible. But when I buy the store brand on sale instead of the name brand, my receipt doesn’t list that as part of my amount saved. While I could be saving just as much, the rewards are less tangible.

For example, I took a look at my grocery receipt for last week and compared prices on a few things that you just can’t use coupons on: store-brand milk, store-brand juice, meat (London broil), cucumbers, tomatoes and nectarines. I chose these because they happened to be on sale at both the discount store and the larger store I used the Grocery Game with store that week.

What did I discover? I was overcharged for my nectarines! I want my $1.47 back!

Erm, um. . . . In the amounts that I bought of these six things, the discount store was cheaper by more than $5 for one week’s worth of groceries. But if I really wanted to compare prices, one thing I’d have to take into account: I bought 2.23 lbs of meat, and the sale price at the other store (already $1/lb more) only applied to “Super Value Packs,” which would probably be at least twice as much meat. (And then I’d have to figure out a place to store it…)

Taking into account what I’d really have to spend to get that price, assuming I could find a small Super Value Pack (5 lbs, or two London broils), the difference grew to $13.63. On six things. That’s a lot of coupons.

What Works for Me


When I was on top of couponing, I review my stock of coupons before looking at the cheaper grocery store’s fliers. Then I look at the fliers and plan the week’s meals around what’s on sale. Then I write down anything else that’s a good deal that we normally eat and check my shelves to see if we’re low. Finally, I see if I have a coupon for anything in the flier and decide whether I really want it. (More ways I save money on groceries.)

We do still stock up on many things and rotate through our stock, but the #1 thing that helps save money is getting a sense of good prices for products. It takes observation and time, but eventually you'll be able to tell whether that's a good deal on meat or milk or mangoes.

My favorite shopping trick: Local stores periodically offer “case lot sales,” where canned goods (usually store brand) are marked down considerably—usually 50¢ a can or less. We stockpile canned goods during these sales. We use several FIFO organizers (first in, first out) and I’ve never run out of canned goods since we started really stockpiling during these sales.

I prefer shopping when and where I want, bringing less junk food into my house, and bringing home meals and food we’ll actually eat. To me, that’s the most cost effective way to get our grocery shopping done.

Need more help grocery shopping? Check out 11 ways to stay sane while grocery shopping with kids and 25 unconventional ways to save money on groceries.

Photo credit: coupons by OOingle.com 

Road Trip Tips: part two- Navigating, Saving Money, Items to Bring, and Memories

I have been working hard on some crafts around the house I can't wait to show you guys!

Today is the second installment of traveling tips. See the first post here.

Navigating:
We brought 4 different types of navigation and we used them all. Most of the time at least two at the same time. Of course we brought our trusty GPS. We put our final destination (going and then returning) so we could keep track of how long total we had to go. We also used the Google Map app on our iPhones to give us the best directions and update us of traffic conditions (which we hit a TON of in Arkansas, boo!). We used an atlas. It gave us distances between cities and and broader view of where and how we were traveling. Last, we used pre-printed paper directions of the whole trip. 

Stopping:
We tried to get as much done as possible when we needed to make pit stops. Gas, potty, food, and nursing the baby and we were back on the road. We had a sheet that we used as a picnic blanket in case we wanted to eat outdoors and let the kids run around. We had a pretty set schedule of when we stopped which coincided with meal times and my usual nursing schedule. For staying the night we used apps on our phones to decide. Mid-afternoon we would decide where we would try to make it to and I would begin my research into where to stay. I used the Expedia and Trip Advisor apps which I will talk about more below. 
Picnicking on a beautiful day
Money Saving:
Gas: So there is no app available on the iPhone for this (only Android) so I had to look at their website but I used FuelMyRoute.com . Once we had about a 1/4 of a tank I plugged in our current location and about where we could make it to and found the cheapest gas. We frequently found that at Sam's Club which is lucky my mom has a membership! If we were close to where we wanted to get gas I used the Gas Buddy app. 
Hotels: As I mentioned above I used the Expedia App. It is super user friendly and I found a promo code the first day to save the first time I booked on the app. We also used the TripAdvisor app to look at reviews of the hotels. There are reviews on the Expedia App but I just like to double check there to make sure.

General Tips for things to bring:
  • First Aid kit with (at least) bandaids, triple antibiotic ointment, anti-itch cream, and stomach, headache, and allergy medicine. 
  • Strings, paper, tape, scissors, and pens. Trust me in case you need to fix something or make something stay in place. I created a paper towel holder with the string and we tied it onto the handles on the back of one of the chairs.
  • Air freshener. Trust it will get gross smelling especially if you were lucky like us and had a puker on the first day!
  • Grocery bags for trash or other carrying needs. Both the paper towel and the trash hung by a baby toy chain link.
  • Sunscreen 
  • Camera (which is easily accessible)
  • Single dollar bills for tolls
  • Pillows for kids and adults
  • Sheet- as mentioned above we used it as a picnic blanket and we also put it over the baby when she napped so she could have some darkness and peace.
  • Gallon sized bags to put snacks once they get opened and all different sizes of baggies.
  • Club membership cards. 

Memories:
Along our trip we did a few things to remember the fun times we had. I made a calendar of our trip. It gave us a visual of when we needed to leave and how long things had and would take. Each day we also wrote in box where we went, funny, sad, and fun things that happened. On the back we wrote our memories about each state. We also took a picture of each state welcome sign. 

I have one more post to write about traveling with kids! Do you have and tried and true methods of traveling?!


What Works for Me: 5 Laundry Tips


A few tips from a laundry lover. Well, at least a laundry-I-don't-hate-you.

1. Get separate hampers/baskets for colors and whites. This saves tons of time for sorting. We have one laundry basket for whites, darks, towels and jeans. It makes life a lot easier. I'm not wasting time sorting and I don't miss one red sock or something.

2. Figure out a laundry schedule. Based on my cleaning schedule, I found a lighter cleaning day and made that laundry day. It's laundry day every week. This makes sure we don't run out of clean clothes and that I'm not guessing when I need to do laundry next. I know it's laundry day all day, so I don't forget about a load of laundry and leave it all day to get mildew-y. Not that I've ever done that before.....

3. Get the right tools. This includes good detergent, stain removers, Oxyclean, fabric softener and dryer sheets. If you have good smelling laundry, you may enjoy it more. Plus you won't have to wash the same things over and over to get a stain out, etc.

4. Organize your dresser and closet. What does this have to do with laundry? You want to put your clothes away, but you may feel discouraged thinking you don't have the space or not sure where to put them. Also, if something is on the floor of a cluttered closet who knows if it's clean or dirty? We've all done the smell test and ended up with a negative result.

5. Try a laundry folder. Clothes folders maximize space and I think they're kinda fun to use. I like breaking it out for the clothes I fold (not very many).

What tips do you have for doing laundry?

Kitchen tip: chill dough fast

Yesterday, I was making cookies that required chilling after shaping. I really didn't want to wait two hours to bake them (why do recipes tell you to preheat the oven, only to not bake for hours?).

Luckily, I remembered a quick tip to chill dough. After shaping into balls, seal them in a plastic zipper baggie, and put the baggie in an ice bath. Be careful to keep the zip top above the water level!

Water is a faster medium for temperature exchange than air, so the dough chills faster this way. This trick also works for chilling drinks and more.

10-15 minutes should be enough for dough balls. 20 minutes was almost too long for mine--they barely spread at all!

What's your favorite kitchen tip?

11 Ways to Stay Sane Grocery Shopping with Children

Kids and grocery stores often don't mix: temptations, temper tantrums, tears—and then there's the kids! ;)

I've been grocery shopping with small children nearly every week for almost eight years now, and while I try very hard to avoid grocery shopping with all four children (all under eight), I've found several other tips to make grocery shopping a little less crazy-making.


Feed them first
. Just like you're more likely to have a successful shopping trip on a full stomach, so are your kids.

Park near a cart return. Usually we maneuver for the closest position to the doors, but if you're next to a cart return, you can often get a cart so you don't have to drag/lug your kids/car seat/first tantrumer in. Then when you're done, you don't have to run across the parking lot to return your cart.

With tiny children, use a front carrier. The car seat takes up too much room in the cart for an effective shopping trip.

Know your grocery store's kid-friendly perks.
Some of my local grocery stores' perks:
  • Free small candy at check out (a roll of Smarties)
  • Child-sized carts
  • Carts with plastic toy cars on the front
  • Carts with built-in plastic child seats
  • Free cookies at bakery
No store has all of these, so it's important to know what to prepare your kids for before you go in ("No, they don't have Smarties here, guys.") And on that note . . .

Cut off tantrums before they begin. Set ground rules before you go in the store. "There will be no tantrums, or [natural consequence]." "We will be getting X, Y and Z, but we are not going to spend money on Q, P and R."

Bring bribes. Small candies, gum or a pack of fruit snacks can help stave off tantrums or the gimme-gimmes. Alternatively, buy bribes and make your children earn them through good behavior while at the store. (I do this with the free cookies and candy from the store.)

Give your kids choices. If you're shopping for food for them especially, you can let them choose. It keeps them from getting bored and (hopefully) increases the chances they'll eat what you buy. Even if it's not something they normally like--let them help pick out your tomatoes, and they just might eat them.

Give your kids responsibilities. My kids love to help hold the list and the pen, or drive the cart; Brooke gives her little girl the coupons to help out. When they're invested, they're not throwing a fit.

Teach them to grocery shop. As your kids get older, they need to learn grocery shopping skills. Teach them how to tell if a piece of fruit is ripe or a vegetable is good (and if you don't know, now's a good time to learn!). Teach them how to save money on groceries. Teach them to use a list.

Take a deep breath, count to four, say a prayer. A little patience goes a long way. A lot goes even further.

Bring along a snappy comeback to those old biddies who tell you, "I never would have let MY children behave that way." I've never had that happen to me, but I do have friends who have. (One brave friend followed the wicked witch into the store to tell her how unhelpful, rude and ugly her behavior was.) How about, "Yes, well, at least they don't reprimand strangers who are doing their best" or "Oh, to be ninety and have forgotten these struggles"?

What are your best grocery shopping with kids tips?

Original photo: GoonSquadSarah

7 Steps to Get Your Kids to do Chores

Our chore system works great--sometimes. I dole out the assignments, help the kids, and we have a clean, well functioning house. Sometimes, I have to remind and push and nag all day, and finally my husband gets them through their chores just in time for bed. There is no perfect system, but as a mom of four kids, ages 7 and under, I can tell you that this works. And my friends with older kids assure me that this struggle to lay a good foundation young is worth it.
Let me repeat that: this is worth it!


A Good Beginning


If you haven't already begun doing chores, it's important to explain your expectations. Doing chores is not the parents taking a promotion; it's having the kids contribute to a happy household. We all have to do work around the house. Sit the children down and explain this. If you're using a chore chart, unveil it and explain it here. If you're withholding privileges and/or offering rewards (more about both later), explain those systems here, too.

As we mentioned last time, clear expectations are key here as well. Young children (and even older children! Heck, even adults!) need to know exactly what's expected of them. You won't get results from taking a three-year-old to the door of a dirty bathroom and command them, "Make it clean." Show them step by step and help them with . . .


Understanding (& Patience)


I still remember what it was like to be a kid, and to look at a room filled with toys, and not know where to begin. Or a room that had all the big things picked up and think I was done, only to be instructed by my parents that I was nowhere near done.

Young children should not be expected to clean a room systematically or completely without explicit instructions, and often help and reminders. Cleaning isn't instinctual ;) . We're not just assigning them chores; we're teaching them how to maintain a household. A three-year-old is capable of scrubbing a toilet--but she may need it explained and demonstrated a couple (dozen) times.

Appeal to the Rules


Our household is run heavily by the rule of law: once we make a law (a rule), it rules (not our tyrannical wills, most of the time . . . whoops, my degree is showing). "I'm sorry, that's the rule," makes it sound like it's totally out of your hands--and any further appeals to you will be fruitless.

I'm pretty sure this is why rules were invented.

Withhold Privileges


I know, how cruel to make your children work for the privileges of playing computer games, seeing their friends, watching TV, etc. We're probably the meanest parents in the history of the world for doing things like this.

Reward Compliance


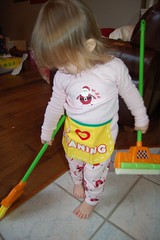
"I heart Cleaning"I once heard a talk by a family counselor, and he said to immediately thank a child as soon as they begin to obey. But you can do more than thank your kids, too: when our kids do their chores, with the Family Do Dots system they earn scrip to use in a family "store" once a week. You might pay your kids an allowance. When we Wayward Girls were little, we got to pick out a piece of candy if we did our chores. Young children can be motivated by the smallest rewards.

Choice & Accountability


Make chore time about their choices. They can choose to do their chores and as a consequence, receive privileges and rewards, or they can choose not to do their chores. Even adults don't get to choose the consequences of our actions!

Also under this, make sure the chores are completed and track this. Kids can tell if you're not really checking. (Spot checks can also be very effective.)

Teach Them to ENJOY the Results


Especially following a large task, like cleaning and organizing the toy room, have your children look around at what they've accomplished. They've cleaned this entire room. Help them not only understand the sense of accomplishment they should have, but also help them appreciate how nice the room looks, how easy it will be to find their toys, how much more fun they can have now that the room is clean. This end result is what we want, and if they can internalize that desire for themselves, it's helping them learn to work independently.

Posts in this series: 7 things every parent should know about kids' chores

Photo credit: two children cleaning—Michael Bentley; child cleaning—Amanda Westmont, via Flickr & Creative Commons

Moving Day 3- Tips and Tricks

Hooray for day three!  If you want to see other posts in this series Monday was supplies to use and Tuesday was Pinterest ideas I tried out.


Today is general tips for moving!

  • Packing:
    • I didn't know where I wanted a lot of my decor for the new house so I labeled it all to go to the same spot. Once it got there I could decide where it should go from there. 


    • Most of our paperwork got packed up but I kept out the important thing. The things I would need right before, during, and after closing. I had my old and new loan documents, our passports/birth certificates/ss cards, extra pens and paper, and child proofing items in there. The child proofing things were collected as we emptied out drawers and were kept there so that we could put them on the outlets and cabinets as soon as we got to the new house. This bag was in addition to the bag I talked about on Monday with moving supplies in it. 
    • Don't pack boxes too heavy. It's really easy to just take all of your books and put them in the same box. Be careful how many books you put in the box. It could make the box break or you could hurt the back of the person carrying it!
    • Don't take your clothes off the hanger! That takes forever to do and forever to put back on the hangers. You can get clothes hanging boxes or the much easier and less expensive option is to get trash bags and tear a hole in the center of the bottom and put them over your clothes with the crook of the hanger out of the hole. Stuff the parts that don't fit into the bottom and pull the draw string closed. Tape the hangers together. 
    • Pack your sheets on top so you can make your bed first when you get there. 
    • I had a schedule for when I would pack everything up. The last minute items such as food, dishes, clothing, toiletries all need to be packed and can't be done at the same time since that is a whole lot of stuff. I had a plan for each day. When I packed my toiletries I had travel ones to get us through moving. When I packed our dishes I had purchased a huge thing of styrafoam plates. I scheduled out our meals and only kept out the food we needed. I made a schedule of all of this so I could make sure it all got done in time.
    • Have an on going box to go to charity. I had multiple bags and they all went at once. 
  • Labeling boxes
    • Label EVERYTHING. Use masking tape to label furniture, big bins, and other large items. My goal was to have the only question people ask me on moving day was "What can I do next?"
    • On Monday I talked about the labels I used. So when I was at our old house I drew a rough layout map of our new house and numbered each room. I taped this map next to the door the stuff would be coming through on moving in day. Each box had a number on yellow tape, blue tape if it was heavy, red tape if it was fragile, and an orange X if it needed to be last one on first one off. The label was placed so it could be seen from the top or side. 
  • Moving your stuff
    • Who doesn't love free labor? We asked for help at church and got the teenage boys as well as quite a few other men and women to help us. That morning I didn't know how we would get everything done but two amazing people from our church showed up. We couldn't have done it without them!
    • We told all of the people that were coming to help that we were going to have food at certain times. We had $5 pizza on moving out day and subs on moving in day. Both were super easy to set out and clean up.
    • At our final walk through I brought a tape measure. I measured where our furniture would fit so I was sure where I wanted it while I still had muscle there to move it. No couches in the middle of the living room for me!
    • I'm a firm believer that unless a child can help out a lot (ie a teenager) they should be somewhere else during moving. My sister-in-law and her family graciously watched PB for two days while we moved. It was the longest I had ever been away from her and it was really hard but it helped out so much no to have to worry about nap times and where she could safely play.
  • Saving Money
    • For our moving truck I used a promo code I found on a discount site. I compared three different companies and we got a great price.
    • When you change your address you will get great coupons in the packet! My favorites are the ones to home improvements stores. Also look on their websites for moving incentives and coupons.
  • Once you get there
    • Set up your beds first! That way you can fall into them when you get too exhausted to move anything else
    • For safety you should rekey your house. We were worried about the price of new locks and door knobs and we're DIYers so we found a tutorial online and changed the pins inside of our existing locks with a kit we bought on Amazon. Instead of spending hundreds of dollars we spent $7. That's a good exchange!
Phew! I think that's about all I have until tomorrow! Do you have any tips for moving?

Enjoy this post?! Here are four others in the series:


Day 2- Pinterest Ideas I tried out

Day 3- General Tips and Tricks

Day 4- Preparing Your House for Showings

Day 5- Leaving Behind Your Home and Neighbors

25 Unconventional Ways to Save Money on Groceries!

Times are tough, and food is expensive. There are lots of ways to save money on your grocery budget, but unconventional thinking with these simple tips can help you spend less on your food, use more of what you have and waste less.


The conventional tips to saving money at the grocery store are a great start:

  • Buy things that are on sale
  • Plan menus around the sales flyer
  • Limit your shopping trips--once or twice a month is ideal
  • Use a grocery list
  • Buy in bulk and keep your cost per-ounce low.
  • Emulate Extreme Couponers, use price matching and sale surf.
But I find that the things that can make the biggest difference in my grocery budget are tips that think . . . a little more outside the box. They might sound like common sense, but they go beyond or even run contrary to a lot of the "conventional wisdom" of saving money on groceries. Like these:

Look at what you're going to use. I recently did this with broccoli. We like broccoli fine, but sometimes it takes us a while to get around to eating it. I needed a little broccoli for a specific recipe. The regular broccoli often comes two stalks bound together. Broccoli crowns, on the other hand, are more expensive, but you can buy them individually. You might not be eating the stalk (peel it first if you are!)--but you're still paying for it. For a small amount of fresh florets, broccoli crowns might be a better deal.

Look at the per-unit price, not just the per-ounce price. For example, if your family can't drink a full gallon of milk before it expires is might be not only less wasteful but cheaper to buy a half-gallon. Now, if a gallon costs $3 where you live, and a half-gallon is $2, the gallon is clearly less expensive by the ounce. But if you're not going to be drinking all those ounces, instead of saving a penny an ounce, save a dollar on the whole unit!

Use a grocery list, but use categories. Let's say you're going to make a stir-fry this week, and you need meat. You can look at the sales flyers to figure out what's cheapest in advance, or you can leave the category a little more open, and find an unadvertised sale, something that's close-dated (i.e. needs to be cooked soon anyway), something that's cheaper by the unit (if you won't use more than what you need this week), etc. I do this especially with fresh fruit for snacks, vegetables for stir-fries, etc.

Keep a running subtotal (or written) as you shop. Not only will you know what to expect at the register instead of playing the supermarket sweepstakes, but you'll be able to pick things that you might not need as much to keep your costs down.

Study the sales flyers--but not necessarily to find the best deals each week. This takes time, but paying attention as you plan and shop over time gives you a good sense of what's really a "sale" and what's actually a good deal. For example, name brand cereal often goes on sale for $3.88 for a large box. That might sound like a deal, but if you've watched the sales cycles, you might know that you can get it for $2 a box or less every quarter. (Sales repeat in 12-week cycles, and you can stock up on durable items--but that's a conventional tip I hope we're all using!) (Side note: name brand cereals often have coupons available.)

Know the stores and their schedules. Aside from saving time instead of walking all over the store for hours, if you know their layouts and schedules you'll know when and where to find the very best deals, such as when they mark down their day-old bakery goods or close-dated packaged produce. Or, if the store closes on Sundays, you might be able to find highly perishable fruits, veggies and bakery items cheaper on Saturday. If you live in the West, you'll frequently find case-lot sales for great savings on canned goods.

Find local Internet forums for sales and coupon advice. Extreme couponers make using coupons a full-time job. Unfortunately, most of us already have jobs. However, there are many "extreme couponers" who have free local forums where individuals can pair up the best sales and coupons for you, or let you know about other good local deal.s

But use coupons wisely. Like I said, extreme couponing is a full time job. Knowing easier ways to take advantage of coupons helps even more. Every once in a while, you'll find a store that accepts expired coupons (which they're supposed to do if you're overseas military, BTW), or doubles, triples or rounds coupons up to a dollar periodically. You can find extra coupons on the Internet, especially ones that load directly onto your grocery store savings card from Cellfire.com and Shortcuts.com. And of course, remember to compare the price with coupon to the store brand, and know that a coupon is not a contract. If you don't really need it and you might not use it, don't buy it!

On that note, know the difference between needs and wants! You do need to eat. You do not need to eat filet mignon every night . . . in fact, you don't even need to eat meat every night. Be open to cheaper options, including cheaper meal plans. Eliminate unhealthy and unnecessary snacks.

Know what's worth it to you. Things are usually cheaper if you buy the parts, pieces or ingredients and put them together. It's cheaper to make your own artisan bread, for example, but is your time worth it? (No judgments--I make my own of some things, other things I'm willing to pay for.)

You do not have to buy something just because it's on sale, nor do you have to buy everything that's on sale. It sounds like common sense, and it is, but sometimes the people who are the smartest about saving money on sales just can't resist a good deal. But again, if it's not something need and/or will really use, it isn't a deal. It's a waste of money, and even if it's free, it's a waste of space in your home.

Learn when a sale isn't a deal! Our local grocery stores will frequently run a "Buy 10 participating items get $5 off" sale. If you're going to eat or use all 10, and they fit into your meal plan already, then that's a great deal! But if you only need three or four items in the near future (and how many boxes of PopTarts does anyone need?), you will probably be spending more than $5 to get the $5 discount. Is that a deal?

Pay attention to when you do--and don't--have to buy a certain # of things to get a deal. Sometimes, the ad says "Buy 2 get one free!" but really, they're all just half off. On the other hand, some sales you do only get the discount if you buy two items. This is especially true for the buy 10 participating items, get $5 off--the fine print will specific that you must by 10 items, and a limit of 10, 20 or 30 items.

Meat is one of the most expensive items on your budget--even the best sale on meat is still well over $1/pound where I live (and we have low food costs!). If you go meatless for a meal or two, you could be saving $5/week pretty easily. That's >$250 a year. Protein-rich foods like beans (dried or canned) and lentils (usually dried) are much cheaper and still tasty.

Know what's almost always cheap. This might vary by where you live, but where I live, onions and potatoes are always pretty affordable, as are dried beans. Along with this, knowing your fruit seasons and buying fruits that are being harvested now can help you save money.

Check out the bulk section for small amounts, too. Most of the time, when we think of "bulk" we think of buying a lot. But sometimes it's perfect for just a little, too. Many stores have some sort of bulk section with nuts, grains, chocolate, dried fruit and granola. A few stores have more extensive bulk sections, and this is a great place to pick up smaller amounts of things, too. For example, around here things like couscous, bulgur, panko and the like come in boxes and are a little expensive. I usually don't need as much as is in the box (and the rest might go to waste or just sit around taking up space for a while), so I go to our best bulk store and buy a cup or two of what I need.

Learn substitutions (or bring a smartphone). I was making mushroom ravioli the a few months ago and I needed dried criminis. My usual grocery store didn't care of them. Instead of driving all over down after them (and then spending a bundle on them), I pulled out my phone and looked up a substitute that I could find in my store for much cheaper.

Ask for help finding what you want. Time is money, they say, and in the grocery store it's true. The longer you spend there, the more you spend. If it takes twenty minutes to find the couscous, you'll probably pick up a couple other things while you're looking. And if the first person doesn't know, ask again. Last month I asked a grocery store employee where the couscous was, and she had no idea what I was talking about. I explained it was a type of very small pasta, and she said if it wasn't where I was looking by the pasta, they didn't have it, and she'd seriously never heard of it. (I didn't give up. It's by the rice.)

Check your freezer, fridge and pantry before you go. Don't buy things you already have! Also, be aware of how much space you have for new food.

I'm bucking convention here (gasp) in buying in bulk and shopping infrequently, but I think aiming for weekly grocery trips is really the most helpful to the budget. The more you go, the more you may fall prey to impulse buys, but if you don't go each week you'll run out of highly perishable items like bread, milk and fresh produce, and then have to go back for "a quick trip." And what are those quick trips but an even easier excuse to go without a list and pick up a few other things? Plus, if you're already there each week, you can take advantage of each week's best sales.

Know your food: how to store it, how to use it, how long it will keep. It's a waste of money to bring home your produce and ruin it. Peppers go in the fridge, tomatoes don't. Pears ripen in paper bags, then go in the fridge. Keeping bananas near apples make the bananas ripen faster. If you need peppers for next week's meal, but they're on sale this week, will the keep? Etc. Etc. 

Process your food once. If you stock up on peppers and you're planning to use them this week, why not chop all the peppers at the same time (and freeze the extras)? When you use your bulk chicken or beef for dinner Tuesday, wrap up the extras for the freezer, or cook it all, chop it and freeze it. I have thrown away a ridiculous amount of food (including expensive meat!) because I keep meaning to freeze it . . . and then it's too late.

Eat your food twice. Okay, that might sound a little gross, but what I mean is to incorporate any leftovers into your meal plan. I tend to make big meals for my family on Sunday, Monday and Tuesday, then I leave Wednesday and Thursday open for leftovers. Friday is more flexible: I keep the ingredients for homemade pizza on hand, or we can pick up a quick pizza, or we can have another night of leftovers if we still have some hanging around. Saturdays are often similarly flexible. We throw away a lot less food (that I work hard on!) this way.

Look into local co-ops, stands and farmers' markets for groceries, and really do your research. One of our local grocery co-op options costs four times as much as the one we used for a while. Also keep in mind that with grocery co-ops, you might have to take what you get. The one we used gave you about 5 kinds of fruit and 5 kinds of vegetables, but it was always a toss up whether you'd get Swiss chard and white sweet potatoes or carrots and bananas. It made menu planning a challenge, but the real reason we stopped using them was the decline in quality. When fruits and vegetables are in season, you can also find great deals at roadside stands and local farmers' markets--but again, it pays to know what's really a good deal.

Form your own co-op. Yes, you can do that! In Mom's congregation, a group of families get together and (if I understood this right) buy wholesale produce from the local farmers' market, then split up the cost and the food. Wholesale prices are generally lower, but the minimum purchase is large, so it's still expensive (and who needs 25 lbs of zucchini?), but if you share the costs, you can also share the harvest.

What do you think? What are your outside-the-box tips to save money on groceries?


Photo credits: money: Julien GONG Ming; carrots: F Delventhal

Jaime's Tips for Thrifting

This year my entire Easter outfit came from the thrift store.

Photobucket
Top and hair flowers: '80s classic, Skirt: Banana Republic, Shoes: Guess(see below), Necklace: ME

I have found some real treasures at my local thrift stores. I've talked about a few of them before. Here are my tips for successful thrifting:

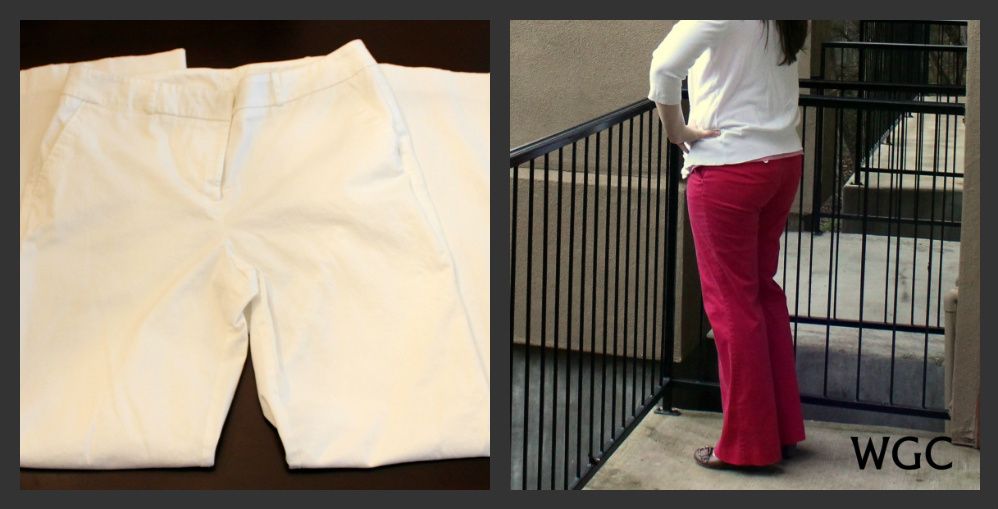
1. Shop with something in mind. Sorting through racks and racks of clothing just trying to find something "cute" may be overwhelming, at least it would be for me. Before I go, I have a game plan of different things I'm looking for. There are some things I'm always looking for, like skirts, but other times I have something specific in mind, like white, cotton pants to dye:

Photobucket

2. Keep your options and eyes open. If you are handy with a needle or dye, think outside the box: sizes that are too big or even menswear! Make sure to check in different areas. My local thrift store divides clothes into knits, sweaters, tees and blouses. If I'm looking for something in a particular color, I check all of the sections. The blouse from my Easter outfit was totally '80s--I removed the shoulder pads and took it in a touch on the sides. Bonus: I used the fabric from the shoulder pads to make the flowers on my hair accessory.

Photobucket 

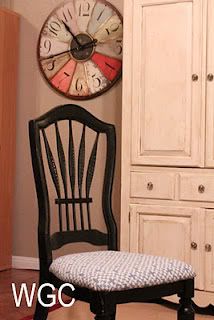
3. Give yourself enough time. I'm pretty bad about this one, I like to go thrifting during lunch. If you are focused, you can do this. I usually am looking for just one item and can be in and out quickly. But as to not feel pressures give yourself enough time to look through the racks. I did find my chair during my lunch hour though!

Photobucket

4. Shop out of season. I got my Easter skirt in the fall. I snagged the shoes right after Christmas. Another bonus: Savers runs sales at the end of the winter season on long sleeved items, coats, etc.

Photobucket 
So this is love? do do do do 

5. Know your store. Savers is my store. I know about the Super Savers card, and about the color system and I get emails about the sales they are having. Other stores in my area get overstock-like merchandise from Target on Tuesdays. Goodwill has a discount store in my area where everything is priced by the pound.  I know Salvation Army has sale days. Try asking the employees at your local store. Another great thing about Savers: they give you coupons or card punches for every bag you donate! Love it!

Photobucket

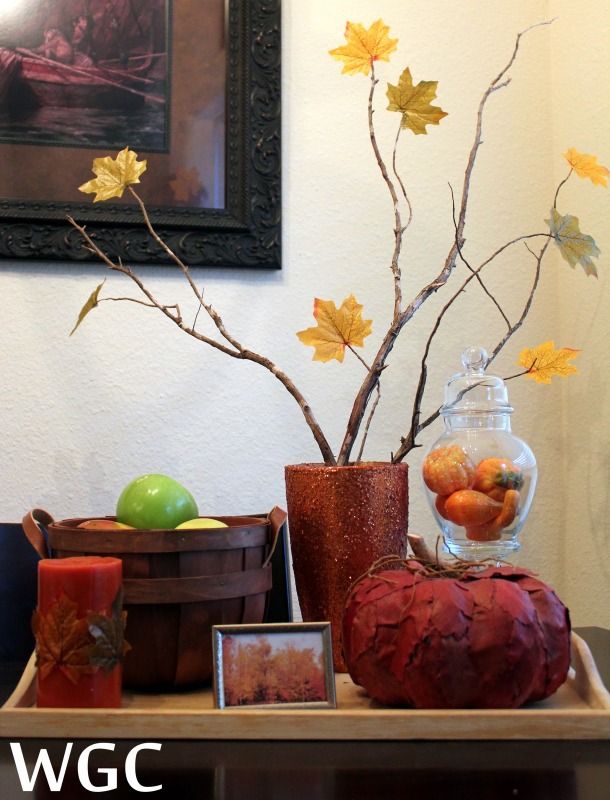
6. Shop for craft, decorating and organizational items. Goodwill has TONS of baskets, I would never buy one full price after having seen all the different kinds they have. I've gotten an awesome shoe organizer and hanging closet organizer as well as tons of decor items like these:

Photobucket
Picture frame, glitter vase, fake apothecary jar and tray all came from the thrift store

My biggest tip: Have fun! I love thrifting! Oh, and be sure to bring your hand sanitizer! 

A Beginner’s Tips and Tricks for the Silhouette Cameo

Before I start, I wanted to let you know how excited I am for our Wayward Weekend Link Party. Please stop by this weekend to share your craft and to learn from others at our link up party!

My tips and tricks for using the Silhouette:

1. The first cut isn’t always going to work. It takes some getting used to!
My cutting tips:
Do a test cut
Don’t double cut with cardstock

IMG_4092
Oops

Make sure nothing is in the way of the mat on either end or you will end up with a off kilter image that won’t work.
Make sure your paper is correctly lined up on the mat
Make sure you turned the blade to the correct number and that you have entered the correct thickness in the settings.

2. Cut yourself some slack. This is supposed to be fun!

3. Read the manual, watch the instructional video and use the user’s guide. Use Silhouette’s website for more answers, and if you still can’t find the answer, Google it!

4. Did you know you can get 50 MORE free images? Because different software has come out, they released new images. The old images are in the Silhouette store for free. Simply search “50” in the search box. Some 1950s stuff will come up first but below that are some more images. My favorite are the kaleidoscope.

5. Maybe you were smarter than me, but when I looked at my 50 free images, I didn’t know what the heck the “Control Panel” was. Then I read Sugar Bee Crafts and had a DUH moment. The control panel image is for your control panel on your Cameo. Cut it out to personalize your machine.

6. I did NOT get this whole transfer paper thing until I read this easy tutorial from Silhouette’s blog: Here

7. Free images are released on Tuesdays on the Silhouette blog. Don’t forget!

8. You can make and share your own images in Silhouette Studio. I’ve gotten some freebies that other people have posted. As soon as I make a good one I’ll share =)

IMG_4094
My Silhouette Cameo, all pink and decorated!

What have you learned about your Silhouette? 

Wreath Making Tips


As the air is getting cooler (kinda-the forecast here for today is 85 degrees) I have started to decorate for fall and put out my lovely fall wreath. It was really complicated making it-NOT! I decided instead of a useless tutorial I would just give you some tips I have found while making different wreaths.

1. Make sure your wreath an stand up to the weather.


2. Make it interesting! Use an interesting pattern, embellishments, or color variation.


3. Don't spend a ton of money. I almost always shop at Michael's mostly because of location but there are always coupons. There are always sales on stems. This wreath the flowers were 50% off and I used a coupon for the grapevine wreath. I paid less than $10 for the whole wreath. The picture below is a great alternative to buying a wreath form.
http://www.thepennyparlor.com/2010/09/coffee-filter-wreath.html


4. Make sure things are secure! Use LOTS of glue.

5. Do a little at a time and hold it back to make sure you can see where things need to be added or taken away.


 For this wreath all I did was get the stems and pull the heads off the flowers. I glued them in place. I took some leaves from the stems and glue them at the edge of the flowers. There is a thin ribbon bow at the bottom you can't see in the picture. Mostly that is because you could see me in in the reflection in the glass. My neighbors already had to see me in my pjs no one else has to :)


Remember the fun summer wreath I made at J&M's?

Do you have any other wreath tips?! Happy Fall!

Reducing Bulk

Sewing instructions usually say trim. Well what the heck does that mean? It can mean a few things. The purpose of "trimming" is to reduce bulk at the seams.The instructions typically don't tell you how to reduce bulk, they just stick with trim. Here's how to tell how to reduce bulk:

Curves:
Reducing bulk at curved seams can be done with notching or clipping.
On an outer curve, we notch. This is cutting triangles along the edge. To check whether or not it worked, pull the fabric and straighten it.When you straighten the curve, it should make a straight line without bumps. If it bunches when you straighten it and looks wavy, you need to notch more. Cut close to the seam line but DO NOT cut the seam (that weakens the seam.)
Now for inside curves you use clipping. This is cutting slits into the fabric. You don't take out any fabric, just one single cut will do. When you straighten the curve to check if it worked, there should be any pulling in the fabric and it should straighten nicely. Add more clips if there's pulling or stress on the fabric.

Corners:
Reducing bulk at corners can be done with trimming and clipping
At an outside corner is really easy to reduce bulk. To trim, just cut the tip off close to the seam. Easy beezy, done.
Clipping at an inside corner is super tricky....just kidding. You make one clip into the fabric where the corner is. Boom, done.
When you straighten these, the trimmed edge should meet and the clipped edge should straighten. Trimming when straightened should look like clipping when not straightened and clipping when straightened should look like trimming when not straightened.

Layers:
Grading is cutting multiple layers shorter and shorter one layer at a time. This is for when multiple pieces of fabric meet. Leave the facing the longest, so just don't cut that one. Cut the layer next to the facing a little bit shorter than the facing. Continue cutting each layer shorter and shorter. How much you cut off depends on how many layers there are. If there are three layers, you leave the facing the same, the 2nd layer should be around half of the length of the facing and the 3rd layer should be very short and close the seam. To check, run your finger along the layers, it should feel smooth and flows nicely.


Don't be jealous of my Paint skills ;) Hope my artistic abilities helped!

And happy anniversary to Jordan and her husband!

Guest Post: Basic Woodworking Hacks from Dad/The Original Wayward

Filling in for Mom (Diana) today is her husband AKA Dad AKA Ben AKA The Original Wayward. He's an unapologetic woodworking fanatic/purist/snob—and that's okay!

One of the crafts that I have pursued is woodworking. The Girls have requested a guest post on some tips and tricks. Here they are:

1) You don't need a garage full of fancy power tools to do woodworking. Saint Norm and other woodworking show hosts would have us believe that woodworking can't be done without pneumatic nailguns, four drills, six routers, etc. In Norm's case, some of that is because his background and training is as a Finish Carpenter. He got paid to do things fast. Many shows are sponsored by tool manufacturers. If this is a hobby, doing it fast, with lower quality will probably not end up being an enjoyable experience. It's really not supposed to be fast. It's supposed to be enjoyable and it's supposed to produce beautiful objects.

2) Wood is an organic material. Many people approach woodworking as if they were working with pretty pieces of metal or plastic. Because wood was once living, it can move a lot with humidity changes. What this means is that you must account for wood movement—especially when working with broad boards. Saint Norm's background in plywood built-ins did not prepare him for this. Many of his early projects ended up as firewood.

3) Get to know the grain of the wood. Consider going to the added expense of figured wood. Acquaint yourself with terms that describe grain such as: figured, curly, tiger-stripe, fiddle-back, quilted, and flame. Patterns for grain-matching include bookmatch, slipmatch, and others.

Figure—it's hard to capture in photos, but the wood shimmers like Tiger Eye.
Fiddle-back figure on mountain ash and birds-eye maple

4) Learn to process green wood. Small pieces are pretty easy to deal with. For larger trees, you can hire a portable sawmill to come cut them up. You can make crafts from trees that were significant to your family and such. I have wood from a cherry tree that was blown down in '96 by Hurricane Fran that was next to the Wayward Girls' swingset. I keep threatening to make jewelry boxes for them with it. One-a-these-days...

5) If you don't value solid wood and actual craftsmanship, it will be much easier for you if you stick with junk from Sauder and Ikea. It doesn't survive moves well, but on the plus side, until you have to move it, it superficially resembles wood furniture from a distance, and is frequently good enough. The follow-on argument here is that home-crafted furniture is not cheap. The materials will usually cost you more than the above-mentioned ready-to-assemble junk, and that doesn't include the purchase and maintenance of tools, your time, quality finishes, etc. Like any other hobby, justify it because it's something you want to do, not because you are going to save money.

6) Polyurethane finishes are usually a mistake. It is a plastic coating that is difficult to repair and has a nasty, plastic feel. Instead, use a high quality tung oil, varnish or shellac.

7) Most people don't enjoy sanding, which is fine, because you should avoid sanding anyway. Learn to use hand planes and finishing scrapers. The wood will look better, there will be less dust, and you will probably enjoy the hobby more.

8) Wear hearing and eye protection. Even for common stuff like hammering nails—nails would not be found woodworking, but wood butchery, but that is another topic—drilling, and power sanding. Any time you are using a power tool, you should have on safety equipment.

Display case made for a hand-knapped obsidian knife. (Case by Ben; knife by someone else.)


9) Finish the finish. None of us live or do woodworking in a clean room environment. Expect to have to deal with dust nibs and drips that you didn't notice, etc. This is one of the reasons polyurethane is bad. The finish doesn't just go on magically. If you choose a finish that you can make better with each coat, then you have the opportunity to make it look good—maybe even great. Learn to use steel wool and mineral oil (if compatible with your finish).

10) Due to the nature of this blog, I'm guessing most readers will be females. Many fine craftsmen are in fact craftswomen. If you are interested in woodworking and your friends won't help you or encourage you, get new friends.

Resources and Links
Saint Norm is Norm Abrams of the New Yankee Workshop—one of the most classic and popular woodworking shows ever. [The parody picture above was not done by Ben, and please realize tongue is firmly in cheek!]

Veneer matching tips

My favorite Woodworking TV show: Woodworks by David J. Marks. Originally aired a few years ago.

If you have any questions, contact me directly at benz2 at earthlink.net. I'd be happy to advise.

Ben Franklin
Original Wayward
Related Posts Plugin for WordPress, Blogger...