Showing posts with label tutorial. Show all posts

Dollar Store Craft: custom geometric vases

A few months ago, I found some great glass vases at the Dollar Store. I filled them with free seasonal decor. When we moved, I had to find a new place for my vases, and the best place was in the living room. But I needed five more vases.

Rather than filling them all again, I decided I wanted to paint them to match our new living room decor. I picked up some acrylic paint and masking tape ($2 and $1, respectively) and sat down to make some awesome designs with the tape. 

I turned this into a kids' craft, too, because I laid out the newspaper and let my kids loose with the foam brushes!


Some tips on getting this right:
  • Use (at least) two coats of paint, and allow the paint to dry fully between coats.
  • Apply the second coat carefully and quickly, and lay it on thick. Try not to paint an area more than once. If you don't, the paint will ripple and pull off!
  • You can use the acrylic enamel made for glass--it'll be dishwasher safe and it might work better, but I don't know how well it works with masking tape.
  • Be careful when pulling off the tape! The acrylic doesn't want to adhere, especially at the point of diamonds or triangles. If I did it over again, I wouldn't do those shapes. A razor blade can be helpful in holding down the paint while you pull off the tape. (Or you can do what I did and use your fingernails. Wayward!).


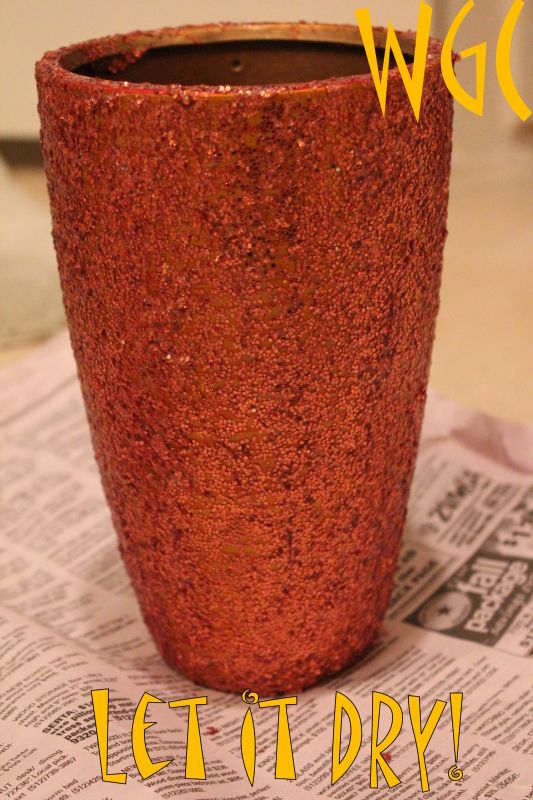
I still have three plain vases. What should I do? I was going to leave them blank, but my husband thinks they look . . . well, blank. My two ideas would be to borrow a page from Jaime's book and do a glitter vase, or to fill them with something cool. Glass beads? Autumn leaves? Colored water? (Ha--asking for trouble with four kids 8 & under!)

What do you think??

Knitting without needles (well, one . . . )

There are actually ways to knit without any needles, but today we're talking about getting rid of an extra needle: the cable needle. When your cables are fairly small, you don't need the cable needle all the time. I made a cute craft yesterday (sharing the finished object Friday!) that featured fairly small cables: 3 and 4 stitches wide. It's the perfect candidate for cable needle-free knitting!

This is an intermediate-advanced technique. A basic understanding of knitting and cables helps a lot ;) .


The basic idea is that you move the yarn in front of the stitches you'd normally slip onto the cable needle (for a back cable; behind for a front cable). Instead of slipping them onto a cable needle, you just put them on your right-hand needle. Then you knit the other stitch(es) in your cable. With a bit of tricky finger work, you pick up the slipped stitches with your left needle, then take them off your right needle, twisting the stitches into the right place.

Sounds complex, doesn't it? You should probably just watch the video. ;) It's amazingly easy to do—and pretty darn hard to figure out from a written explanation!

The problem with penuche

I have a problem with penuche, aside from its fairly ridiculous pronunciation (puhn-OO-chee).


You wouldn't think I'd have a problem with the stuff. My favorite type of candies are See's Bordeaux (milk chocolate, please), with have a brown sugar buttercream filling. You'd think brown sugar fudge would be pretty much perfection for me. Jump to recipe.


I mean, it's made with ingredients that I have on hand all the time: milk (or cream), white sugar, brown sugar, butter, vanilla.


You get to play chef with your candy thermometer that broke in the move instant read meat thermometer. Just look at the bubbling goodness!

And then just when it gets sticky (well, to the soft ball stage, 236 - 240 F), you pull it from the heat, throw in butter and vanilla and walk away.

When you get back, you beat it within an inch of its life.

Uh . . .yeah. Once it gets to this amazing phase, side note: that's a bad time to stop stirring and pick up the camera. It's done, but it's solidifying by the second.

No matter, as long as it's warm, you can still press it into the buttered pan:


Oh, did I say there was a problem with penuche? Oh yeah.
 So my problem with penuche is that I ate the whole thing.

Recipe
adapted from Better Homes and Gardens New Cook Book, 12th Ed.
Ingredients
  • 1 c granulated sugar
  • 1 c packed brown sugar
  • 2/3 c low fat milk (you can also use cream or half-and-half)
  • 2 Tbsp butter
  • 1 tsp vanilla (I used um . . . 1 "spill" vanilla. Whoops! Wayward!)
  • 1/2 c chopped pecans, walnuts or cashews (optional)
 1. Line a loaf pan with foil by shaping the foil on the outside of the pan first, then molding it to the interior. Butter the foil.

2. Butter the sides of a 2 quart saucepan. In the saucepan, add the sugars and milk. Cook and stir over medium heat until the mixture boils. Grab your instant read thermometer. Reduce heat, continuing to boil steadily but not hard, stirring frequently, until you reach the soft ball stage (236 - 240 F). You may have to adjust the heat to maintain the boil.

3. Remove from heat but leave the thermometer in. Add butter and vanilla. DO NOT STIR. Let sit until thermometer registers about 115. (Original recipe says 110, but this seemed to be just a little late to come back to the party, IMO.)

4. Remove thermometer. Beat mixture within an inch of its life, first to mix in the melted butter, then to incorporate air. (If using nuts, add them when the mixture begins to thicken.) When the mixture is lighter and loses its gloss, it's ready (original recipe says this takes about 10 minutes; seemed like less for me).

5. Spread penuche into prepared pan. Score. When firm and cooled, lift out of pan using the foil and cut into squares. Store tightly covered for up to 1 week . . . or, like me, eat it within a couple hours.

Makes 32 1"x1" squares.

Developing Your Talents

Sorry for our absence! Jordan just moved, Jaime is preparing to move, Brookie...moved almost a year ago (sorry I don't really have an excuse for you), I am graduating with my Bachelor's in just a few short weeks and mom is supermom doing supermom things. So yes, there are our excuses. Anyways....

This past weekend I went to a dance performance put on by my school. Each piece was based off a piece of artwork or the author. One of the dances was based on the painting "The Son of Man." In this dance (well at least how I interpreted it) was about how we sometimes sell, abuse or don't use our talents and creativity. This really made me want to live up to my potential. This makes me think of the parable of the talents in Matthew 25. This is the parable about how 3 men are given talents (coins). The first two men multiply their talents. The third man buries his. How easily we must do that all the time; bury our talents or not develop them. So I challenge each of you and each of my sisters and our mum to expound on their talents this week. Develop or indulge in something you're good at or interested in. Even if it's only 5 minutes that you do this, it's better than ignoring it. Now...don't ignore your kids or job or other important responsibilities either but strive to achieve something better.

Help! I Have an Ugly Couch

I have an ugly couch. We got it from the thrift store so it has to be ugly apparently. Why don't you cover it you ask? Well it's a recliner sofa and they just don't make slipcovers for those. So I would have to completely recover it. My schedule clears up quite a bit in August (I'm graduating in July!!) so I will have time then to do some recovering. But I want to get it ready now. So what are your thoughts? We're newly weds so spending a bunch of money on fabric isn't really an option. I was thinking maybe buy painter's canvas since it comes in huge sheets and dye it? I don't know...HELP!!

Custom-fit ruched swim coverup

My girls weren't the only ones who got new swim duds!


I sewed this ruched swim coverup myself from very lightweight jersey knit. And here's how I did it!

First, you need very accurate measurements--and a lot of them.

  • High bust
  • Bust
  • Under bust
  • Waist
  • Hip
  • Lengths: high bust to bust, bust to under bust, under bust to waist, waist to hip, and waist (or hip) to desired skirt length, top of back of bodice (a bit below underarm height) to hip


Once I had my measurements, I subtracted a square for the back. (You can measure from side seam to side seam for an exact measurement--I wouldn't just divide all the numbers by two because the side seam will be farther forward on the bust than the waist.) You probably want to bring in the sides a bit at the small of the back:

You could sew the whole bodice as a tube, but that makes it hard to add the ruching, and generally in a sleeveless top, the back is lower than the front, so keep that in mind!


For the front of the bodice, take your other measurements, subtract the square, and divide that answer by two. If your fabric is really stretchy like mine was, you'll need to subtract another inch or two here to create negative ease. "Ease" is the difference between the fabric measurements and your measurements. Normally you want at least a couple inches so you can put on the clothing and move in it.

In a knit fabric, you can use negative ease to have a very fitted garment. Or, in this case, one that stays up. I definitely need more negative ease in mine!

Once you have all your measurements ready, using the length measurements and your halved and adjusted front bodice measurements, make the pattern (I believe this is similar/identical to making a sloper, a personal generic pattern). I use a piece of newspaper to make my pattern, laying out the adjusted widths spaced according to the lengths. Connect the measurements with curves.
Then you use this half pattern on a fold, which will make the bodice top:
Cut one piece like this. Then, to create the ruching, take your regular pattern and draw horizontal lines across it. I did mine about 1.25" apart.

Cut the pattern along these horizontal lines, and space the pieces evenly to double the overall length of your bodice. You'll have to redraw the curves here.
Cut one long piece like this. Sew two lines of long basting stitches along each edge (mine also required two sets of basting stitches down the front of the bodice). Pull the threads to gather the fabric to match the regular-length bodice. Stabilizing stitches for the ruching are your friend.

Then sew the back and front together.

For the skirt, draw a straight line on the angle from the waist to hip measurement. Extend this line to reach the desired skirt length.
My research favored a six-gore skirt, and the bodice is only the front half of your dress, so you'll want to divide that original skirt trapezoid into three even gores to get your final measurements or pattern pieces.

The full pattern will look like this:
Cut six gores and sew them together, then sew them to the bodice!

Here's a closeup of my bodice. You'll probably be able to see the lines of stabilizing stitches:


And just for fun, I got some cool pictures of the finished product on a breezy day before heading to the pool at our RV campground outside of Bryce Canyon!


Happy summer!

Kids' Towel Coverup: the Wayward Way!

As part of my Summer Sewing Spree two years ago, I made . . .


Wayward Kids' Towel Coverups!


I found this adorable terry towel coverup for kids, and I fully intended to sew something equally cute for my daughters. But a major time crunch hit and I ended up having to go the super-fast route. So here's the quick and dirty wayward way to make a cute, fast towel coverup for a child, boy or girl.

Step 1: Measure! 
You'll need two (or three) measurements. The first is width around the chest (girls) or waist (boys). You'll want to add at least four inches for overlap. If you want to use elastic in the back (I recommend this for boys, but it doesn't seem to affect my girls'), you'll want to add more width to account for the gathering. Decide how long you want the elastic to be, then add that to the width. Remember this one, too! (Also keep in mind that the elastic will need to fall between the shoulder straps for girls.)

The second measurement is length--for girls, that's from underarm to however long you want the cover up to be (mid-thigh or knee length works well); for boys, that's from waist to the bottom of his swim trunks. (Which is often not his knees. Don't make the same mistake as me!)


Step 2: Materials!
You'll need:
  • A towel at least as big as the rectangle formed from your measurements.
  • A piece of cute fabric 4" wider and 2-4" longer than your measurements.
  • Sewable Velcro (or snaps)
  • Elastic (may be optional for girls' coverups; at least 3/8" wide)
  • Thread
  • Pins
  • Scissors or rotary cutter
  • Iron
  • Sewing machine
Step 3: Cut the towel!
Use your measurements to trim down a towel. Towels can be hard to cut, so I would use scissors or a rotary cutter to get through the hem, then rip the towel.

Many towels have decorative weaving near the ends. I cut out the towel between these lines, and save the weaving to form the straps. I also kept the top hem intact.

Step 4: Cut the fabric!
Add 4" to your width and 4" to the length of your rectangle (I added 2" to my length and used the selvage to form the long top edge on some of the pieces), then cut out a piece of fabric that size.

Step 5: Sew them together!
Center the towel on the fabric, wrong sides together (ff your towel has a wrong side). (If you're using the selvage on top, make sure the top edges of the fabrics align.) Fold over the edge of the fabric to meet the edge of the towel, and press. Then fold that folded edge of the fabric again, overlapping the edge of the towel:

Sew along the folded edge where it overlaps the towel (indicated by a dashed line above)--but do not sew the top edge of the fabric to the towel! (You can, however, sew the hem of just the fabric along the top if you're not using the selvage.)

Step 6: Place the elastic! (May be optional for girls; didn't really make a difference for mine)
Remember the elastic measurement we used in step 1? We need it again. Cut that length of elastic. If you want the finished product to have 4" elasticized, we need to work with 8" of fabric. Find the center of the towel & fabric, and measure out 4" (or whatever your chosen # is) on either side. Mark both of these points.

Pin either end of the elastic between the towel and the fabric at the points you've marked. Sew in the elastic (more details here).

Last year's coverup almost fits this year...
Step 7 (girls only): Place the straps!
Either cut 2" strips from the towel remnant, or get the decorative woven strips you saved earlier. If you placed elastic in, pin the straps between the fabric and towel on either side of the elastic. Otherwise, you might want to have your child try on the cover up to determine the best placement and length for the straps.

Measure the strap length twice!

Sew the straps in place between the towel and the fabric. (You can use a reinforced box stitch pattern for this if you'd like.)

Step 8: Velcro/snaps and finish!
If you're very picky, you might want to sew the Velcro or snaps on the front flap to only the towel, so that the sewing lines don't show through. But let's face it, if you were very picky, you wouldn't be doing it the wayward way, would you?


Place the Velcro or snaps on the front flaps. Remember that the inner flap will have the Velcro on the outside (fabric side)! Sew in place. Sew any unfinished edges along the top. And voila!

Grownup sunhats!


Last summer, I went a little nuts with sewing. I've shared my daughters' reversible toddler sunhats, but the one I made for me wasn't quite the success theirs were. I wanted to love the result, but, well . . . I didn't quite.


I started off fantastic: a yard of gorgeous, emerald green 100% linen and a free sunhat pattern from BurdaStyle.

Only once I opened the file, it was less a pattern and more just instructions. I am not a sewing wiz. Frankly, I wasn't smart enough was too WAYWARD to follow the instructions well. The results? Also wayward!

So let me just tell you how to custom size your sunhat, wayward style!

First off, measure your head!! Measure around your head where you want your hat to fit. Please don't think that just because the pattern says you should make the hat 24" circumference and your head is 22", you should follow the pattern and your head needs "ease." It doesn't! Do not follow the pattern! Follow your head circumference! (Oh, and write it down.)

Top stitching on the crown
Second, measure your head!! And not just in the measure twice, cut once way. (And oh yes, I cut more than once.) Measure your head from forehead to the base of your skull, where you want your hat to hit. Also measure from ear to ear, where you want the hat to hit. Be sure to measure those lengths by wrapping the tape over where you want the center point of the hat to be. Take the average (i.e. add those numbers and divide by two). Write that down, too.

Now, you have your head measurements. The crown of the hat is made in six sections. So, if your head is 22" in circumference and your ear-to-ear/front-to-back average is 12", we'll need to divide that up into the sections. The ear-to-ear/front-to-back average is divided in two to give 6" as the crown height.

The circumference has to be divided by six, giving us the ugly number of 3.67" for the width of each piece.

Don't go cutting yet!

First, add the seam allowance to the measurements, 5/8" on each side. This brings our width to 4.92" (okay, rounding up will make the hat 1/2" larger around), and the crown height to 7.25".

NOW you can cut your paper pattern of a 4.92" x 7.25" rectangle. Lovely. Now, fold your paper pattern in half (making the rectangle even narrower) and sketch a curving, convex line, starting about 1/3rd of the way up the long edge and ending at the top midpoint. I might have used an iron as a tracing guide. Cut along the line and open to reveal your very nice, symmetrical pattern piece!


Cut 6 of these (or 12 if you want to line your hat; I did).

Now, cut out your brim. You'll need two of these. Again, don't make the mistakes I did!

Brims tend to hold up better if they're not quite a full, flat circle. Leaving out a segment of the circle gives the hat dimension and the brim shape. But remember that the inner circumference of the brim must match the circumference of the sewn crown!

I forgot that and drew a circle with an inner circumference to match the crown, then hacked off a bit of the end to make the not-quite-circle. My brim was too short to go all the way around my hat! Fortunately, I had some extra fabric and was able to fix it, but I was not happy!

So, let's say you want to omit 4" off the full circle (the more you cut off, the further down the hat brim will droop. Personally I wouldn't do more than 4"-6"). You'll still need to end up matching your 22" crown, so here's what you gotta do: add the amount you want to cut off the circle to your head circumference, bringing us to 26". Now, do some math (sorry!) to find the radius of that circle: 27"/(2*3.1415) = 4.30".

Using a protractor (or two pencils and a piece of string 4.3" long!), draw a semicircle with a radius of 4.30" on the edge of a piece of pattern paper (or newspaper, if you're me).

Top stitching and satin stitch along brim edge
Decide how wide you want your brim. Wider isn't always better--it can also be heavier, even too heavy to support its own weight! The Burda pattern also made the brim asymmetrical, 1/2" narrower in the back than in the front (6" in front, 5.5" in back). However, I feel like the interfacing used just isn't strong enough to support the brim and it ended up too floppy. To reinforce a wide hat brim, you might consider Timtex or buckram.


Draw a second circle to finish the brim (or 2 more circles, if you're changing the brim width) by adding your brim width to the original circumference to get the outer circle radius: 6" + 4.30" = 10.3".

NOW, on the INSIDE semicircle of the brim, measure in 2" (half of the length we're trimming from the brim) from the edge. (If your brim will be asymmetrical, make sure to do this on the narrower/back side.) Sketch a line from this point out to the outer circle. (You need this to be large enough that you can fit the hat together, but the larger the angle this line would form with the edge of the paper, the more the brim will angle/droop down.)
Add your 5/8" seam allowance all around and label the angled end "back". Place the non-angled end against the fold and cut two whole brims.


Now you have all the pieces ready for your custom sunhat. The BurdaStyle directions from here are very helpful. Hopefully it will fit you better (and come together with less trouble) than mine!

Outdoor sewing room photo by NormaNack
Related Posts Plugin for WordPress, Blogger...