Showing posts with label Pillow Case Top. Show all posts

PB's 1st Birthday Party: an ice cream party!

Here is PB's 1st birthday party. Can I just say first that I was really stressed the day of and things didn't go as smoothly as I had hoped but do you know why I threw the party? For the pictures. When PB looks back years from now she will know how much I loved her and wanted her to have a special day. We had an ice cream party. We also had hot dogs and chicken salad. We had it at a park since our house is currently on the market. 

I was running a little short on time so I just made one invitation, scanned it, and sent it out. The stickers are Martha Stewart and the bow tutorial can be found here. 

Recognize this? To get this up I had to throw the spool of ribbon over the rafter. I felt like I was TPing a house.

I painted these frames and glued the foam number ones inside. The centerpieces for the tables were balloons and candy jewelry. In each corner of the pavilion my tall dad taped up white table clothes and tied bows with tulle -under my close supervision ;) All together there were 9 tables with pink table clothes and I used 4 white ones- one for each corner.
Party favors. There was pink (white chocolate dyed) and milk chocolate popcorn.  Use quality chocolate and a bit of salt. To melt the chocolate I microwaved it for 30 seconds, stirred well, and put it in for another 15 seconds and that did the trick.  Decals were cut out with my Cherry Limeade Cricut font with miscellaneous number ones printed out for the center. 

Pink s'mores with kisses for the chocolate. If you look close you can see little bows on those skewers. Why yes I did stay up late (after 1 am...) the night before making tiny bows and hot gluing them to skewers.

Pink lemonade with lemon slices. Pink straws purchased from Michael's

The sweets table minus the ice cream which was in the cooler. There are butter mints and toppings for the ice cream. 

The A.M.A.Z.I.N.G. cake my mom made. Check out how to here.

The pillowcase romper I made her. Do you see her "1" button? She didn't take it off the whole time. It's a dollar store baby shower button I glued one of the favor decals on. I would share with you the tutorial about how to make the romper but guess what- it was far too wayward for me to pretend I did this the "right" way. You are far more likely to figure it out on your own! I would search for a romper tutorial and a pillowcase top one and combine them if you want to make a similar outfit. After all my searching I couldn't find one just like I wanted.

Look at that cutie!! Aren't those jellies just  the best?


Can I toot my own horn for a moment? So I about three months ago I featured this post. Soon after I went to a consignment sale in search of some dolls. It always go on the 75% off days because that's how cheap I am. I'm going to stop the story right there because I'm going to finish the rest next week. Just know I found a doll and I made her a matching outfit. Her little dress was just a pillowcase dress. 

Tune in next Wednesday to hear about PB's dolls! 


Accent Pillow

Last year, when I was redecorating my bedroom, I saw a picture of an accent pillow in a pattern book. Of course, instead of even considering purchasing the pattern, I said to myself, "I can do that!" I took a picture of it, and gave it a whirl.
Since this is the WAYWARD girls' craft blog, I'll bet you think it didn't turn out. But guess what! It did. Of course I learned a few things that I would do differently should I ever make one again, but all in all, I think it turned out well.


You need a square pillow or pillow form or poly-fill, enough fabric to cover the pillow, contrasting fabric, cording to go around the edges plus create the tie, and tassels. You will need to measure your pillow to figure out your exact yardages.

Start by cutting a front and a back to fit the pillow. Be sure to leave a seam allowance. Sew on the cording to one side. (If you have never sewn piping on a pillow, check here.  (You can use the overlapping method they show, or you can just sew in the finished product as I did.)

Measure the edge of your top pillow fabric. They should all be the same. Subtract 3 inches from the length, and then multiply by 2.

For example, if the length of the edge was 16 inches, subtract 3 to get 13, then multiply by 2 to get 26 inches.
You should cut a rectangle that is 26" x 16" from the contrast fabric.

Double this fabric. Stitch and turn right side out. Press with the seam in the center of the back of the square.
Loosely gather the both raw edges of the fabric of the contrast piece. Center it on the front of the pillow fabric. Baste in place.

Then, place both pillow top and bottom right sides together and sew around the edges, leaving enough open room to fit in your pillow. Don't leave the edges with the contrasting fabric open. You will need to be careful with the cording. Turn right side out. Put your pillow inside (or stuff it with poly-fill), then handstitch closed.

The cording I got was attached to webbing so that it could been sewn in. I used it with the webbing for outlining the pillow, but then carefully snipped the webbing off to create the tie. By using a combination of a little craft glue and some careful sewing, I attached the tassels to the ends of the cording. I wrapped thead around the place where the cording joings the tassel as you can see below.
Loop the cording around the contrast fabric and voila! Done!


TWO Quick Pillow Case Adult Shirts

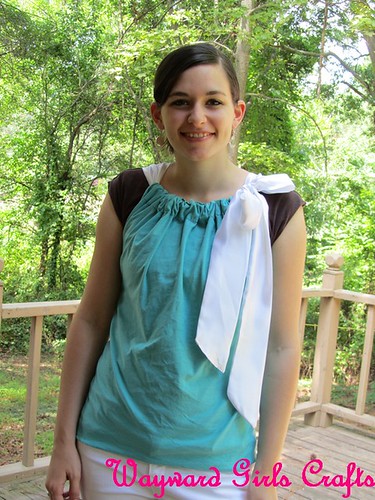
So I saw this tutorial here and thought this would be a great quick top to make. I did two versions- one like hers and the other my creation. One took me about an hour and 15 minutes the other took me about 20 minutes. As always when I was making things didn't go perfect but this is what I would do the second time around:

Pillow Case Top from Scratch
Needed:
1 hour and a half
3/4 yard of Jersey Knit fabric (60" wide)
1/3 yard of silky fabric (45" wide)
Coordination thread
Step One: Make the tie-
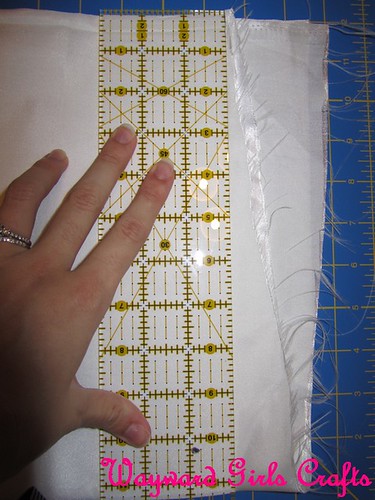
  1. Cut the silky fabric 5 inches wide in two 45" strips. I thought 3 inches was too wide:( If you want yours as wide as mine I originally cut 6 inch to make them 3" wide instead of 2.
    Don't you love how crooked they cut the fabric at the store?"pillowcasetop 004
  2. Sew the two strips together to make one long 90" inch strip.
  3. Fold in half with right sides together, pin.
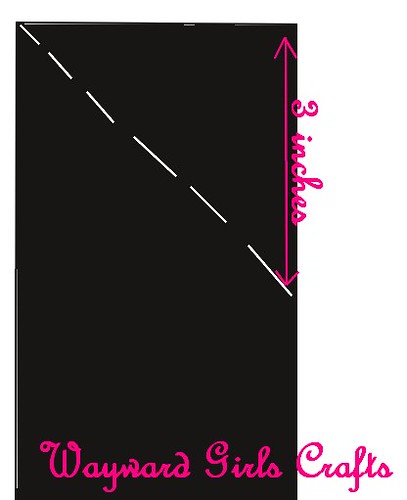
  4. At each end three inches down mark a line to the opposite corner (see picture)and sew.PillowCasetops001
  5. Leaving a 6 inch gap in the middle, sew along edge.
  6. Turn right side out through gap in middle, fold under and sew gap.
  7. Press
Step Two: Make the shirt-
  1. Cut the fabric 23" (W) by 26"(L). In the tutorial I mentioned I found the dimensions to be way too large. I have a long slender torso so you may need to adjust your fabric somewhat. You might want to start bigger (her dimensions were 30" x 30") if you feel it will be too small. I made the other shirt first so I had some numbers to go off of.
  2. Press a two inch from top and baste stitch. This step it to prevent the jersey knit from rolling when you fold it over.
  3. Fold over to make casing a sew zig zag stitch along bottom of edge of casing.
  4. Thread the tie through the casing and put on. Pin where the arm holes should stop below your under arms.
  5. With right sides together sew up sides.
  6. Zig Zag stitch on arm holes and around bottom (see video). Try on

    pillowcasetop 012

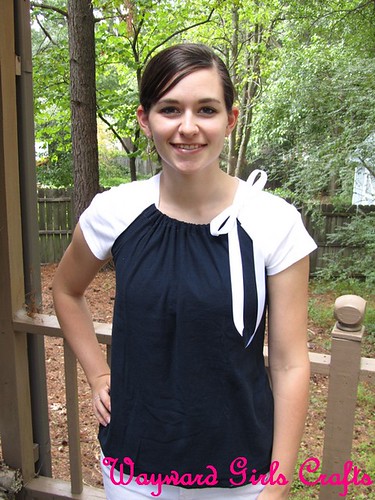
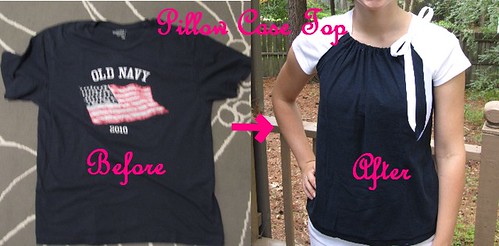
Very East Pillow Case Top from Men's Shirt

Needed:
20-30 minutes
Men's Shirt- I used my husband's old 4th of July Old Navy shirt that had shrunk a little. It was size large. The shirt after step one was 21" (W) by 23.5" (L)
1/2" wide ribbon
Coordinating Thread
Sewing Ruler
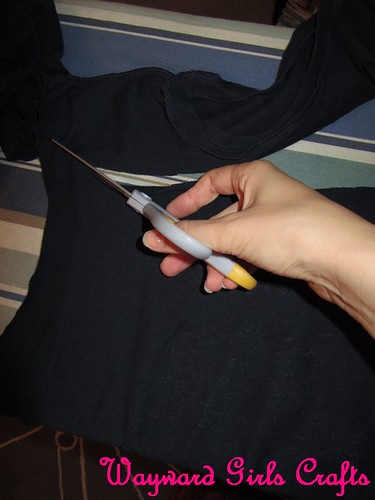
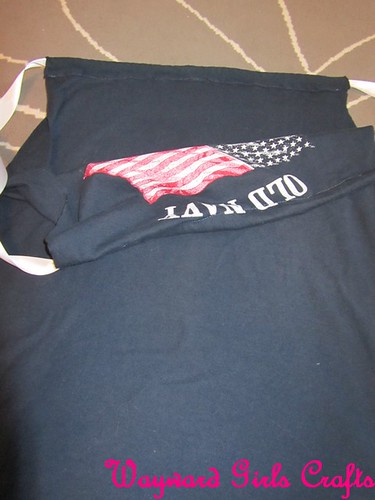
  1. Turn shirt inside out and cut off arms. Align the ruler at the base of the collar and cut in straight line across. pillowcasetop 003
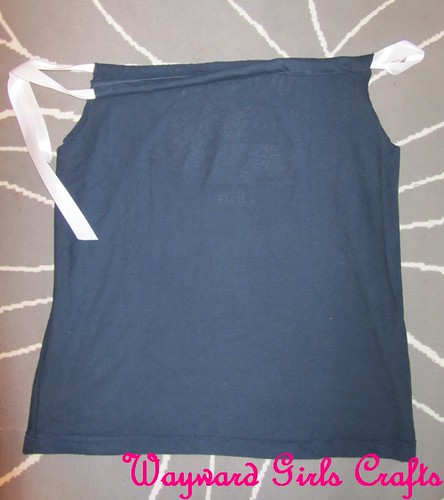
  2. Make 1" wide casing and straight stitch along bottom. **Make sure here that your new right sides is actually the inside of the shirt since. You don't have to do this but mine had a flag I didn't want on it so I just used it inside out. I will now refer to it as the (old outside and new inside) flag side. pillowcasetop 009
  3. With flag sides out sew along each side with a small seam allowance. I did this so that the old inside seam wouldn't show.
  4. Thread ribbon through casings and try on!
pillowcasetop 008
pillowcasetop 018

PillowCasetops019


Have any shirts you want to revamp?
Related Posts Plugin for WordPress, Blogger...