Showing posts with label fabric. Show all posts

Interlocking Notebooks

These are the directions for the notebooks I shared a few weeks ago.


To make these, purchase notebooks and pens. These notebooks were about 5" x 8".
You will need 1   2"  fabric strips about 6 inches longer than it the measure of the front and back of the book,  1 strip of heavyweight fusible interfacing and 1 strip of fusible web the same length.

Following manufacturer directions fuse the interface to the wrong side of one of the  fabric strips. Then fuse the two strips together using the fusible web. Next, select a decorative stitch and finish the longs edges of the strips.
Lay the strip around the book and cut the last 3 inches (from the end of the fabric to the edge of the book) in the center. Wrap the top strip on the front of the book tightly around the pen.

Keep the pen snug against the book edge. Pin the loop and then sew it.
Repeat with the bottom strip on the back of the notebook. Fold in the bottom strip on the top cover and the top stitch on the bottom cover.
Next stitch the strip right onto the notebook top and bottom cover. (You may need a heavy duty needle). Trim the excess strips inside the covers.


Slip the pen through the loops to lock the notebook. Great for your purse.


Now

Scarf Swagged Sheer Curtains

We have only blinds as window treatments in our apartment. We also only have a few windows. In our bedroom we have a window right over our bed. I decided that I would make a window treatment. Ok, I'm taking a sewing class and we had to make a window treatment and I decided to do one for our bedroom. I didn't want something heavy or dark and it's also quite near the end of the semester so I didn't want to make a large project for myself. I decided to go with sheer fabric and go from there. Good thing my mom lives a whole heck of a lot closer to a JoAnn fabric store than me and found some grey fabric for me so I don't really know how much this project cost. But anyways.


I measured the rod above my window which is a decorative rod (it had knobs at the end, nothing fancy but prettier than a plain rod. From end to end (not measuring the decorative knobs) it was 70 inches. Big guy. So I knew that the middle measurement needed to be 70 inches. I then measured how long I wanted my tails to be. 53-55 inches looked good. I had 6 yards to work with. I measured 55 inches with room to spare and pinned it. Then I measured the 70 inches and pinned it as well.
Here's where the work starts! Now, at the bottom of the pins, I measured 12 inches away from the middle panel. This measurement can be adjusted to anything you want depending on how deep of a swag you want. I had no idea what I was doing so I just went for 12 inches. It made a deeper swag that I thought but I was ok with it. I then put my tape measure (a ruler would've been better) and marked where the angle went.

Then I gathered every four inches making sure the markings lined up straight, not angled. I just pinned this into our rug (made sure not to scratch our floors!) I used a lot of pins. Other methods are probably better but I didn't do that...

After all the gathering was done I stitched it by hand. Now...when you are doing the other side...make sure you fold it (accordion style) the same direction as your other side or it will twist. That is exactly what happened when I held my curtain up. I had to fold the sewn fold in half towards the front on one side and towards the back on the other side so the swag would fall right and someone had to hold it for me and blah blah blah. Wayward. 

Then I serged my edges doing a rolled serged edge. It would've also been smarter to do that in the beginning but alas, I didn't do that either. So the tails. I just lined them up together and cut them even to each other so it will hang sort of at an angle at the bottom. If you want it to be a straight edge then you take the shortest edge and line it up 45 degrees to the selvedge (making it so the cut edge meets the selvege in a triangle) then mark and cut and you'll get a straight tail. But I got it done anyways! Well, I had to turn it in for a grade and don't have it back yet so I don't have a picture of the finished product. I will be sure to put in a post once I get it back though! It was super easy once I got the hang of it. It took me a while to figure out that I needed to angle it and make a trapezoid to make it swag.

Modern Accent Pillows

A great resource for fabric for pillows are discontinued sample pieces. Many home fashion fabric stores sell these for just a few dollars each. A few years ago, I was looking EVERYWHERE to find fabric to make pillows for my living room. I finally found a few samples that would work great. The only problem was that the flowers were not centered on the fabric. So, I got creative and made two abstract designs:

As you can see, I cut the fabric into blocks with the two floral patterns centered in a block. Then I switched up the blocks and sewed them together. I actually made a matching piping to create a more finished look.

So... look in the sample bin and think out of the box when you are designing your own pillows.

Headboard Redo

In case you missed it, last week I recovered buttons. I didn't just do that for fun. I redid my headboard for my bed and added the buttons to it. My mom found this fabric shop that sells fabric for around $7 a yard in wide bolts. We went all over the store looking for a color that would match. Initially I didn't want a patterned fabric but when I saw this fabric I loved it. We got 4 yards which was a whole lot more than we needed but better safe than sorry.

First, start out by adding batting to the front of the board. Since we recovered the headboard we didn't need to add a thick layer. I wanted it a little bit thicker so that's why we added more batting. 
Roll the fabric over the batting. You can do this by laying the fabric down first then laying the board over it or roll the fabric on the top, tack it down with pins and flip it over. Be careful if you tack it down with pins, they might stick through to the back. My mom and I worked opposite of each other to keep the fabric taut.
If the fabric is too long it might be hard to fold the corners. I aimed the pins to go parallel with the edge of the board. The pins should stay if they aren't aimed so the fabric can easily come out. At the corners, keep folding the fabric until there are no more wrinkles.

Now to add the buttons. On the back of the board, mark where you would like to place the buttons. Measure how tall the bed is and where the pillows hit so you don't place the buttons where they can't be seen. Space the buttons evenly on the same level. Attach the buttons with string through the back. We tied a toothpick on the string on the back of the headboard so the string doesn't come out.You can also hot glue the string or toothpick down.

And now you have a quick, easy, and inexpensive headboard. Plus, it looks pretty good! We'll use the extra fabric for the curtains.

Dressed Up Canvas Tote

A while ago I got a plain canvas bag to carry my things to church in. I had plans to do something to make it great and just never did anything with it. Then I got a big ink stain on it and I conceded to doing something with it. I used some left over fabric that I had and a flower to embellish it.

What I used:
Canvas Tote
Fabric ( I used two contrasting fabrics)
A flower with rhinestone (got to have some sparkle!)


1. The fabric I used for the bottom was thin so you could see the ink spot through it so I lined the yellow fabric. I decided how high up the bag I wanted the yellow fabric to be. I laid the bag inside out flat and to determine the width to cut the fabric. I added an 1" for seam allowance. I then cut the lining fabric the same dimensions


2. I sewed the sides (it was one piece so the bottom did not need a seam) with the yellow and lining fabric together with the lining on the outside. I sewed the top edge of the yellow and lining together. To mimic the shape of the canvas bag I sewed the corners of the lining and yellow so the bottom will lay flat.

3. I turned the new bottom right side out and sewed it on to the outside of the bag with a seam on the top edge. I had orange fabric that I measured it out to be double the width of the bag and 4 inches wide. With right sides together I sewed it in half length wise, turned it inside out, and pressed it.

4. I sewed it onto the top edge of the yellow sewing the top and bottom edge. I added the flower to embellish it.

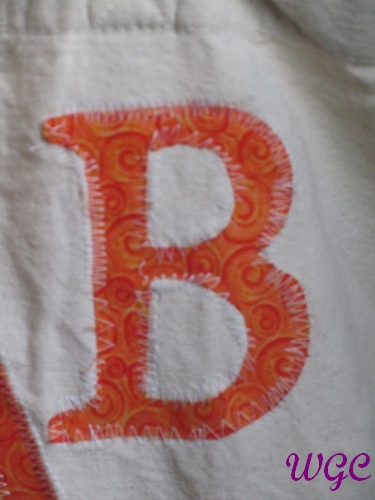
5. I used the computer to print and cut out letters for my initials. I ironed on heat transfer paper to the orange fabric and traced the letters BACKWARDS onto them. I cut them out and ironed them to the bag.

then I waited over a year to the point where they were falling off before I did the last step. Oops!

6. Using a zig zag stitch I sewed around all the edges.

bag 004


Mother's Day fabric flowers (and a GIVEAWAY!)

A couple years ago, a friend at church had her second grade class make flowers for the women in the congregation for Mother's Day. They weren't too difficult: make wire "petal" shapes, glue some fabric on the wire for the petals, wind four or five together with fabric tape and voila! I can do that, I thought. I don't need to look for directions.

Hoo-boy, was this a fiasco! It was supposed to be a twenty minute craft. Two hours later, I finally gave up in disgust. Clear school glue didn't work. We were out of the right size hot glue sticks.

I'm not sure how my friend did it, but nothing was going my way when I sat down to make these. The two larger flowers are pansies—and I had to get darn creative to make them worth. (There is no glue involved, but the white one is satin ribbon + masking tape and the purple one is fabric + thread. If they look good, thank you, but it's really just blurry photography!)

Ironically, the other flower—the little purple one—is my favorite of the three, and not just because it was the easiest and fastest!

Truth be told, I was so disgusted with my lack of working materials that I finally gave up and Googled . . . with the words "martha stewart" in the query. (A true cry for help! At least I did my own illustrations ;) .) (Okay, so I thought I'd just seen a similar project from her, but I didn't find it.)

Her ribbon flowers instructions inspired me to try one (well, two) last time(s). (The very last one didn't work out.) I cut a strip of fabric about 1" x 6" and folded it in half, then basted the halves together along the fold:
 Once I sewed along that edge, I pulled the thread tight. The fabric gathers and naturally wants to curl around into a flower.
I sewed the ends together, stuck a piece of wire through at the seam and called it cute!

In other news, I think I'm going to be going for cut flowers from my yard instead ;) .

Are you craftier than a second grader? Have you ever made wire and fabric flowers? What did you do differently?


This week we have a giveaway!

THIS GIVEAWAY HAS ENDED

It's this lovely crafty organizer:
It's great for all the little loose odds and ends that get lost so easily—buttons, beads, stickers, etc. It has eight compartments, and a flip-top spout for easy access. (I doubt you can tell from the picture, so it's six inches tall and four and a half inches wide.)

To win, you must:
  1. Be a follower of the blog AND
  2. Comment on any new post this week (before the end of Sunday).

Every comment is another entry, and every post this week is eligible! The winner, to be drawn at random, will be announced next Monday!


Mom said so....

These wayward girls of mine have created this blog and now want me to join in the fun. I thought that somehow a post would magically appear, but apparently not. After I got a rather pointed text from the eldest daughter, I realized I had to do something. So.... to introduce myself, I am the lucky mom of four beautiful and talented daughters. I work as an academic coach in a middle school. My crafting goes in spurts. Lately I have spent my time creating a quiet book for my wonderful grandchildren and sewing a quilt for my grandchild due in a few months. I will be sharing both of those in coming posts. I am never quite satisfied with what I create, but I still keep trying! I will probably be the first one to point out what is wrong with whatever I do! (Maybe I should stop that!)

Anyway, in the giveaway spirit of our debut week, I have a lovely group of ten five-inch charm squares of vintage fabrics. My great grandmother was a seamstress in the early 30's and 40's. When my grandmother passed away 10 years ago, we found a bag of my great grandma's scraps way in the back of a closet. I don't know the exact age of the fabrics or fabric contents, but they each have a beauty of their own.

So make a comment on the blog or do any of that Tweeting or Facebook Liking or whatever it is that the girls have listed below if you want to win these charm squares. Since I don't Tweet or Facebook I really don't have a clue what those mean. 

You get:
  • One entry for commenting on this blog post.
  • One entry for becoming a follower of our blog, and commenting on this blog post to tell me about it.
  • One entry for following us on Twitter, and commenting on this blog post to tell me about it. (even if you started following us yesterday, you can comment today for an entry)
  • One entry for Liking us on Facebook, and commenting on this blog post to tell me about it. (Even if you liked us yesterday, you can comment today for an entry)
  • One entry for blogging about our new blog, and commenting on this blog post to tell me about it (with a link to your post!).
  • One entry for asking us a question about ourselves, new blog, crazy dreams, whatever.
Just so we're clear: each of these should be in their own comments! So if you like us on FB, comment, Follow us on Twitter, you should make 3 separate comments.

The winner will be announced one week from today, and welcome to Wayward Crafts!
Related Posts Plugin for WordPress, Blogger...