Sorry for our absence! Jordan just moved, Jaime is preparing to move, Brookie...moved almost a year ago (sorry I don't really have an excuse for you), I am graduating with my Bachelor's in just a few short weeks and mom is supermom doing supermom things. So yes, there are our excuses. Anyways....
This past weekend I went to a dance performance put on by my school. Each piece was based off a piece of artwork or the author. One of the dances was based on the painting "The Son of Man." In this dance (well at least how I interpreted it) was about how we sometimes sell, abuse or don't use our talents and creativity. This really made me want to live up to my potential. This makes me think of the parable of the talents in Matthew 25. This is the parable about how 3 men are given talents (coins). The first two men multiply their talents. The third man buries his. How easily we must do that all the time; bury our talents or not develop them. So I challenge each of you and each of my sisters and our mum to expound on their talents this week. Develop or indulge in something you're good at or interested in. Even if it's only 5 minutes that you do this, it's better than ignoring it. Now...don't ignore your kids or job or other important responsibilities either but strive to achieve something better.

Showing posts with label artwork. Show all posts
Showing posts with label artwork. Show all posts

Developing Your Talents

No comments
:
 Labels:
art
,
artwork
,
creating
,
creativity
,
developing your talents
,
Jasmine
,
painting
,
talents
,
tutorial
Labels:
art
,
artwork
,
creating
,
creativity
,
developing your talents
,
Jasmine
,
painting
,
talents
,
tutorial
Labels:
art
,
artwork
,
creating
,
creativity
,
developing your talents
,
Jasmine
,
painting
,
talents
,
tutorial
Lord of The Rings Picture
(Don't worry, there will be more wedding posts) My husband's favorite movies are the Lord of the Rings Trilogy. I wanted to decorate our wall that the TV is against with the movies and other things we love. So I thought I would attempt to make a LOTR picture. I started out with a picture.

Not too ambitious, right?
So we ventured out to WalMart and bought paints, brushes and canvas board. I started by painting the sky. I started at the top with the darkest part. (I didn't want to paint the mountains so I just didn't) Then I added a small amount of white to my paint and moved down the canvas. I got to the lightest part and painted it white to help with blending and texture even though the canvas was already white. I painted the bottom black for the ground. Then I set it in the sunshine with a fan pointed at it to dry.
.jpg)
Next, I traced the images of the people onto printer paper. Then I cut them out and spaced them on a scratch piece of paper. Then it was time to draw them on.
 Here's where it really made it look good. I drew just some scribbles on the back of the cut out making sure there was pencil where the outlines were.
 Then I traced the outlines on the front hard onto the canvas. The pencil transferred onto the canvas. I then drew it in a little darker and moved on to the next character.
 After I did all the people, I took a sharpie and traced the outlines again. Then I colored them in with sharpie as well. And voila! A totally awesome LOTR picture worthy to hang.

Not too ambitious, right?
So we ventured out to WalMart and bought paints, brushes and canvas board. I started by painting the sky. I started at the top with the darkest part. (I didn't want to paint the mountains so I just didn't) Then I added a small amount of white to my paint and moved down the canvas. I got to the lightest part and painted it white to help with blending and texture even though the canvas was already white. I painted the bottom black for the ground. Then I set it in the sunshine with a fan pointed at it to dry.
.jpg)
Next, I traced the images of the people onto printer paper. Then I cut them out and spaced them on a scratch piece of paper. Then it was time to draw them on.



Guest Post: Shades of Blue Interiors
Rachel and I met our freshman year of college. She is a fun, spunky, and positive person. I've always been impressed by her art. Now she's doing furniture redos and they're amazing! I'm so glad to have her here! Take it away Rachel!
First of all, I am so thankful for this opportunity! Jaime and I became friends in college and years later, after we are married, moved and settled into our lives, she's a big "dot com" blogger and I'm just a start-up blogger! I feel so honored that she asked me to share a little about myself and my successes!

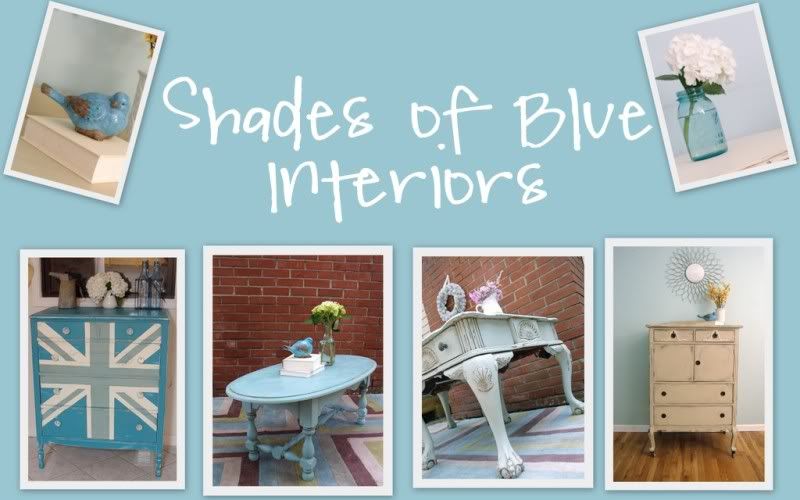
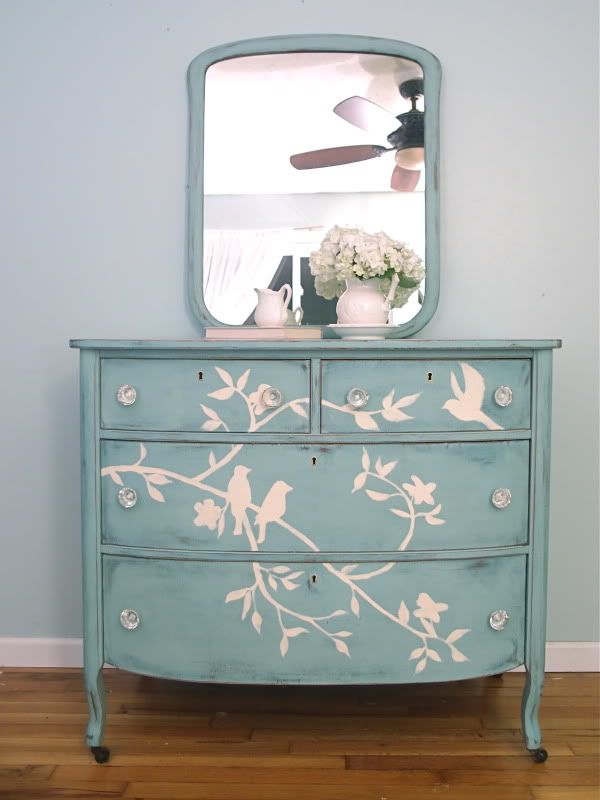
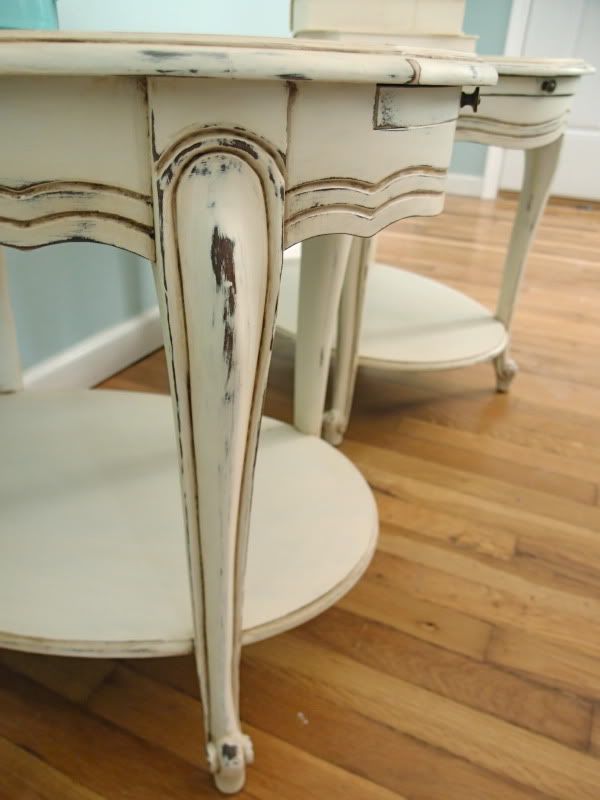
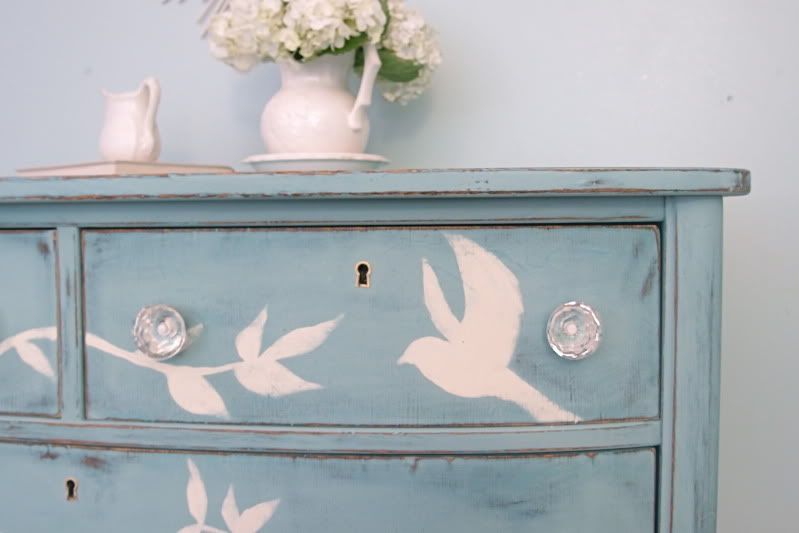
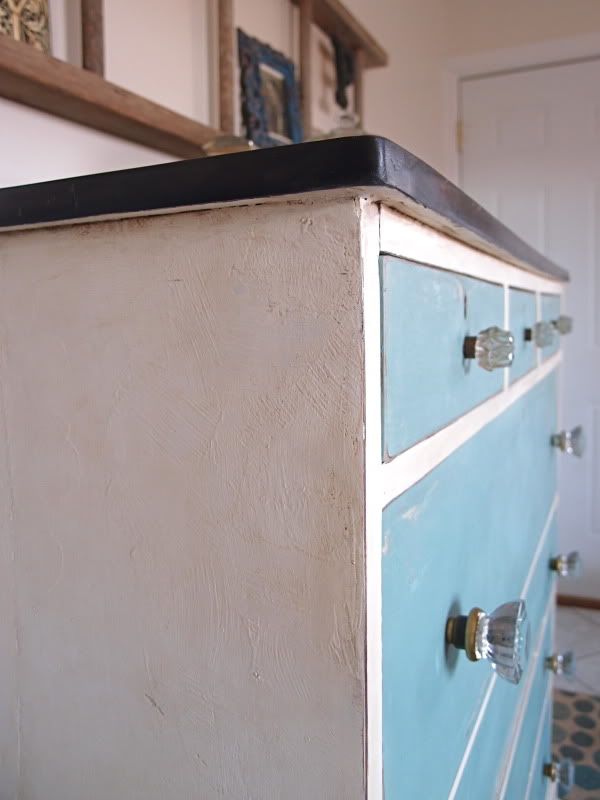
First of all, I am so thankful for this opportunity! Jaime and I became friends in college and years later, after we are married, moved and settled into our lives, she's a big "dot com" blogger and I'm just a start-up blogger! I feel so honored that she asked me to share a little about myself and my successes!

My
name is Rachel. I'm a midwest transplant (who loves it here!) and I am a
full-time mama to 3 sweet kids (2 boys, 1 girl). I have always been an
artist, doing painting, drawing, sculpture, crafting, you name it (art
related), I've done it.
About a year ago I
caught on to the Annie Sloan Chalk Paint craze and started re-doing my
own personal furniture. After a short time, I started selling my work on
Craigslist and fast forward to a month ago, when I started selling my
furniture in a retail store in the mall! I absolutely love working
around my schedule, using my artistic skills, and creating something
beautiful and loved from something ugly and rejected! Several months ago
I brainstormed what I would call my store if I ever opened one and came
up with Shades of Blue Interiors because I'm pretty much obsessed with
all shades of blue (especially anything teal or turquoise). So, it was
just a matter of making it (somewhat) official when I started my blog a
little over a month ago with the intention of connecting with other
talented people for inspiration, recognition, and so I could have a
place to direct my clients when they ask to see my work!

I
am going to share with you some of my favorite projects that I've done
and sold, then share some tips for those of you who are thinking about
starting to re-paint your own furniture or to make it possibly into
something more!
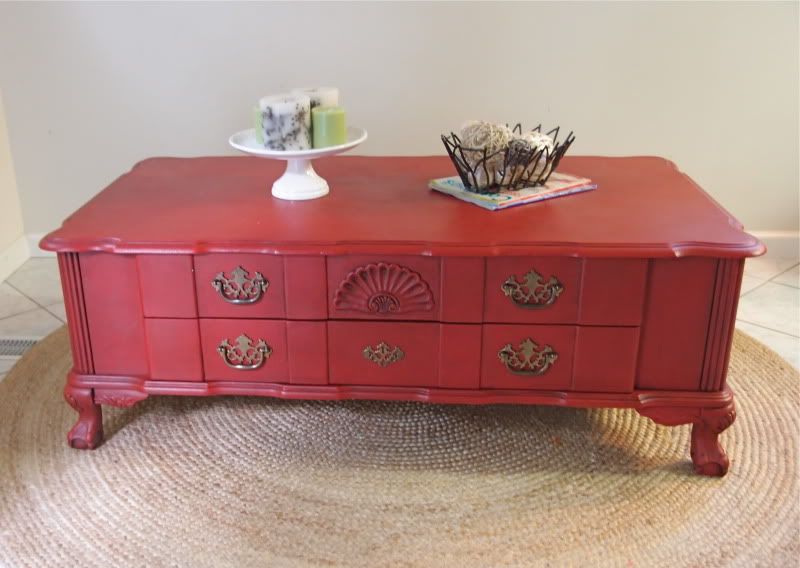
I had been painting mostly
white & blue pieces (because they sell the fastest) for months
before I finally took the plunge and painted this gorgeous coffee table
RED! The color is called Emperor's Silk and I used Annie Sloan Dark Wax
on top of it, to add depth. It is probably my favorite coffee table to
date. I loved the claw-foot legs, the two huge drawers, and of course
the color.

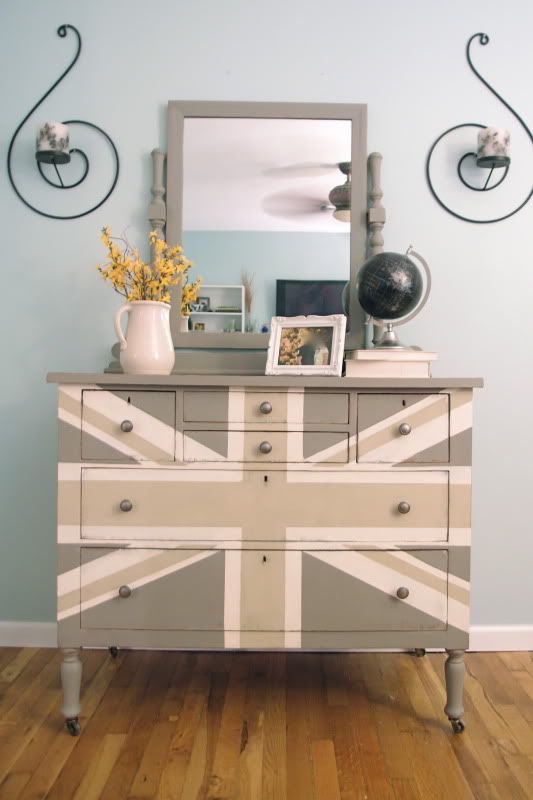
Another
one of my favorite pieces was the Gray Union Jack dresser I did. After
my very first entry into Miss Mustard Seed's Furniture Feature Friday,
it got picked! I love the simple lines, the solid wood, and the neutral
colors, while still making a statement with the British flag design. I
also love how original this color combination is. I seriously looked
everywhere, because I was nervous that the French Linen, Country Grey,
and Old White, wouldn't look good together. I ended up getting on the
old-school Paint app and drawing a dresser, and coloring it in with the
colors I wanted, to make sure it looked good, before I actually plunged
in.

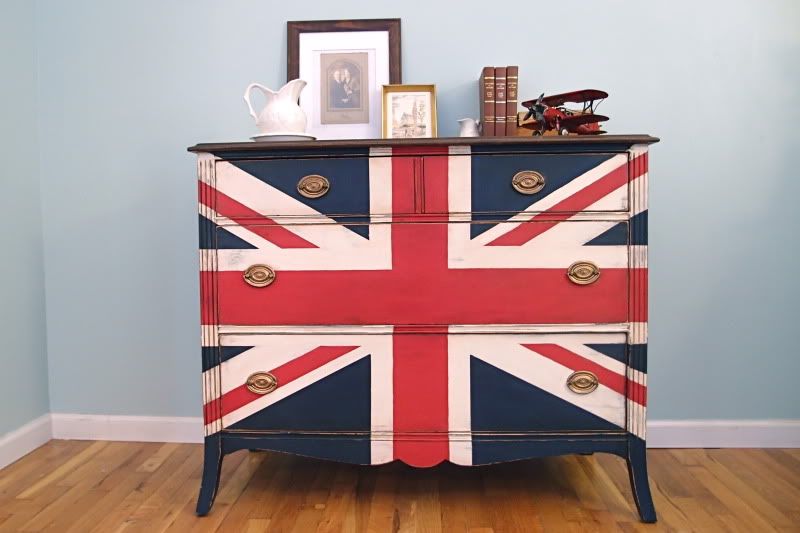
I
have a thing for Union Jack dressers actually. Another favorite is the
traditional Union Jack dresser I did. It just has a rich, regal look
about it, I can't help but love it! This was the 3rd time I did the same
design (different colors each time) and I often get asked how I do it. I
use a trace-projector! I have a mini one that I put over a picture of
the British flag and move it around till the size and placement is just
right and centered on the dresser-front. Then I use chalk to draw on the
lines, then tape over the chalk lines (with frog-tape). I can't even
believe people will measure it out and go through all the painstaking
math to get it right! I hate math! The mini projectors are less than $50
and they can be used for all kinds of projects.

The
last favorite that I'm going to share is the Blue Bird Dresser I did a
couple weeks ago. It was by far the most fun I've had painting
furniture. I wish I could have kept this one! I saw the same bird and
branch design online and after painting the dresser, just sketched it on
with some chalk. Because it was free-hand, I didn't have to worry about
it being perfect, which is part of what made it so much fun. It was
fast too! I think people are too intimidated by free-hand sketching on
furniture, so they rely on stencils. But free-hand allows you to make it
your own, unique, one-of-a-kind, which is also what will make you stand
out as an artist, and what, coincidently, people pay the most money
for!

Ok,
now on to some tips. If you are a beginner and are debating whether to
fork out around $40 for a quart of paint, let me offer you my advice.
First, if looking at it for a value standpoint, Chalk Paint is the best
value IF you have several pieces of furniture you want to paint, using
the same color (ie: 1 quart could easily paint 5-7 small pieces, each
with 2 coats), AND/OR you like the distressed, textured, or layered
look.
Chalk Paint is an artistic paint, but
you don't have to be an artist to appreciate it's potential! For
example, when you distress it, the paint comes off in a fine chalky
powder... no chips, ever! This makes the piece look authentic. I always
try to imagine where the furniture was, how it was used, and where it
would naturally show wear as I'm sanding off corners and edges.

You can also layer colors (like a lighter color over a darker color) and lightly distress to reveal the color dimension. [View full project here]

Another
technique is to paint unevenly and in all different directions, to add
texture, then use dark wax to highlight the texture. This look reminds
me of old french plaster walls. It also is more visually interesting to
look at. [View Full Project Here]

If
you are planning on possibly selling the furniture you paint, I'd say
it is definitely worth the investment, because you save time, more than
anything, and time is money. No sanding or stripping is required
beforehand or afterward and you are left with a completely smooth
painted piece, ready for whatever kind of protective top coat you want
(if any)!
So, for you beginners, I hope I have
given some useful information to get you inspired to paint that old
dresser you have or that dated night stand. Don't be afraid! Just do
it!
____________________________________________________________________________
Thank you Rachel! Please check out Shades of Blue Interiors for tons of inspiration and tips!
____________________________________________________________________________
Thank you Rachel! Please check out Shades of Blue Interiors for tons of inspiration and tips!

Gift Idea: Watercolor Artwork by My Sweet Rose
This weekend my husband and celebrated six years of marriage! And six years ago we moved into an LDS ward (congregation) where I met the lovely Laura. She is a woman of many talents and has opened an Etsy shop, My Sweet Rose, to offer those talents to you!


I asked her a few questions about her work and here's what she had to say:
When did you start painting? I started painting when I was in high school. Back then, I used acrylics and loved painting huge flowers like Georgia O’Keeffe. Then when I got to college I took a drawing class and a watercolor class and I changed mediums. From then on I’ve mostly worked with watercolors, although I occasionally do some larger works in acrylic and oil paint.
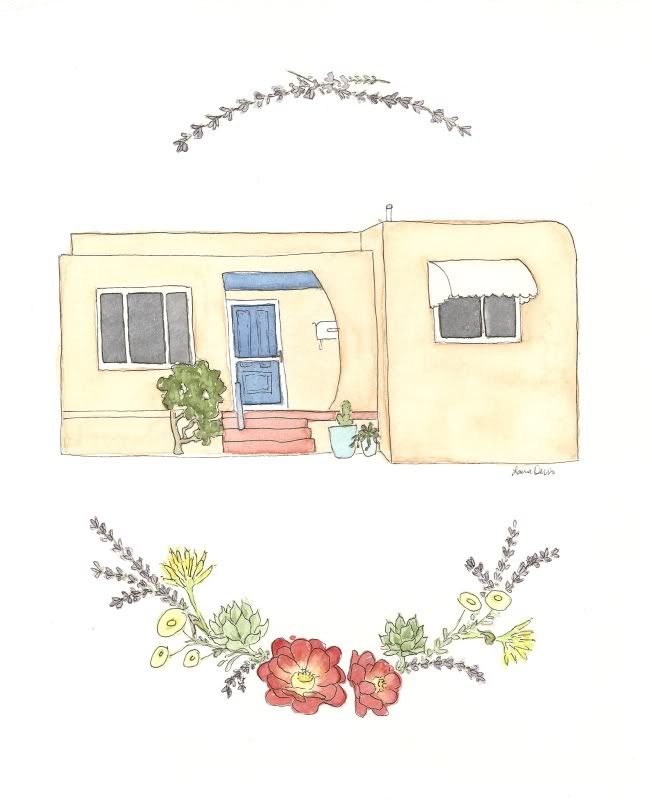
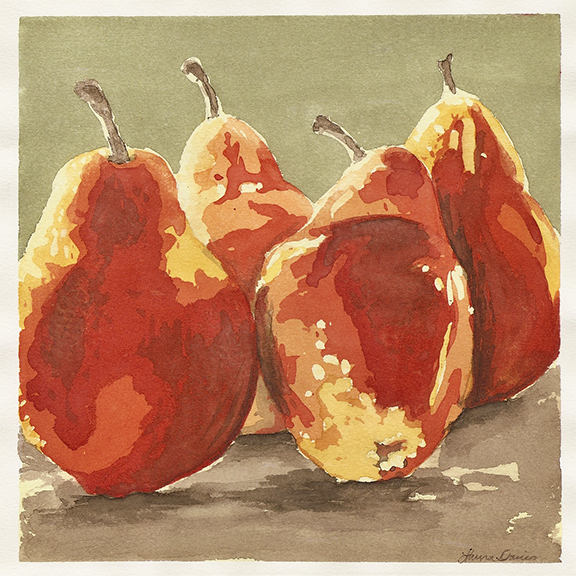
How do you find time to paint with two little ones? Painting can be hard some days with my two busy sons (ages 3 and 1 yrs) but I usually get little breaks here and there throughout the day. They may be brief 10 minute increments but I know there’s always bedtime to really focus in and get things done. Most of my painting happens between 8 pm and 10 pm. I also try to get the housework done during the day, with the help of my boys, so I don’t have to worry about finishing it up after they go to bed. And if worse comes to worse I find a baby sitter and get to work!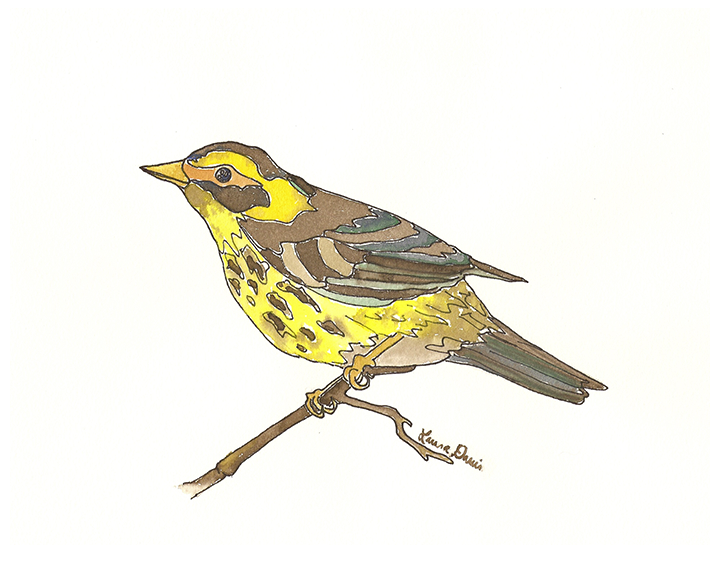
Here she is:

Yes, she's beautiful in addition to being an artist, photographer and awesome momma.
I asked her a few questions about her work and here's what she had to say:
When did you start painting? I started painting when I was in high school. Back then, I used acrylics and loved painting huge flowers like Georgia O’Keeffe. Then when I got to college I took a drawing class and a watercolor class and I changed mediums. From then on I’ve mostly worked with watercolors, although I occasionally do some larger works in acrylic and oil paint.

Where do you get your inspiration? My
inspiration comes from nature. I’m always attracted to the simple beauty found
there, from feathers, to fruit, to my potted plants around my house. I also
love to peruse Pinterest and draw inspiration from all the beautiful things
there.

How do you find time to paint with two little ones? Painting can be hard some days with my two busy sons (ages 3 and 1 yrs) but I usually get little breaks here and there throughout the day. They may be brief 10 minute increments but I know there’s always bedtime to really focus in and get things done. Most of my painting happens between 8 pm and 10 pm. I also try to get the housework done during the day, with the help of my boys, so I don’t have to worry about finishing it up after they go to bed. And if worse comes to worse I find a baby sitter and get to work!

So talented right? She also does custom work like these home portraits! Which would be perfect for someone like Brooke, who just bought a new home!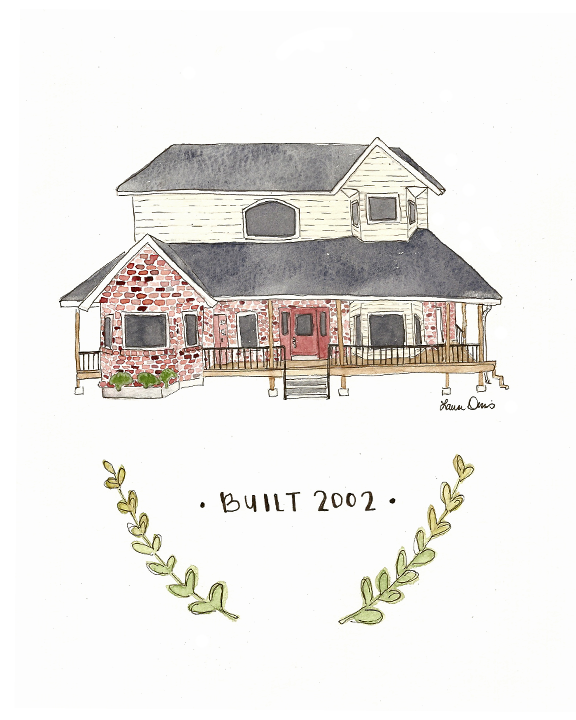

Please visit Laura's shop to see all her beautiful work: My Sweet Rose!
1 comment
:
Labels:
art
,
artwork
,
Etsy Shop
,
gift ideas
,
gifts
,
Holidays and Entertaining
,
Just Jaime
,
painting
,
presents
,
tutorial
Labels:
art
,
artwork
,
Etsy Shop
,
gift ideas
,
gifts
,
Holidays and Entertaining
,
Just Jaime
,
painting
,
presents
,
tutorial
Painted Collage
Remember that collage I did for Craft-a-Palooza? Well, I finally decided what to do with it. One of my favorite animals is a duck so I decided to paint a duck on my collage! Since I used mod podge (AKA shiny, school glue based paste) I needed to use acrylic. Oil could've worked as well. Using a small paint brush, I free handed the outline of a duck. First I tried black but that just blended into the background. Then I decided to go with white. I covered the black outline with white then filled it in.



Triptych, part 1
Jasmine made a collage I just loved at our craft-a-palooza last December, and I have been wanting to try it myself. I have pondered and wondered what I should do. Finally this week, with the help of a friend (thanks, Alisa), I made a decision.
Today I will show you part 1 of the triptych (a three paneled artwork) that will hang above my mantle. I hope Jasmine doesn't mind that I am going to steal her collage for my craft.
So... I decided to have 3 collages with a branch crossing all three. I may put a bird on the branch of the last one. For the first panel, I used all black and white prints from magazines for the background. I used Modpodge to adhere them to a 12" x 12" flat canvas.
 Next, I found a picture of a branch I liked. I was too lazy to go outside and take one myself, but that would have been cool!
I told my printer to print it on multiple pages (3 x 3). If that doesn't work for you, you can crop out sections of the picture one at a time and use the Paint program to make them the size you want.
 Next I cut out the branch and laid it across the three canvasses. It didn't fit exactly, so I stretched some pieces and added some smaller branches here and there. (I decided to use a different branch, as you can see.)
 Take a picture so you can remember how it goes after you create the stencil.
 Now, create the stencil. I used my Xyron machine with a temporary adhesive. It was a little hard to see exactly where the clear laminate was on my canvas, but it worked ok. I also used masking tape.

I carefully dabbed on the paint and let it dry. I added a quick coat of Modpodge over the paint. I carefully removed the stencil and did some touch up. It isn't perfect, but I like it!

Stay tuned. Next week I will show the finished triptych.
Today I will show you part 1 of the triptych (a three paneled artwork) that will hang above my mantle. I hope Jasmine doesn't mind that I am going to steal her collage for my craft.
So... I decided to have 3 collages with a branch crossing all three. I may put a bird on the branch of the last one. For the first panel, I used all black and white prints from magazines for the background. I used Modpodge to adhere them to a 12" x 12" flat canvas.

I told my printer to print it on multiple pages (3 x 3). If that doesn't work for you, you can crop out sections of the picture one at a time and use the Paint program to make them the size you want.


I carefully dabbed on the paint and let it dry. I added a quick coat of Modpodge over the paint. I carefully removed the stencil and did some touch up. It isn't perfect, but I like it!

Stay tuned. Next week I will show the finished triptych.

Craft-A-Palooza: Shaving Cream Painting
This is my last Craft-A-Palooza! How sad. This one is very fun for both you and the kids. I got this idea from Little Wonders' Days. You need shaving cream, paint and card stock.
On a plate or a pan, get a nice layer of shaving cream. Smooth it out with a spoon or other utensil. Now here's the fun part.
 Add some acrylic paint (any color and amount will do) and swirl it into the shaving cream. You don't need to do this too deep into the shaving cream. The marbleized it looks, the cooler you paper will turn out.
 Now taking card stock or any sturdy paper, press it down into the paint and shaving cream design then pull it up carefully. Let it stand for a minute or so.
 Next, using another piece of paper or squeegee, remove the paint and shaving cream.
 Your paper should now be tye dyed and ready for you to cut out fun shapes and patterns!


Wayward Tip: So I learned the hard way not to cut out the shapes and then dip your paper. I also learned when you are scraping off the excess paint and shaving cream, do it on one movement and in one direction. Also, use something bigger than the paper you are removing the extra off of...
On a plate or a pan, get a nice layer of shaving cream. Smooth it out with a spoon or other utensil. Now here's the fun part.


Wayward Tip: So I learned the hard way not to cut out the shapes and then dip your paper. I also learned when you are scraping off the excess paint and shaving cream, do it on one movement and in one direction. Also, use something bigger than the paper you are removing the extra off of...
2 comments
:
Labels:
art
,
artwork
,
craft-a-palooza
,
Jasmine
,
painting
,
paper crafts
,
papercrafts
,
shaving cream
,
tutorial
Labels:
art
,
artwork
,
craft-a-palooza
,
Jasmine
,
painting
,
paper crafts
,
papercrafts
,
shaving cream
,
tutorial
Craft-A-Palooza: Collage Painting
So I made the collage for Craft-A-Palooza and then I made another one. This time I wanted to do something I saw on Pinterest but not exactly copy it. They took a collage, covered part with a stencil and then panted over the rest. It was quite pretty but I didn't want a bird. So I chose a bear. I Googled animal silhouettes and found one I liked. I adjusted the picture to the size I wanted (print preview helps you gauge the size) then printed it out.

Then using my mom's sticker maker machine thing-a-ma-jig I made it into a sticker. Strategically placing my bear silhouette, I stuck it to the dry collage. Side note: I spent a lot of time and effort to make one spot on my board look good since the rest was going the be painted and wouldn't show. I just left the part I knew would be painted boring.The mod podge glue was slick enough the sticker would be easily removable.


If you want texture when doing mod podge, allow there to be air pockets or wrinkles in the paper. If you want it to be smooth, good luck! Just kidding. Apply the mod podge all the same direction (to the left or up or whatever.) Also, apply smaller piece since it's easy to get air out if it gets under there. When applying pieces, start from one side and work to the other. If you do all the edges then the middle, you're going to have some air under there. When you paint over the collage you can see the texture a whole lot better.
2 comments
:
Labels:
art
,
artwork
,
collage
,
craft-a-palooza
,
Jasmine
,
mod podge
,
painting
,
tutorial
Labels:
art
,
artwork
,
collage
,
craft-a-palooza
,
Jasmine
,
mod podge
,
painting
,
tutorial
Help With Painting!
Back in the day, Brooke and I used to share a room. When my mom asked us what color we wanted to paint our room, Brooke chose purple and I chose pink. After Jordan went to college, Brooke got Jordan's room and I stayed in our purple and pink room. It's been some time since then and I've seemed to out grow lilac purple and cotton candy pink. So now I have paint to paint my room. I chose "Valuable Gift" (AKA a light khaki) and "Chocolate Sundae" which are pictured below. Valuable Gift will be all the walls except one. Chocolate Sundae will be my accent wall. So here's my question. What should I do with my accent wall? I saw on Trading Spaces years ago where they painted the room one color and painted stripes on the wall with gloss paint. I was thinking about maybe doing that but instead of stripes, checkers. But I don't know. I need your help! If you've never commented on the blog, I challenge you to today. If you're our top commenter, don't stop any time soon especially on this post! I need suggestions people, pretty please!


Calender Artwork
Last week, I made this and took pictures all the way through and was so excited to show you all. And then, to my great disappointment, I accidentally deleted all the pictures...So now I'll just have to give you the details instead of show them.
 I wanted to do something with the months of the year and not just the seasons. I knew I had a lot of popsicle sticks so why not use them! I taped 12 (one for each month) popsicle sticks together with masking tape.Then I glued a popsicle stick at the top and one at the bottom with a hot glue gun and removed the masking tape. On the other side, I sketched a tree lightly with a pencil making sure the tree extended to all 12 sticks. The first coat of paint I did was the sky. Then I painted on the tree using a narrow brush for the skinny branches. Next I did the green leaves and grass by tapping the paint on. Then I layered on some "flowers" with different colored dots on the grass and tree. I used the end of a small brush handle to make the dots. I used the same technique of dots for the fall leaves. Then I added some snow on to the branches and ground again with a narrow brush. To make it look like it was snowing, I got a cheap brush, dabbed it in white, and on a scratch piece of paper I hit the brush a couple of times until the bristles fanned out. Usually, cheap paint brushes end up looking like that already from being smashed by little kids so I didn't feel bad doing that to this paint brush. Fan brushes are great for doing snow but since this was so small, I didn't use one. After it all dried, I painted the first initial of each of the months on the sticks. And just like that, you have a cute and easy picture of the months of the year!
*You can also use tongue depressors or paint mixing sticks if you wanted to do it on a bigger scale.

*You can also use tongue depressors or paint mixing sticks if you wanted to do it on a bigger scale.
Fall Leaves "Canvas" Art for $1
I have a hard time with seasonal decorating. One reason is I'm picky. Another reason is I'm thrifty (aka cheap). This year I decided to make some fall decor to go in my home. I headed to my trusted friend: Dollar Tree. There I found a pack of 50 fall leaves. From there, I made my Fall Leaves "Canvas" Art.

Materials:
Leaves (from Dollar Tree)
Lid to a shoe box-- yes that's your canvas!
Tools:
Scissors
Glue gun


Materials:
Leaves (from Dollar Tree)
Lid to a shoe box-- yes that's your canvas!
Tools:
Scissors
Glue gun

First, map out your "canvas," This is to make sure you have enough leaves.

Next, start gluing!

This is the fully covered "canvas"

I didn't like the little specks of white poking through on the bottom. I only had a few leaves left and they were all red. I chopped them up like so:

I slipped the pieces in the bottom to fill up the white:

I also scouted out any white spaces I left and filled them in. I wanted a more finished look for my canvas, so I glued the edges of the leaves to the sides. This is the final product:
Fall art for $1. What do you think?
34 comments
:
Labels:
art
,
artwork
,
canvas
,
decor
,
fall
,
fall decor
,
Holidays and Entertaining
,
home decor
,
Just Jaime
,
leaves decor
,
tutorial
Labels:
art
,
artwork
,
canvas
,
decor
,
fall
,
fall decor
,
Holidays and Entertaining
,
home decor
,
Just Jaime
,
leaves decor
,
tutorial
State Canvas Art
This post was originally featured on She Wears Flowers.
So I've seen a lot of state-loving on Pinterest lately and the bug has bitten me! I love my home state, North Carolina, and am sad I can't live there right now. I thought a North Carolina print would be perfect for my home, but you can make State Canvas Art with any state or country. This is what I created:


1 Stretched Canvas (I used 11 x 14)
Three different colors of acrylic paint (red paint is not pictured)
Paint Brush
Scissors
Cardstock and Printer (not pictured)


I took my scissors and got to cutting. I decided to skip trying to cut out the island chain on the coast of my state (The Outerbanks) and left them on there. I like the shape better. At this point I started remembering my 4th grade state project, where I used salt dough to make the Ol' North State. Good times. Back to the project!

I applied removable adhesive to the back of my cardstock and stuck it on my dry canvas (I let it dry overnight just to be sure).


I gave the canvas two coats but didn't wait until the second coat fully dried before removing the state.

I wanted to make sure it would come up easily. I used tweezers to pull the side up so I wouldn't hurt the paint. It looked AWESOME. So awesome I forgot to take a picture. But I decided to put the final touch, a little heart over my home town.
I cut out a stencil from cardstock of a heart and dabbed a bit of red paint in the heart. Voila! I love the results. This project was really easy, a little messy and pretty cheap.
What colors would you use?
So I've seen a lot of state-loving on Pinterest lately and the bug has bitten me! I love my home state, North Carolina, and am sad I can't live there right now. I thought a North Carolina print would be perfect for my home, but you can make State Canvas Art with any state or country. This is what I created:

First let's start with the materials:

1 Stretched Canvas (I used 11 x 14)
Three different colors of acrylic paint (red paint is not pictured)
Paint Brush
Scissors
Cardstock and Printer (not pictured)
I started by giving my canvas 2 coats of blue acrylic paint (Folk Art 2555 Deep Ocean Blue):

I tried to make sure the paint was even, especially in the middle where the state would be seen. The first coat I went across my canvas. For the second I went up and down.

Then this happened....I couldn't have done this if I tried! My scissors just landed this way!

Next I printed out a map of my state on cardstock. I measured it to make sure it would fit well on my canvas.

I took my scissors and got to cutting. I decided to skip trying to cut out the island chain on the coast of my state (The Outerbanks) and left them on there. I like the shape better. At this point I started remembering my 4th grade state project, where I used salt dough to make the Ol' North State. Good times. Back to the project!

I applied removable adhesive to the back of my cardstock and stuck it on my dry canvas (I let it dry overnight just to be sure).

I used a contrasting paint color (Folk Art 2561 Steel Gray) and started in the middle and painted OUT from my state. I didn't want to try to push the paint against the edges and have the cardstock curl or the paint get underneath.

I gave the canvas two coats but didn't wait until the second coat fully dried before removing the state.

I wanted to make sure it would come up easily. I used tweezers to pull the side up so I wouldn't hurt the paint. It looked AWESOME. So awesome I forgot to take a picture. But I decided to put the final touch, a little heart over my home town.
I cut out a stencil from cardstock of a heart and dabbed a bit of red paint in the heart. Voila! I love the results. This project was really easy, a little messy and pretty cheap.
What colors would you use?
20 comments
:
Labels:
art
,
artwork
,
decor
,
home decor
,
Just Jaime
,
painting
,
State Canvas Art
,
State love
,
tutorial
Labels:
art
,
artwork
,
decor
,
home decor
,
Just Jaime
,
painting
,
State Canvas Art
,
State love
,
tutorial
Subscribe to:
Posts
(
Atom
)
