

Showing posts with label t shirt. Show all posts
Showing posts with label t shirt. Show all posts

Silhouette Shirt
This isn't done by me but I thought it was so stinkin' cute I had to share it (plus I've been traveling all day and didn't prepare a post.) Jordan's sister in law made Jordan's oldest daughter this cute shirt. She bought a striped shirt. Easy beezy right? Then using her Silhouette, she cut out an even cuter owl on suede (made for the Silhouette) and applied it to the shirt. And just like that, Jordan's daughter now had a one of a kind, stinkin' cute shirt!


TWO Quick Pillow Case Adult Shirts
So I saw this tutorial here and thought this would be a great quick top to make. I did two versions- one like hers and the other my creation. One took me about an hour and 15 minutes the other took me about 20 minutes. As always when I was making things didn't go perfect but this is what I would do the second time around:
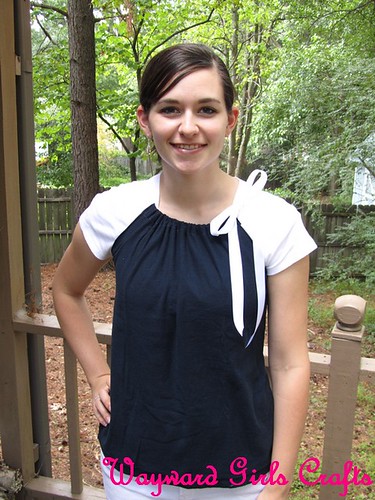
Pillow Case Top from Scratch
Needed:
1 hour and a half
3/4 yard of Jersey Knit fabric (60" wide)
1/3 yard of silky fabric (45" wide)
Coordination thread
Step One: Make the tie-
- Cut the silky fabric 5 inches wide in two 45" strips. I thought 3 inches was too wide:( If you want yours as wide as mine I originally cut 6 inch to make them 3" wide instead of 2.
Don't you love how crooked they cut the fabric at the store?"
- Sew the two strips together to make one long 90" inch strip.
- Fold in half with right sides together, pin.
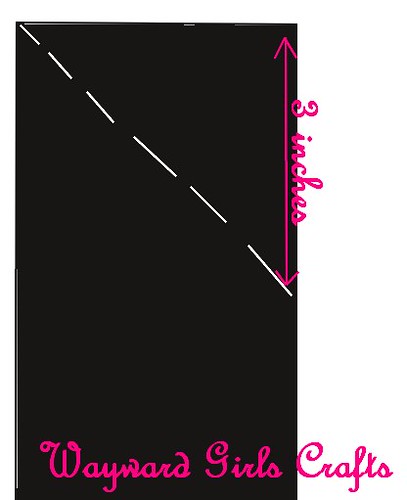
- At each end three inches down mark a line to the opposite corner (see picture)and sew.
- Leaving a 6 inch gap in the middle, sew along edge.
- Turn right side out through gap in middle, fold under and sew gap.
- Press
Step Two: Make the shirt-
- Cut the fabric 23" (W) by 26"(L). In the tutorial I mentioned I found the dimensions to be way too large. I have a long slender torso so you may need to adjust your fabric somewhat. You might want to start bigger (her dimensions were 30" x 30") if you feel it will be too small. I made the other shirt first so I had some numbers to go off of.
- Press a two inch from top and baste stitch. This step it to prevent the jersey knit from rolling when you fold it over.
- Fold over to make casing a sew zig zag stitch along bottom of edge of casing.
- Thread the tie through the casing and put on. Pin where the arm holes should stop below your under arms.
- With right sides together sew up sides.
- Zig Zag stitch on arm holes and around bottom (see video). Try on
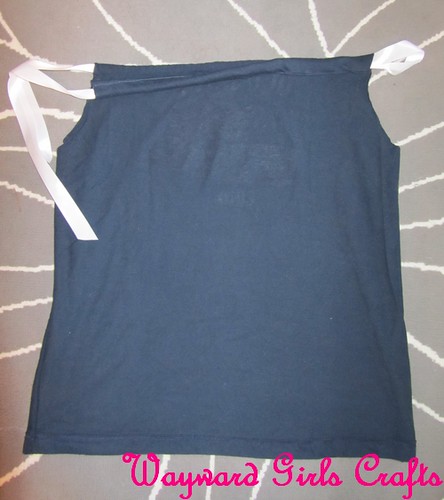
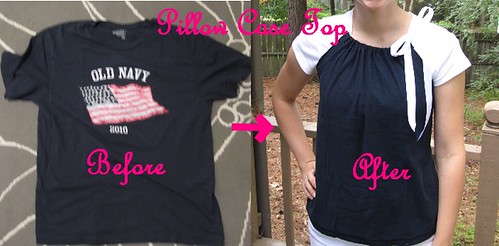
Very East Pillow Case Top from Men's Shirt
Needed:
20-30 minutes
Men's Shirt- I used my husband's old 4th of July Old Navy shirt that had shrunk a little. It was size large. The shirt after step one was 21" (W) by 23.5" (L)
1/2" wide ribbon
Coordinating Thread
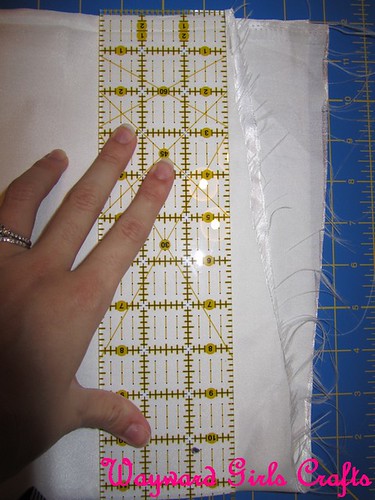
Sewing Ruler
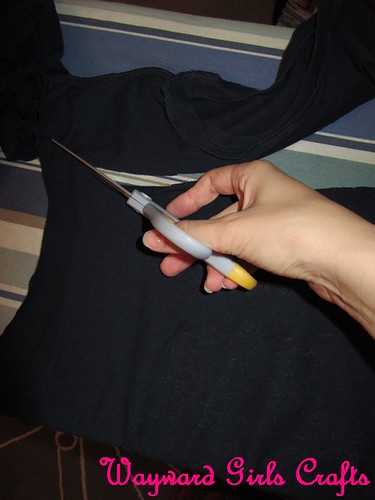
- Turn shirt inside out and cut off arms. Align the ruler at the base of the collar and cut in straight line across.
- Make 1" wide casing and straight stitch along bottom. **Make sure here that your new right sides is actually the inside of the shirt since. You don't have to do this but mine had a flag I didn't want on it so I just used it inside out. I will now refer to it as the (old outside and new inside) flag side.
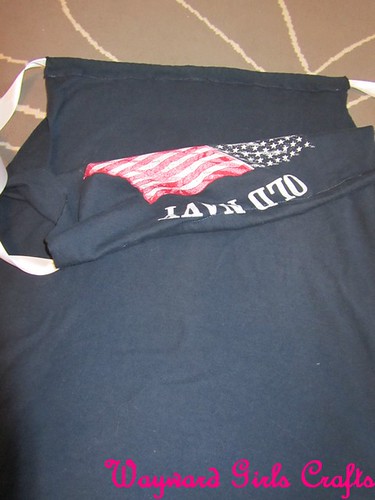
- With flag sides out sew along each side with a small seam allowance. I did this so that the old inside seam wouldn't show.
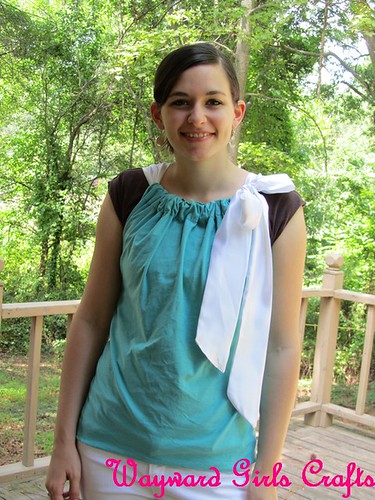
- Thread ribbon through casings and try on!
Have any shirts you want to revamp?

Wayward Shirts
I decided to surprise my sisters with some awesome WGC t-shirts. My mom was in on the secret. Here is the design:
(Mom's had "daughters' " instead of "sisters'")

And here we are at the beach sporting our awesome threads!
(from L to R: Jaime, Jasmine, Mom, Jordan, and Brooke)


I hope everyone is having a safe and awesome weekend!

IRON CRAFT 1: T Shirt Makeover
Last week, in honor of 250 followers (and an awesome beach trip), we Wayward Girls gave one another an IRON CRAFT challenge: each of us brought one (or two) "secret" ingredients for a craft. Many ambitious plans later, we're (sort of) ready to start showing how we answered the challenge.
We could use multiple crafts to use up all the secret items, but each craft had to use at least two of the secret ingredients. My craft today does just that (with more IRON CRAFTS to follow). (When they're done.) (I LOVE PARENTHESES!)

Materials (secret ingredients in bold):
First, I cut off the ribbed crew collar at the top of the shirt. Then I cut off the bottom hem of the shirt below the hem stitching, like this:

(Save this piece for another job!)
I cut off the hem stitching, then cut off another strip of fabric about 1 inch wide. I pinned the strip about half an inch below the collar on the outside of the shirt. I wanted to sew it down, but Brooke's sewing machine was giving us fits at the beach house and I re-broke Mom's 30-year-old sewing machine, which just got serviced for the first time a couple months ago (for this exact reason!). So I really just pinned it in place to show you how the finished product will look:

And here's a faster explanation than I can give:

I also gathered (well, added folds which I guess are more like pleats) one side of the shirt, but I'm not sure if I'll keep this in, since the shirt seems a little short already:

And of course, the decorative details:

I made the white flower from the bottom hem-edge of the shirt, similar to the ribbon flowers from Mother's Day. It was already nicely creased, so I kept that and basted along the folded edge:

Once I reached the end of the strip (took forever!) I pulled the thread tight to scrunch up the fabric. It curls naturally from this:

Unlike the little ribbon flowers, though, this was going to need a bit more stabilizing to stay together as a big flower. I started by sewing together the center, then as I wound each new layer around the center, I sewed that layer to the last layer:

And voila:

And the (almost) finished product (with a stripey placemat so you can see the collar):

What would you do with a T shirt and silk flowers?
We could use multiple crafts to use up all the secret items, but each craft had to use at least two of the secret ingredients. My craft today does just that (with more IRON CRAFTS to follow). (When they're done.) (I LOVE PARENTHESES!)

Materials (secret ingredients in bold):
- Large white T shirt
- Offwhite & gold silk flowers
- Sewing supplies: thread, needle, straight pins, sewing machine & scissors (and rotary cutter, optional)
First, I cut off the ribbed crew collar at the top of the shirt. Then I cut off the bottom hem of the shirt below the hem stitching, like this:
(Save this piece for another job!)
I cut off the hem stitching, then cut off another strip of fabric about 1 inch wide. I pinned the strip about half an inch below the collar on the outside of the shirt. I wanted to sew it down, but Brooke's sewing machine was giving us fits at the beach house and I re-broke Mom's 30-year-old sewing machine, which just got serviced for the first time a couple months ago (for this exact reason!). So I really just pinned it in place to show you how the finished product will look:
And here's a faster explanation than I can give:
I also gathered (well, added folds which I guess are more like pleats) one side of the shirt, but I'm not sure if I'll keep this in, since the shirt seems a little short already:

And of course, the decorative details:

I made the white flower from the bottom hem-edge of the shirt, similar to the ribbon flowers from Mother's Day. It was already nicely creased, so I kept that and basted along the folded edge:

Once I reached the end of the strip (took forever!) I pulled the thread tight to scrunch up the fabric. It curls naturally from this:
Unlike the little ribbon flowers, though, this was going to need a bit more stabilizing to stay together as a big flower. I started by sewing together the center, then as I wound each new layer around the center, I sewed that layer to the last layer:
And voila:

And the (almost) finished product (with a stripey placemat so you can see the collar):

What would you do with a T shirt and silk flowers?

8 comments
:
 Labels:
challenge
,
Clothing
,
flowers
,
iron craft
,
sewing
,
t shirt
,
tutorial
,
upcycle
Labels:
challenge
,
Clothing
,
flowers
,
iron craft
,
sewing
,
t shirt
,
tutorial
,
upcycle
Subscribe to:
Posts
(
Atom
)