When I was choosing my flowers I had an idea from a good friend's wedding that I was a bridesmaid in. I loved her bouquet. When I started looking at flowers I realized that bouquet really didn't transfer well to winter colors. From them I just looked at what was available and looked like it fit in the right season for my wedding. I didn't want stark white flowers and I definitely wanted red in there. I looked so many times at flowers (mainly at Michaels). I planned on having silk flowers so I can keep my bouquet and it's the same bouquet for my bridals and the wedding. I found some magnolias that I loved! They were off-white and not too big. A great filler flower that comes in so many colors is the hydrangea. We found some of those in the right shade of red and found a couple other kinds of flowers that would accent the others. If I had been thinking about it I would've taken pictures of the process of making the bouquet but of course I didn't even think about it.
So arranging my bouquet was no easy task. I rearranged everything a few times and took pictures to remind myself of what I liked. When it came time to actually make it we used heavy duty shears, floral tape and some creativity. It helped to have another pair of hands doing this. Thanks mom! We made sure only the pretty flowers made it to the bouquet. We weren't afraid of taking apart the flowers with the shears and occasionally a knife...that was not the safest! We built it from the center, starting with the best magnolia, and then fanned out, tapping the layers as we went. After all the flowers had been adjusted, taped, and readjusted, we cut the stems to the same length and then I pinned ribbon around the stems. I glued VERY carefully a small circle of cardstock to the bottom of the bouquet then cover it with ribbon to give the bottom a clean, flat surface. I found this pearl bouquet wrap thing at Michaels and slid that on over the ribbon for the last finishing touch and voila! There's my bouquet!

Showing posts with label flowers. Show all posts
Showing posts with label flowers. Show all posts

Bridal Bouquet

Posted by
Jasmine
at
10:46 PM
2 comments
:
 Labels:
bouquet
,
fabric flowers
,
flowers
,
Holidays and Entertaining
,
Jasmine
,
wedding

Tissue Paper, Spray Paint, Fabulous!
Last week, my church had a "tea" party. (We don't drink tea, so I'm not really sure why they wanted to call it that.) All I really knew about it is that we were supposed to wear hats.
So I went big.
I'd just been perusing pictures from this year's Ascot, so I knew exactly what I wanted to do:
But since the craft stores only supply straw hats, it felt a little more like:
I wanted my hat to be a little lighter, so I went for the good old standby, spray paint.
Two coats on each side left enough variation in the color to make it look natural.
Then Mom and I worked on the flowers. Mom made an accordion flower, and I made a big twist flower.
Accordion flower
Twist flower
Secure the twist with wire, trim to round the corners and you're set to go!
We combined our flowers, with Mom's according flower forming the center of for my big twist flower. I poked the wires from Mom's flower through my tissue paper and tied the wire below.
Rather than worrying about attaching it to the hat, I clipped the stem of the flower in my hair and put the hat on at an angle. It did fall off once, and the breeze was a problem when shooting photos, but it was also nice to be able to take it off to fit into my car without worrying about messing up the flower.
I also discovered my new life motto:
What makes you feel fabulous?
So I went big.
I'd just been perusing pictures from this year's Ascot, so I knew exactly what I wanted to do:
 |
| Princess Haya of Jordan, Sheikha of Dubai via Order of Sartorial Splendor |
I wanted my hat to be a little lighter, so I went for the good old standby, spray paint.
Two coats on each side left enough variation in the color to make it look natural.
Then Mom and I worked on the flowers. Mom made an accordion flower, and I made a big twist flower.
Accordion flower
Twist flower
Secure the twist with wire, trim to round the corners and you're set to go!
We combined our flowers, with Mom's according flower forming the center of for my big twist flower. I poked the wires from Mom's flower through my tissue paper and tied the wire below.
Rather than worrying about attaching it to the hat, I clipped the stem of the flower in my hair and put the hat on at an angle. It did fall off once, and the breeze was a problem when shooting photos, but it was also nice to be able to take it off to fit into my car without worrying about messing up the flower.
I also discovered my new life motto:
Just get me some spray paint and tissue paper, and I'm fabulous!
What makes you feel fabulous?

Posted by
Jordan McCollum
at
7:00 AM
6 comments
:
 Labels:
flowers
,
hat
,
Jordan
,
sunhat
,
tea party
,
tissue paper

Muy Facil Flowers (Very Easy Flowers)
I'd like you to know, I take requests on occasion. One of our readers, Heather, asked in her comment on my thrifting post for a tutorial on how to make the flowers on my hair accessory. She asked, I am delivering!
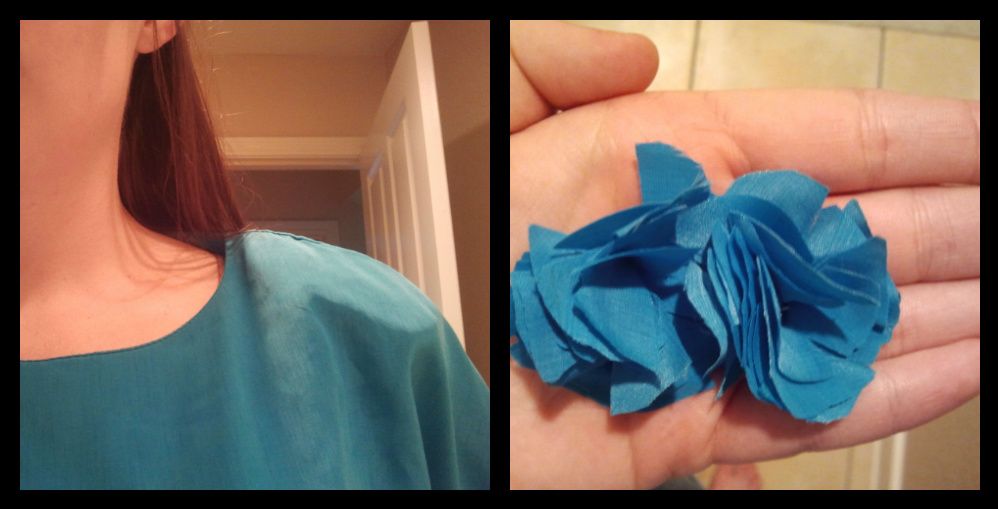
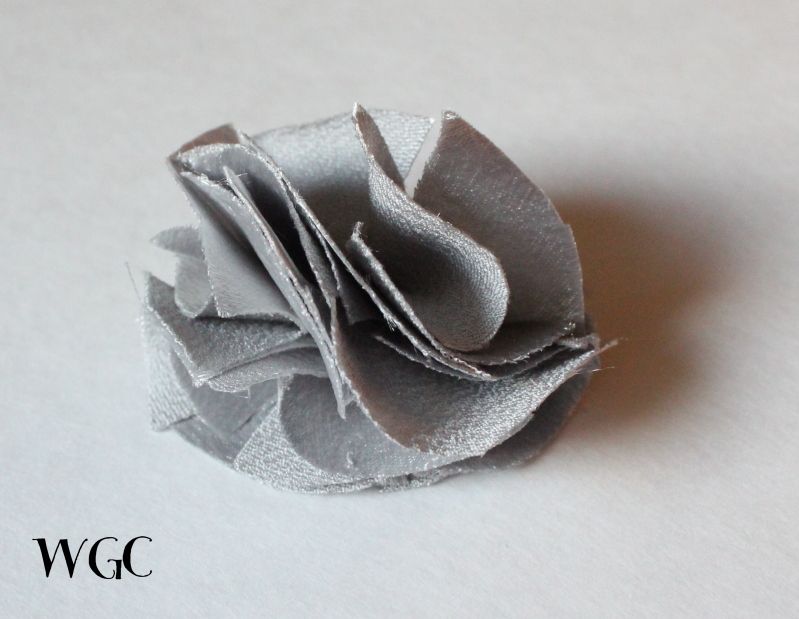
My first attempt I made two flowers out of the shoulder pads from my totally tubular '80s top. The best thing about these flowers: they are scrap pile busters! Perfect for just a little bit of pretty fabric you have left.
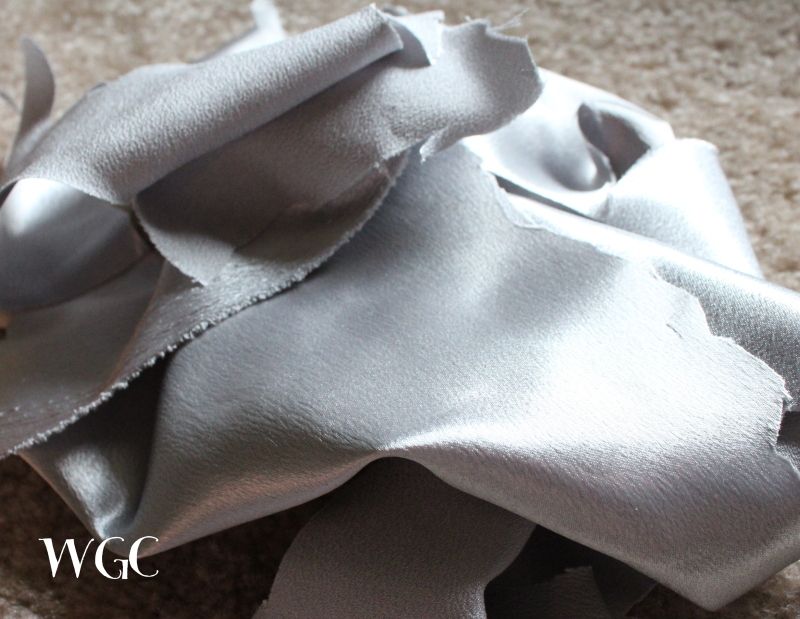 |
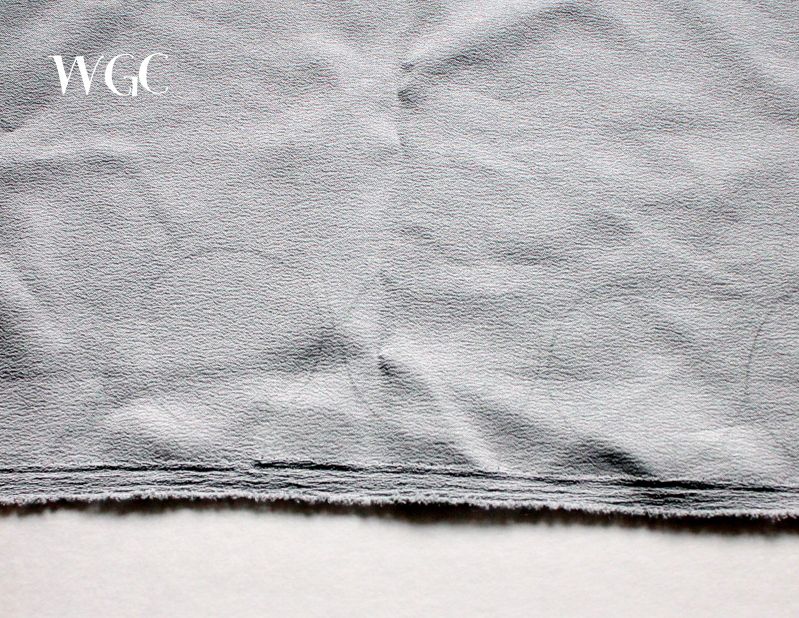
Start with some pretty fabric you can't bear to get rid of
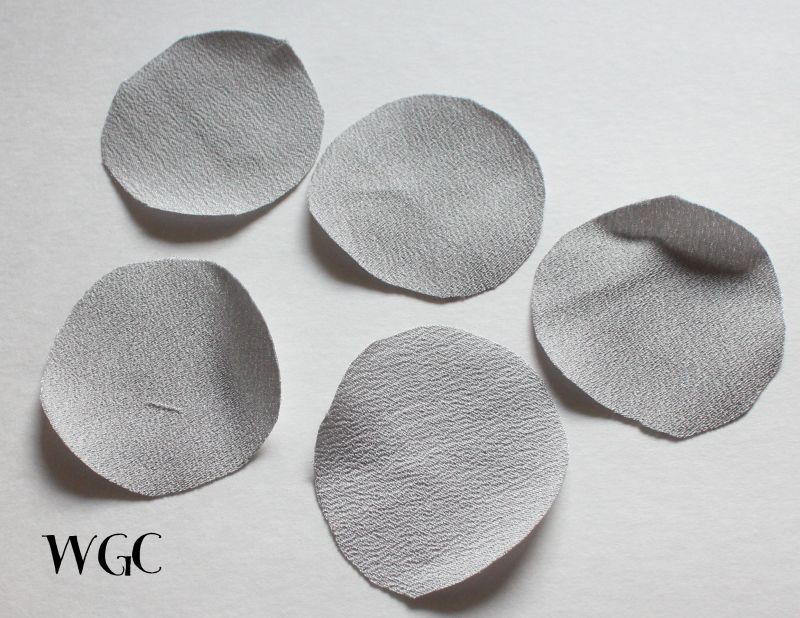
Trace circles onto the fabric. Between 4 and 6 circles seem to be best.
Cut out the circles. It's ok and almost preferable if they aren't perfect.
Stack the circles and while holding them between your pointer finger and thumb, cut slits around. The more slits, the puffier it will be. Twist the different layers so the slits aren't lined up.
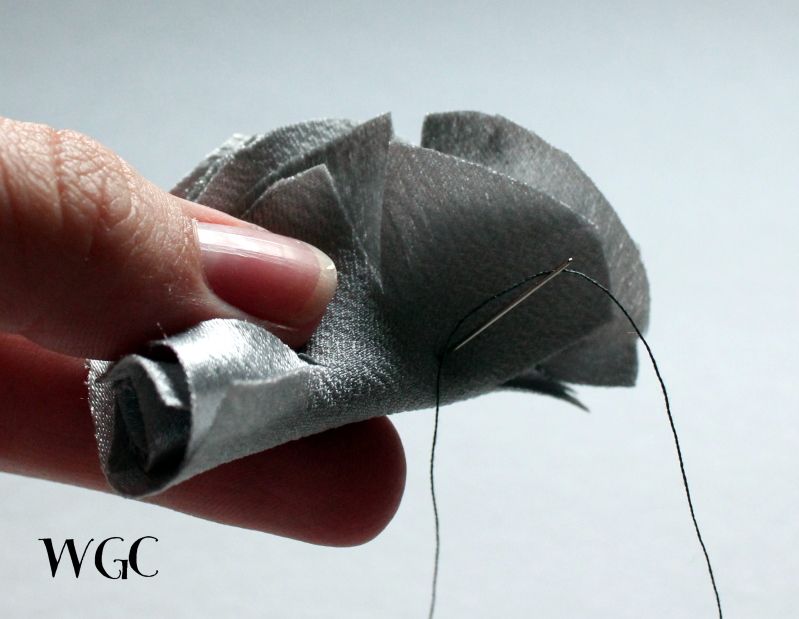
Fold the flower over and make several stitches, ensuring your needle goes through each layer.
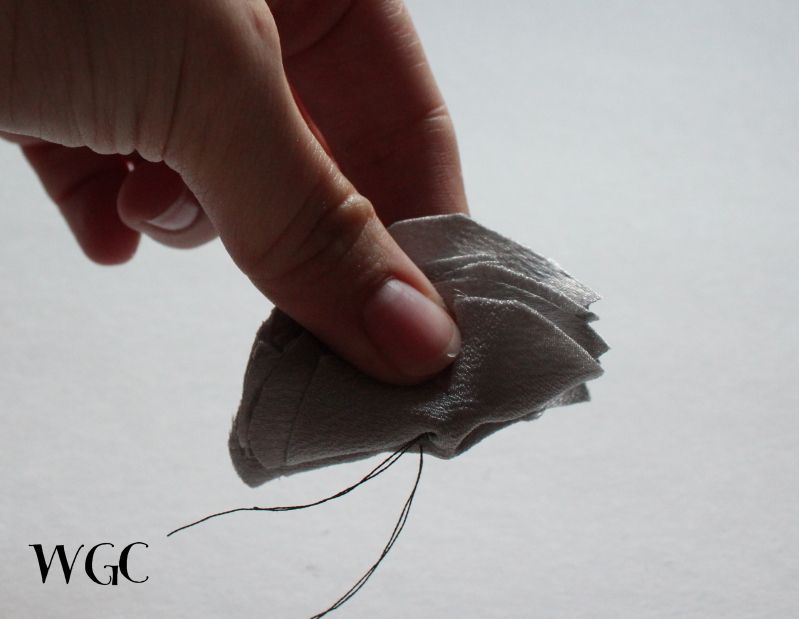
Then fold the flower the opposite way and stitch again.

Then fold the flower the opposite way and stitch again.
Voila!
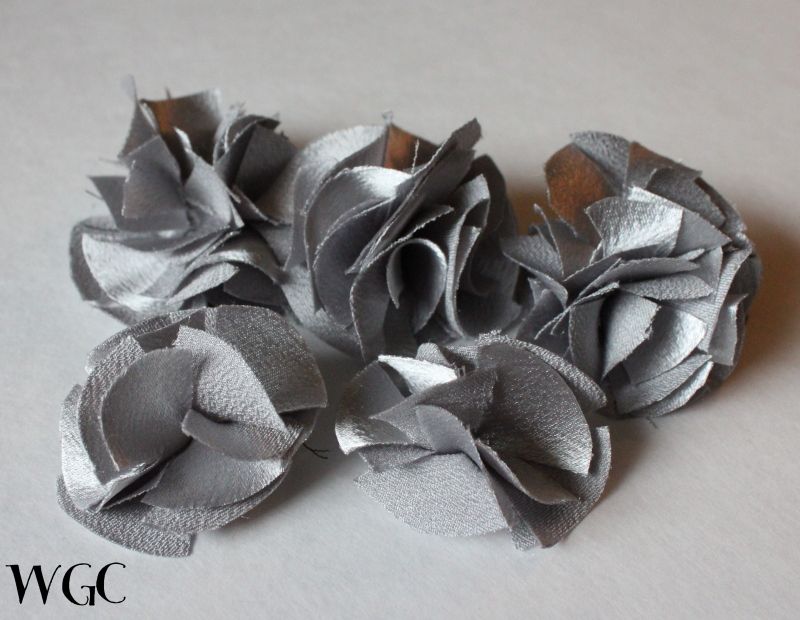
Here I have two different sizes. The ones in front needed more layers or more slits I think. The back ones I like more.
These flowers are perfect for hair accessories, brooches, and jewelry.
Now go make ya some Muy Facil Flowers!!

Posted by
Just Jaime
at
6:30 AM
7 comments
:
 Labels:
accessories
,
cheap and easy
,
fabric flowers
,
flowers
,
hair bows
,
Just Jaime
,
scrap buster
,
sewing
,
tutorial

Daffodil crafts!
When I was little, I bugged asked my mom about when my birthday would be. Frequently. Finally, when my birthday was close, my mother pointed out the blooming daffodils and told me when I saw daffodils blooming, my birthday was near.
I guess it's kind of appropriate that the scientific genus of the flower is Narcissus, because I think that selfish reason is a big part of why it's my favorite flower.
And today they are blooming, because today it's my birthday! (Incidentally, in the South where we lived, they never bloomed that late again, LOL. But I live in a colder place now, and they've only come out in the last 2-3 weeks.)
So while I'm off celebrating, here's an awesome selection of daffodil-inspired crafts that will fit in great with any spring or Easter decor/menu/celebration/awesomeness.
Have you shared any Daffodil crafts this year? What's your favorite flower/flower craft?
I guess it's kind of appropriate that the scientific genus of the flower is Narcissus, because I think that selfish reason is a big part of why it's my favorite flower.
And today they are blooming, because today it's my birthday! (Incidentally, in the South where we lived, they never bloomed that late again, LOL. But I live in a colder place now, and they've only come out in the last 2-3 weeks.)
So while I'm off celebrating, here's an awesome selection of daffodil-inspired crafts that will fit in great with any spring or Easter decor/menu/celebration/awesomeness.
Daffodil treat cups (great for an Easter basket!)
Have you shared any Daffodil crafts this year? What's your favorite flower/flower craft?
THIS POST HAS BEEN TAKEN OVER BY THE WAYWARD GIRLS:
HAPPY BIRTHDAY JORDAN!!

Posted by
Jordan McCollum
at
8:21 AM
7 comments
:
 Labels:
birthday
,
birthdays
,
daffodils
,
flowers
,
Holidays and Entertaining
,
Jordan

Flower Shoe Clips
Want to update a pair of flats? This took me no time and cost less than $5. You probably have all the supplies on hand!
Materials:
Felt (I used stiffened)
Small flowers
Bling
Paperclips
Directions:
Materials:
Felt (I used stiffened)
Small flowers
Bling
Paperclips
Directions:
Cut two circles out of felt, a little bigger than a quarter.
Pull the heads off the flowers. Glue bling in the center of the flower
Then take the bottom off the flower
So it looks like this:
Then chop some of the plastic stem off, so it's not so tall
Smear glue all over the back, like so:
Then stick 'em on the felt circle. I put three on each circle
The top of one and bottom of the other:
Next stick a paperclip in there. YES, a paperclip.
Finally slip them on your shoes for a new look and a little sparkle! I used smaller clips and couldn't feel them when I walked.
What kind of shoe clips do you want to make?

Posted by
Just Jaime
at
7:00 AM
16 comments
:
 Labels:
flower shoe clips
,
flowers
,
Just Jaime
,
shoes

Silk Flower Arranging Tips
Over the years, I have attended a couple of flower arranging classes-- nothing very intense. I really enjoyed them and have had fun arranging both fresh and artificial flowers. I have done the flowers for all of my girls' weddings and many other things. I buy flowers from warehouse stores. The cost is not great, so I am willing to try different things. Have some fun with flowers. It is very satisfying.
I wanted to have some pretty silk flower arrangements in my home, but didn't like how much a single stem costs. Nice flowers, such as hydrangeas and calla lillies can cost $7-10 a stem. So... one day when I was at a craft shop, I saw that all of their seasonal flowers were on sale for 90% off. I purchased lots of them. I can't remember whether it was spring or fall, but whichever one it was had many flowers whose colors worked well with my decor. Also, when you are paying less than $1 a stem, you are free to experiment an try unusual flowers and shapes. Don't forget to pick up lots of greenery and small flowers to fill in. Now I always look for the sales which occur at least 2x a year so I can stock up on flowers.*
Once you have your flowers, get some good wire cutting pliers and have get to cutting. You will want to cut some stems apart. I often pluck the bloom off and put it back on a stem I like better. I add leaves to flowers as needed. Sometimes I have to tape stems, greenery and/or blooms together with wire, floral tape, and toothpicks. I just like to experiment.
I use containers that I have around the house, or ones that I get at thrift shops (you can find very interesting things to use there. Think out of the box.) or at places like Big Lots.
Secure floral foam and the bottom of your container and create. Here is a link to some basic shapes of floral arranging.
*These sales are also a great time to stock up on flowers for the floral accessories and hair bows that are so popular now.
Here are a few of my arrangements:


IRON CRAFT 1: T Shirt Makeover
Last week, in honor of 250 followers (and an awesome beach trip), we Wayward Girls gave one another an IRON CRAFT challenge: each of us brought one (or two) "secret" ingredients for a craft. Many ambitious plans later, we're (sort of) ready to start showing how we answered the challenge.
We could use multiple crafts to use up all the secret items, but each craft had to use at least two of the secret ingredients. My craft today does just that (with more IRON CRAFTS to follow). (When they're done.) (I LOVE PARENTHESES!)
Materials (secret ingredients in bold):
First, I cut off the ribbed crew collar at the top of the shirt. Then I cut off the bottom hem of the shirt below the hem stitching, like this:
(Save this piece for another job!)
I cut off the hem stitching, then cut off another strip of fabric about 1 inch wide. I pinned the strip about half an inch below the collar on the outside of the shirt. I wanted to sew it down, but Brooke's sewing machine was giving us fits at the beach house and I re-broke Mom's 30-year-old sewing machine, which just got serviced for the first time a couple months ago (for this exact reason!). So I really just pinned it in place to show you how the finished product will look:
And here's a faster explanation than I can give:
I also gathered (well, added folds which I guess are more like pleats) one side of the shirt, but I'm not sure if I'll keep this in, since the shirt seems a little short already:
And of course, the decorative details:
I made the white flower from the bottom hem-edge of the shirt, similar to the ribbon flowers from Mother's Day. It was already nicely creased, so I kept that and basted along the folded edge:
Once I reached the end of the strip (took forever!) I pulled the thread tight to scrunch up the fabric. It curls naturally from this:
Unlike the little ribbon flowers, though, this was going to need a bit more stabilizing to stay together as a big flower. I started by sewing together the center, then as I wound each new layer around the center, I sewed that layer to the last layer:
And voila:
And the (almost) finished product (with a stripey placemat so you can see the collar):
What would you do with a T shirt and silk flowers?
We could use multiple crafts to use up all the secret items, but each craft had to use at least two of the secret ingredients. My craft today does just that (with more IRON CRAFTS to follow). (When they're done.) (I LOVE PARENTHESES!)
Materials (secret ingredients in bold):
- Large white T shirt
- Offwhite & gold silk flowers
- Sewing supplies: thread, needle, straight pins, sewing machine & scissors (and rotary cutter, optional)
First, I cut off the ribbed crew collar at the top of the shirt. Then I cut off the bottom hem of the shirt below the hem stitching, like this:
(Save this piece for another job!)
I cut off the hem stitching, then cut off another strip of fabric about 1 inch wide. I pinned the strip about half an inch below the collar on the outside of the shirt. I wanted to sew it down, but Brooke's sewing machine was giving us fits at the beach house and I re-broke Mom's 30-year-old sewing machine, which just got serviced for the first time a couple months ago (for this exact reason!). So I really just pinned it in place to show you how the finished product will look:
And here's a faster explanation than I can give:
I also gathered (well, added folds which I guess are more like pleats) one side of the shirt, but I'm not sure if I'll keep this in, since the shirt seems a little short already:
And of course, the decorative details:
I made the white flower from the bottom hem-edge of the shirt, similar to the ribbon flowers from Mother's Day. It was already nicely creased, so I kept that and basted along the folded edge:
Once I reached the end of the strip (took forever!) I pulled the thread tight to scrunch up the fabric. It curls naturally from this:
Unlike the little ribbon flowers, though, this was going to need a bit more stabilizing to stay together as a big flower. I started by sewing together the center, then as I wound each new layer around the center, I sewed that layer to the last layer:
And voila:
And the (almost) finished product (with a stripey placemat so you can see the collar):
What would you do with a T shirt and silk flowers?

Posted by
Jordan McCollum
at
10:45 AM
8 comments
:
 Labels:
challenge
,
Clothing
,
flowers
,
iron craft
,
sewing
,
t shirt
,
tutorial
,
upcycle
Subscribe to:
Posts
(
Atom
)


