Easter Decor

Have I mentioned my mother the decorator? No, I don't mean interior decorator. I mean holiday decorator. Her house is transformed at Christmas, and to a lesser degree, all other holidays. Here are a couple of the decorations she has created for Easter.

To make these, you need styrofoam eggs, Easter themed napkins,  craft crystals, and white glue. Tear out the parts of the napkin you like. Put a coat of glue on the egg, and then gently add the pictures from the napkins. Then cover the entire egg with another coat of glue. Roll the egg in the crystals and allow to dry.
These are painted wooden eggs.

We hope you have a happy Easter. Here is a link to a video entitled "He is Risen."

Lord of The Rings Picture

(Don't worry, there will be more wedding posts) My husband's favorite movies are the Lord of the Rings Trilogy. I wanted to decorate our wall that the TV is against with the movies and other things we love. So I thought I would attempt to make a LOTR picture. I started out with a picture.

Not too ambitious, right?
So we ventured out to WalMart and bought paints, brushes and canvas board. I started by painting the sky. I started at the top with the darkest part. (I didn't want to paint the mountains so I just didn't) Then I added a small amount of white to my paint and moved down the canvas. I got to the lightest part and painted it white to help with blending and texture even though the canvas was already white. I painted the bottom black for the ground. Then I set it in the sunshine with a fan pointed at it to dry.

Next, I traced the images of the people onto printer paper. Then I cut them out and spaced them on a scratch piece of paper. Then it was time to draw them on.
Here's where it really made it look good. I drew just some scribbles on the back of the cut out making sure there was pencil where the outlines were.
Then I traced the outlines on the front hard onto the canvas. The pencil transferred onto the canvas. I then drew it in a little darker and moved on to the next character.
After I did all the people, I took a sharpie and traced the outlines again. Then I colored them in with sharpie as well. And voila! A totally awesome LOTR picture worthy to hang.

Mini Easter Symbols

This post is for Miriam Parker who specially requested I post the mini version
Last year my mom posted this tutorial for an Easter Symbols Basket. As a teenager we made mini-versions of this and I have since also made these with some of the children in our congregation. The symbols are all the same but just much smaller.


These are the scriptures that go along with the symbols:
1. Matthew 26:39 "... O my Father, if it be possible, let this cup pass from me..." (Sacrament cup)
2. Matthew 26:14-15 "...And they covenanted with him for thirty pieces of silver." (nickel)
3. Matthew 27:1-2 "And when they bound Him, they led Him away." (piece of rope)
4. Matthew 27:24-26 "...He took water and washed his hands." (soap)
5. Matthew 27:28-30 "...and put on Him a scarlet robe." (red fabric)
6. Matthew 27:31-32 "..Him they compelled to bear His Cross." (cross)
7. Matthew 27:35-36 "And they crucified Him, and parted his garments, casting lots." (dice)
8. Matthew 27:50-51, 54 "and the earth did quake..." (dirt)
9. Matthew 27:59-60 "...he wrapped it in clean, white linen" (white fabric)
10. Matthew 27:60, 65-66 "And he rolled a great stone (stone)
11. Mark 16:1 "Mary Magdalene, and Mary, the mother of James, and Salome, had brought sweet spices." (spices)
12. Matthew 28:6 "He is not here; For He is risen, as He said." (empty box)

I forgot to add the 12 on the empty box. 

These would be great to make with the kids in Primary or in the YW/YM (youth) programs. I have had mine around 10 years so it is something to keep safe and get out each year as a reminder of the symbols of this Easter season. 

Watercolor Easter Cards

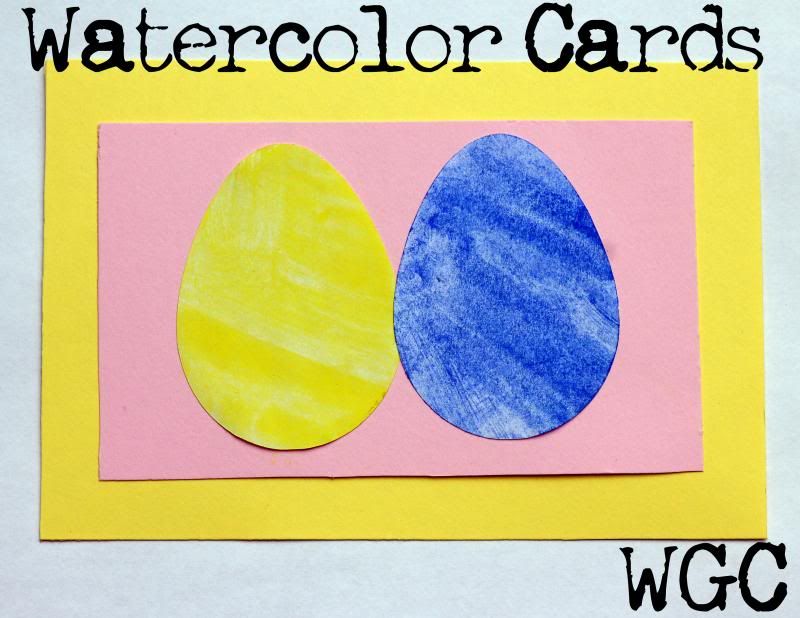
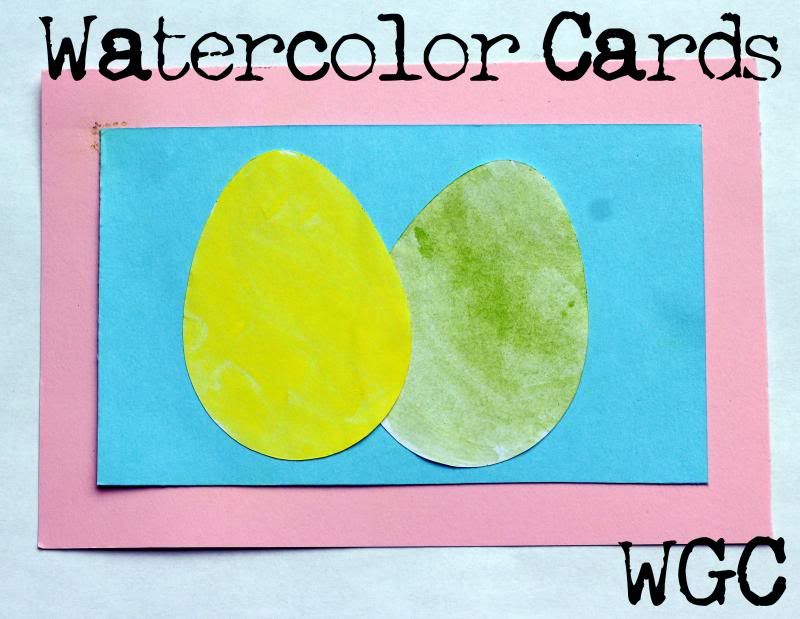
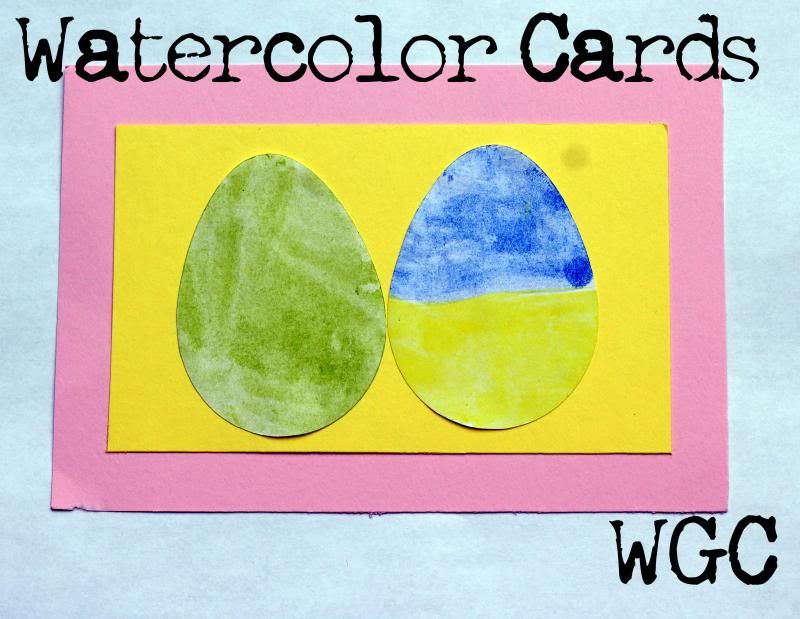
Sometime last year I became a tiny bit obsessed with watercolors. I wanted so badly to try them, but the local class was $84, with $100 worth of supplies. It seemed like an investment I wasn't ready to make. A few weeks ago I decided to get some cheap supplies and just try to see if I liked it. $15 later and I was set. I decided my first project would be greeting cards for Easter. After brainstorming I came up with these:

 photo Eastercard1_zpsd7178f98.jpg

The eggs were cut with my Silhouette Cameo. One of the best features about the Silhouette Studio (software program for the Silhouette) is the "Trace" feature. I can take any picture and trace it and have a shape for free. I found an egg shape online and saved it. Then I opened it in Silhouette Studio, used the trace feature and had a free shape!

 photo eastercard2_zps5a9571f1.jpg

I used watercolor paper and dug in! While the eggs were drying, they curled up, but with glue they stayed down on the cards. I love how the watercolor looks like dyed eggs! This was a fun, simple project and perfect for my first time with watercolors!

 photo Eastercard3_zps3aeb2423.jpg


Did you send anything fun for Easter? 

Pintesting: alcohol for a microfiber couch

Right before we found out I was pregnant with my first baby, we bought a house. To furnish said house, we bought a microfiber couch and loveseat.

In off-white.

Yeeeeah.

Allegedly the couches were treated with some sort of protectant that meant you could only use water on the seats. But using water to clean your cushions leads to watermarks, which look even worse than the stains themselves:


The spot-cleaning with water solution is pretty much worse than the problem here.

Naturally, even though I'm not much of a deep cleaner, I had to repin this cleaning idea.


The basic idea: use rubbing alcohol instead of water.


Alcohol dries faster than water (the technical term for this chemical property is "volatility." Now you know), so the alcohol won't leave those big watermarks. Once it's dry, you take a scrub brush to the fabric to lift the fibers again.

Results!


A lot better, but obviously not perfect. I might have been able to get better results with more alcohol and more scrubbing, but it's very hard to tell how much scrubbing you still need to do when the entire cushion is wet! And if you're getting the entire cushion wet . . . hm.

Verdict:

My other solution to this problem was to liberally wet the entire couch top of the cushion: no edges, no watermarks, right?

Frankly, my solution was a bit easier. Both methods require considerable elbow grease, but my hands got tired from working the sprayer (a very wet rag is sufficient to clean the couches with water). Plus alcohol fumes are NOT fun. Alcohol does dry a lot faster (the above pictures were taken about an hour after the before shots, and the couch was dry enough that we put the cushions back on).

Also, neither method is effective on stains like pen, candy or permanent marker, and neither really helped with the very dirty arms of the couch.

And of course, a year later, the couch is just as bad—worse in places where my youngest has decided to express her artistic side. :\

Pintesting success:

I don't want to be all bad news. I tried this pin this weekend, and as you'd probably expect, the results were perfect:
Source: Laura on Pinterest

Line a bowl with foil before draining meat for easy cleanup! My husband thought this was so clever, he had to tell me twice!

Framing your own art

Confession: I am cheap. Not as cheap as some, but I don't like spending money on things I can do myself for less. Case in point: Matted artwork. Having a professional do this can cost hundreds of dollars. Yes, they do a lovely job, but I don't want to spend that much on my art.
Here's a couple ways to save money on matted artwork.
First you need a frame with similar dimensions to your artwork plus a mat. It doesn 't have to be exact. I use coupons from Michaels or go to thrift stores to find frames.

Since it is likely you won't find a precut mat to fit the frame and the artwork, you have a couple choices. You can purchase a mat cutting instrument and do it yourself. I tried this with moderate success. I don't recommend it.

OR just google mat board. There are many places that have larger pieces that you usually cannot find in craft stores. You can also get a custom opening cut. There are some ways to select the size based on whether you want your artwork centered or weighted.  Look into it a bit and decide what your prefer.

This is a print that my family bought me a few years ago. It is weighted on the bottom. That means the mat is wider on the bottom.
I couldn't get rid of the glare, but you can see how it turned out.
With shipping, the mat cost about $30. I bought the frame for about $20. I will try to get a better picture, but it turned out well.
Here is what this beautiful painting by Liz Lemon Swindle looks like.

 You can see this work and many other here. It is called "Why Weepest Thou." I love it!

Try framing your artwork! It will work!

Mailing Easter Eggs!

So you may have seen this pin:

Source: giverslog.com via Jaime on Pinterest


I did sometime last year and have been patiently waiting for Spring since! Here's what I came up with for my nephew and nieces.

 photo EasterEgg_zps0c7120d1.jpg 

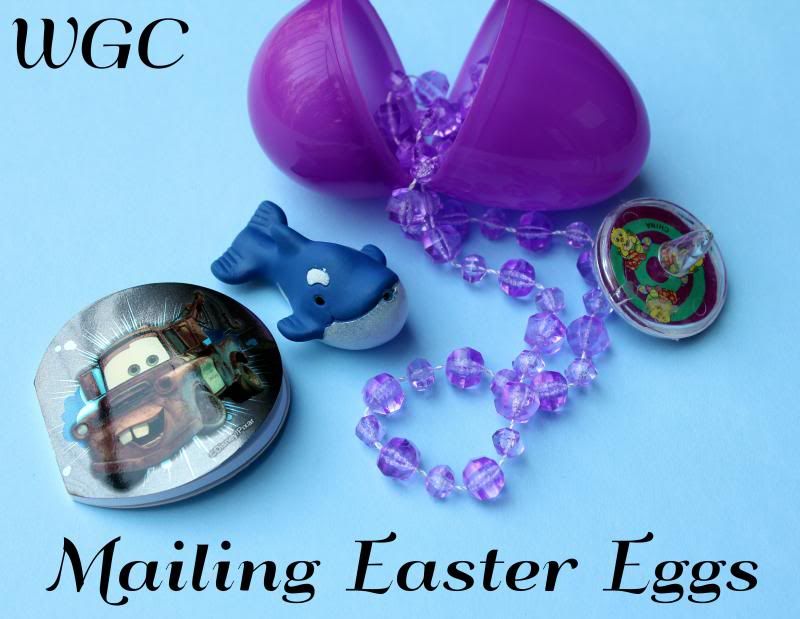
For my nephew: A growing, glow in the dark skeleton, a spinning top, a Lightning McQueen pad of paper, a Phineas and Ferb sticker and a little squirting animal.

 photo EasterEgg2_zps6134be27.jpg

My niece's wasn't too different: a spinning top, a Mater pad of paper, a Phineas and Ferb sticker (not pictured for some reason!), a little squirting animal and a pretty necklace.

All these small items fit inside a somewhat larger egg (it's not huge!). All my items came from the Dollar Tree, including the eggs. I will send these out soon and let you know how they fare in the mail!

Wedding receptions!

We've been sharing a lot about Jasmine's fantastic wedding reception, but she's not the only member of our family tying the knot. Our cousin, who happens to be just 8 days younger than Jasmine, got married last month! Jasmine and I were able to attend. If you're looking for wedding reception inspiration, check out these fun ideas!

The ceremony

(sorry, no pictures allowed inside)

The happy couple!

My son, always the bridesman.
(This is amazingly clear of snow. Some people had to hike up other stairs
that were so full, their high snow boots also filled with snow!)

The luncheon

Hosted by the groom's parents, the luncheon was held in their church building. 
Friends and family provided soup, salad, rolls and desserts.
Tablescape, table of honor
Lots of Valentine candy to match the very, very varied color scheme!

My kids with my aunt, the lovely mother of the bride

My grandparents with my kids. This picture is true life.

The reception

The reception was held in an event room at the local library. They also coordinated with a decorator through the library, which was weird for the Wayward Girls (we seriously asked three times when we needed to be there to help set up), but also really nice.

The entrance: guestbook, a vintage suitcase for cards, along with some other cool vintage touches. 
The picture of the couple is from a photo session they did in advance (along with her bridals?).


Table centerpieces: fresh flowers, engagement photos, books, birdcage, ceramic birds . . .
(My youngest under the white flowers)

The receiving line and backdrop (Jasmine isn't a part of it, she's just chatting)

FOOD!

It's what you really want to see, isn't it?

A rainbow of lemonades to match the wedding colors!
Lemonade, blue raspberry (with blackberries?), pink, peach (with blueberries) and water 
My son made sure our whole table stayed topped off with the color of their choice.

Some of the cupcake spread--friends and family provided 600 cupcakes! 
Also to eat: pre-plated cream cheese chicken salad on croissants, chocolate drizzled strawberries, and cucumber/mozzarella/tomato toothpicks drizzled with dressing. Yum!

The wedding cake: white cake layered with raspberry filling, with an ivory and white lace stencil pattern on fondant.

The groom's cake: Chocolate mustache cake!

Fun!

A friend set up a professional photo booth in a side room and provided props, a backdrop, lights and a photographer (her husband) for a fun photobooth. My kids loved it!


It was a lot of fun!

To pick out or not to pick out, that is the question!

It is the wayward crafter's eternal question. Is it good enough or should I do it over?

I am still working on the baby quilt for Jordan's baby. I was a little disappointed with the front because not every angle matched perfectly. I was extra careful in the back. I picked out seams and recut and squared up. And guess what. Yep, still not perfect. 

When do you decide your product is good enough and when do you decide you must redo it? This was my dilemma when I was doing free motion quilting on the quilt. I can sew for about an hour on one bobbin. After one bobbin change, I didn't change my thread tension back to where it needed to be.  When that happens, the top thread shows on the bottom of the quilt too much. It makes the stitches feel rough. I didn't realize this until the next time I changed the bobbin--an hour of free motion quilting later.

Was it good enough? Did I want to take out that much stitching? 

I decided I did. It took as longer to pick it out than it did to put it in. What a pain! 


All those little dotted lines used to be stitches. All told, it was about 2 square feet of stitching or about this much thread.

I am getting ready to do it over now and I don't regret my decision at all. I know I will be much happier with the result. 

In this case, I decided to pick out, but earlier I decided not to redo the angles in the quilt that weren't perfect. I don't really understand my criteria or my tolerance level for my own imperfections, so I am asking my fellow crafters what they think. (Of course this assumes that a few of you are also less than perfect, too.)

Here's what I want to know...

  • How to you decide when your craft is "good enough?"
  • Is "good enough" really good enough?
  • Do you feel compelled to point out mistakes in your own work when others look at it?


Choosing THE Dress

You may have noticed but Latter-day Saint members cover up a little more than the average person. No, we don't wear turtlenecks and floor length skirts everywhere we go but we do believe in dressing modestly (Click here for more information on LDS dress and grooming standards.) Dressing modestly is a sign of respect for our bodies. Wedding dresses are no exception especially if you are marrying in a Latter-day Saint Temple (Click here for information on LDS temples.)
 It is very hard to find a wedding dress with sleeves and a modest neckline outside of Utah and Idaho. Very very hard. Luckily we have an amazing and wonderfully talented family friend who was willing to make my wedding dress (along with Brooke and Jaime's dresses too!) I still had to figure out what looked good on me however. So I went wedding dress browsing. We went to a big ol' wedding dress store that had heaps of wedding dresses in all sorts of styles. It was almost like going on Say Yes to the Dress but not quite that huge of a selection and you had to pull your own dresses. I tried on dresses of all sorts and it turned out a style similar to my dream dress looked  not so great on me. I tried on A-Line, ball gown, and lacey. I even tried on a dress named "Princess Jasmine." Then I found it. A dress that I could hopefully ask to be made just for me, except with sleeves...and lace instead of all the intricate beading that would take a million years to do and we only had 15 weeks.


So here's what I learned in trying on dresses:
1. Pull styles that you don't even want to see on you. Try on different silhouettes. Big poofy to slender or mermaid. Just do it! See what you like and what looks good then invest more in that style.
2. Take pictures of what you like. Necklines, waistlines, backs, fronts, bodices, I could go on and on. Take pictures or at least notes to remember what is flatter and what you feel good in. You can piece it all together and find or make the perfect dress for you.
3. Sit down in the dress. I don't mean roll around on the floor but sit down. See if you can breathe or if it's even comfortable while sitting.
4. Try on a veil and ones at different length, layer and style. Even if you don't want one, it could change your mind or keep your decision. It's good to have those options.
5. Write down the dress item numbers and designer so you can look them up online, at another store, at the same store but another day or whatever! Make sure you know what you've tried on especially if you like it.
6. Eat!! Carrying around heavy dresses and putting them on and taking them off gets tiring. Eat something good and filling before you go. Not too filling though, you want to feel good in those dresses and not uncomfortable from a full stomach. Bring a small snack and take a break in the middle of dresses if you need to.

For more information on LDS marriage click here!

Newborn Hair bows

I love hair bows. Currently the only ones PB will wear are clippies in her bangs. I jumped at the chance to make some hair bows for a new niece!

The total I spent on these was $1. I had all the basic supplies for making the bows but I purchased these headbands at the dollar store. I have found these at two different dollar stores so I would totally suggest checking out the hair section at your local store. I made these 12 inches long unstretched for newborn size. These are made for children so I think the elastic is extra stretchy since I only cut off the knot and glued the ends together. I didn't think the knot would be very comfortable for a baby.


I went through my hair bows and was very grateful to my self for making extra bows the last time I made some for PB. I completed all 6 headbands in less than an hour so these are super easy. Here they are:

I did a round up of hair bow tutorials when PB was born that can be found here. Below I referenced which ones I used. 

I thought that little bow on the green one would be so sweet. I happened to have the perfect color button to go in the center. The directions for the flower on the yellow headband can be found here (tutorial #1)

The pink bow can be found here (#5 the pinwheel bow). The crocheted bow on the purple headband can be found here. I didn't leave a long tail for the head band or the button. 


 The flower for the blue headband I made out of felt. I cut three layers, two with four petals and one smaller one with three petals. To make it slightly curl up I only used glue in the center and pushed hard each item I glued on. The flower for the orange headband is again tutorial #1 found here.

I just love making things for babies, don't you?!
Related Posts Plugin for WordPress, Blogger...