Showing posts with label Christmas ornaments. Show all posts

Christmas Parade of Homes 2013: Day 3


My cute friend Kristen is sharing her decor with us today!

Outside:
She always has the best wreaths!

Inside:


 These are all handmade by her grandma


 Along the bottom of the picture you can see little glasses with pictures of the kids printed on vellum. They are votive candle holders. 
 What great chalk boards!
She said they make these hanging ornaments every year and it has become one of their favorite traditions. 

 This small tree is in remembrance of her grandmother who recently passed away. This is the little tree that she had with her ornaments on it. They added ornaments that she had made as well. What a great way to remember a loved one.


 These are some of her favorite ornaments. The soldier and lady were made by her father and painted by her mother.
 This is another of her favorites. These belonged to her grandmother as well. She has a few of these and they are music boxes. 


 Made by her dad!


 This is something that was hanging in her grandmother's house that the kids would hit as they went by. She hung it in her hallway as well and they continue the tradition. 
 Now this isn't a Christmas decoration but I was floored by this amazing piece of art. It is the Washington D.C. temple where they were married. Her brother painted it for them!

Something you can probably tell from this peek you got at my friend Kristen is that family is very important to her! I loved all the stories behind her decorations!

Come back tomorrow for even more Christmas decor!

Ornaments kids can make!


For years when we were younger, Mom put together Christmas crafts for us to do every night of December.

It was probably a lot like this:
Pietrini School Visit 003huge craft mess

And this:
Craftmaggedon ...

Only with four of us. Screaming at each other. And glitter!

Which is also probably why she always threatened to never, never do this next year. (But we probably did.)

However, some of the crafts we made have lasted through the years, especially ornaments like these:


These ornaments still adorn our Christmas trees! How do you trim your tree?

Photo credits: kids doing crafts: Franklin Park Library; huge craft mess: Insolvable_self; craftmaggedon by Natalie Steed

Guest Post: Blissful Bucket List

So happy to have Sarah here today! What a cute craft she's sharing! Thanks for guest posting!


Hi Everyone!!! I'm Sarah, the gal behind Blissful Bucket List.  
I am trying to contain my excitement, but I am not sure how well that will work.
I am so thrilled that Just Jaime asked me to do a guest post here at Wayward Girls Crafts.
(Love them by the way. How can you not?!)

Jaime and I have known each other for a long time.
When she did a guest post on my blog she threatened to pull out old pictures of us
However, she couldn't find them.
And lucky for her...I can't find them either. Haha!
Over at my blog, Blissful Bucket List,
I share many Pinterest Projects that I have successfully conquered (er...sometimes failed)
as I cross them off my creative 'bucket list'.
We are talking crafts, photography, recipes, fashion... a little bit of everything!
For the month of December I am doing a series called
25 Pinterest Posts/Projects Til Christmas
So, it is only natural that my post today will be centered around a Christmas idea.
My goal this Christmas has been to try out DIY Ornaments.
Last week I shared a super cute DIY Snowman Ornament
and I specifically saved this awesome Grinch one to share with y'all....
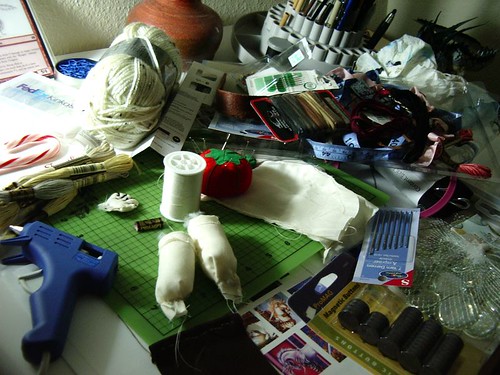

In The Making:
Supplies - green glitter, yellow, red, and black paint pens, green fluff, and Pledge Floor Care Finishing, clear plastic ornament

1. Take the plain ornament and pour the Pledge into the ornament - just enough to swirl around the inside. Swirl liquid so that the entire inside gets covered. Pour extra liquid into sink.
*Do not shake the liquid in the ornament because it will cause bubbles.
2. QUICKLY pour green glitter into ornament and shake. You want to do this fast before the Pledge dries.  Continue to shake green glitter in ornament until the entire inside is coated.
3. Let ornaments dry for a day before you begin to decorate.
4. Draw Grinch face onto ornament with paint pens.
5. Use a hot glue gun to stick the green fluff into the top of the ornament.
6. Hang on tree and Enjoy!
Short and Simple crafts...thats what I do!
It was such a pleasure to be here with you and The Wayward Girls!
Hope to share with you again sometime soon!!
And Happy Holidays!
  

What I gave for Christmas

Happy New Year!

I decided to take it pretty low-key for homemade Christmas gifts this year. I gave the holiday hokey-pokey candy to my mother- and sister-in-law.

I put together a work-at-home survival kit for my brother-in-law who made the transition to a home office this year: over-the-ear headphones, a KEEP OUT SIGN and a water bottle (doubles as an emergency bathroom!).

But for my mom and sisters, I went a little bigger. It was my year to give Jaime & her husband gifts. I planned this well in advance, and had her send me a picture from their honeymoon back in September, about the time I pinned the inspiration project.

In progress

Of course, I still finished it the week before Christmas....


I also made little gifts for my mom and other sisters. These took some major experimentation . . . and still kind of failed.

This was the inspiration:


But I was worried the shells would get lost in the sand, so I wanted the sand to be more of a solid base.


Clear gel glue, water and sand do not mix. They also do not dry into a solid. Ever.


So I went for another method. Put a little sand into the bottom of an ornament, add a little watered down mod podge, add a little more sand, and stir with a straw. I added a few shells I collected from our beach week, and wrote the name of the beach and the year around the ornament in silver metallic sharpie.

Unfortunately, the glass ornaments didn't survive the shipping, even though I packed them in another homemade gift, a set of purple flannel crib sheets for Brooke's daughter, PB. (I also packed them in plastic bags, so I'm hoping PB won't find any bits the hard way.) For these, I followed my own tutorial on sewing a crib sheet. I also gave her some knitted ballerina slipper booties, which I actually made for her when she was born. My youngest was kind enough to model them for me about nine months ago:


I still have an almost-finished surprise for PB, too.

What did you make for Christmas?

Applesauce Ornaments

In kindergarten we made applesauce ornaments. I LOVED these 2 little gingerbread people I made. They smelled oh-so-good! I put them on the tree every year. A few years ago, we brought down the boxes of ornaments to decorate the tree. When I opened my box of ornaments, I found my ornaments on top. I also found that they looked very different. I was so upset when I discovered some vermin ATE most of my 10+ year old applesauce ornaments. So I decided to make more this year. It's not the same of course but I'm sure they'll smell just as good.

To make applesauce ornaments you need applesauce and cinnamon. Mix together equal parts applesauce and cinnamon gradually adding the cinnamon in. About 1 cup of each will make a small batch.

The dough will be pretty soft and gooey. Simply roll out the dough (don't roll out too thin, they might break!) on wax paper or parchment and use cookie cutters to create fun ornaments. Be sure to poke a hole in them somewhere if you want to add a ribbon or ornament hook to it, you could also glue a ribbon on the back after it's dried.

Lay them on a cookie sheet and let dry for a few days or bake in the oven at around 200 degrees for about an hour. Keep an eye on them in the oven and make sure it's on a low heat. After they are completely dry, you can decorate them or just let them stay that cinnamon color. Mmmm I can almost smell them by just thinking about them on the tree. Merry Christmas!

A few more ornaments and gift wrap idea

Here are three more ornaments that we have made over the years. They span the decades of the girls growing up as you will see.

From a looong time ago... this little ornament works for the under 10 crowd.


Remove the topper and then paint a small clear glass ornament with a clear glitter paint. When that dries, dot it with red and green acrylic paint. Easy!

From not so, so long ago


You will need a 2" clear glass ball, Mod Podge, tissue paper, glitter gold tinsel trimmed wire, and glitter

Remove the topper and put some of the gold tinsel inside the ball. You can add glitter, too. Then Mod Podge a few pieces of tissue paper on the outside of the ball. Don't cover the entire ball-- leave some clear spots, too. Sprinkle lightly with glitter before it dries. After it dries, replace the topper and twist some of the wire around the top.


Finally from just a few years ago, these were the favors at Brooke's December wedding.


One more craft for the kids. I don't have a picture, but it won't be hard to imagine it. We used to have big rolls of white paper leftover from my husband's work. One year at Christmans, the girls made stamps from potatos. (Cut a potato in half and then carve a design such as a bell, star, holly leaf, etc.) Then they dipped the stamp into red or green paint and stamped away. You can add GLITTER!!! to make it more festive. 

ENJOY! 

Related Posts Plugin for WordPress, Blogger...