Showing posts with label Fourth of July. Show all posts

4th of July

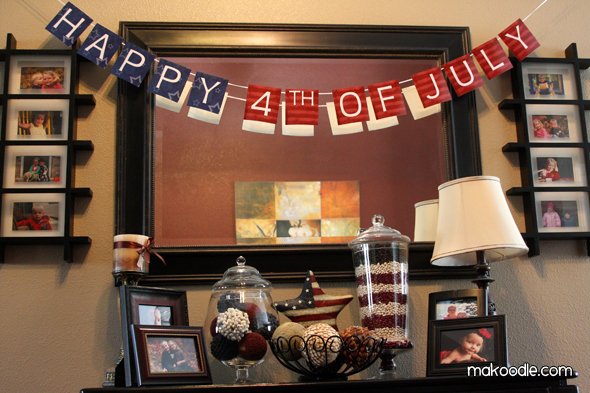
Happy 4th of July!! Here are a few projects that if I was perfect I would have done ;) !

Source
Source
Source

I hope everyone is enjoying their Independence Day with good food, good company, and lots of beautiful fireworks!

Fourth of July Fun


These stars are a fun and easy decoration for kids to make.
You need fun foam scraps, foam core board scraps, paint and brushes, gluestick, and cardstock. If you want to skip the who stencil part, you could use striped and starry cardstock.
Trace at least 4 stars per each decoration you want to make. The stars need to have 1 line of symmetry. I used white and blue cardstock.
This will make 1 finished star.

Cut shapes from  the fun foam to make stencils. Glue the shapes to foam core board with the gluestick. The shapes don't have to be perfect. (In the words of Severus Snape.... "Oooobivously.")

Lightly paint poster or acrylic paint on the shapes. (The less paint the better. You can tell from some of my over-stamping.)
Now stamp away. I liked using various directions and color intensity. (That means you can stamp more than once without reloading if you want.) Don't try to stay in the lines. You will need 2 striped stars and 2 starry stars for each decoration.
Cut out your shapes after they are dry. Glue the 2 striped stars together and the 2 starry stars together so that you have the pattern on both the front and back. Trim as needed.

Cut a line up the center of of the striped star. Stop about 1 inch from the top. (Where the scissors end in this picture.) You might want to draw a dot to show a child how far to cut.

Cut down 1 inch from the top center on the starry star.

Now slip the striped star onto the starry star and Voila! Stars and Stripes in  3-D!


Patriotically Playing with Wire

So who knew patriotically was a word? Not me! Anyways, I recently went to Tuesday Morning (aka the store that has a lot of stuff I don't need). I was looking around and saw some 18 gauge wire. I've been wanting to use wire in my beading and jewelry making and the price was right, $1.99! For the past two days I've been playing around with it and came up with a little patriotic craft.

Supplies & Tools:

Photobucket

Wire cutters
Round Nose Pliers (very important!)
Bent Nose Pliers (less important but still good to have)
Wire (I used 18 gauge, very bendable!)

Directions:

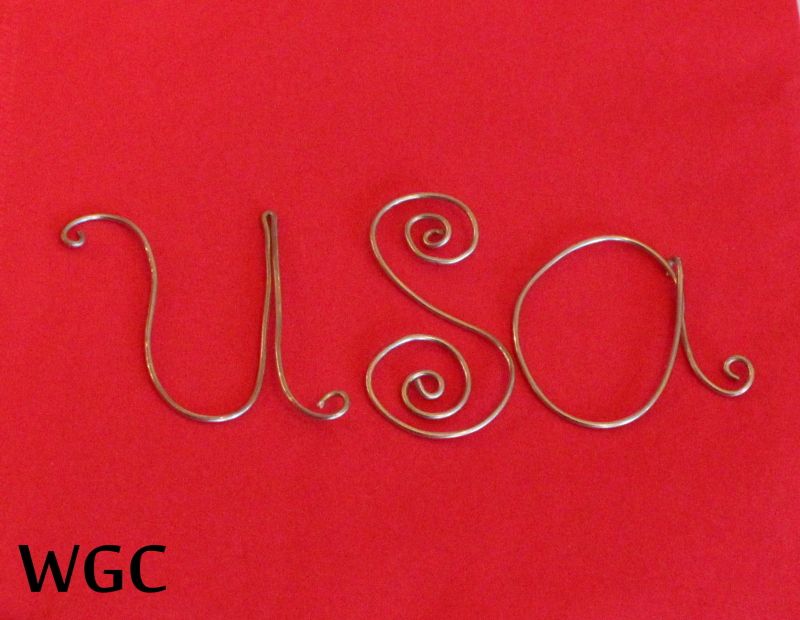
First figure out your design. I went with a swirly USA. For a reference, I wrote it out. Then cut a piece of wire for the first letter, and overestimate what you think you want to use.

Photobucket

Next, start swirling! Hold the end of your wire with your Round Nose Pliers and twist the wire around. 

Photobucket

Using your pliers, hands or a combination of both, bend the wire into your shape. I like to use my sketch as a reference. 

Photobucket

When you come to the end of the letter, leave enough tail to swirl but not too much (eh, just guess!)

Photobucket
I trimmed this a little. 

Here is the finished product:

Photobucket

It only took me about 15 minutes from start to finish, and that included taking pictures! 

Ways to use wire letters:
On papercrafts
Glue to napkin ring
Hair barrettes, like this one
Glued onto sturdy key chain
Home decor, like with a faux firework display
Fridge Magnets
Jewelry**

**One thing to remember: the wire is still VERY bendable, so however you use these letters, make sure you know that little fingers can ruin your shapes. 

What would you design?

WGC Independence Day Craft Roundup!

Last year on Wayward Girls' Crafts, we were very excited to celebrate Independence Day. Here are some of the Americana-themed crafts we shared in 2011!


Hope you found something to love in this
Wayward Weekend Roundup!


What will you make for Independence Day?

Upcycling Baby Clothes for the Fourth!

Happy Birthday, USA!

Be sure to check out my guest post on the fastest crib sheet in the West at Creative Cowgirl!

Most of my kids' clothes are borrowed from their cousins or gifts, so I wouldn't dare cut them to pieces, even to make another cute outfit. But when a friend from church was getting rid of her granddaughter's out-grown clothes, I finally had a chance to make an upcycled baby outfit!


I started with 3-6 month denim shortalls and red and white gingham pants (not sure what size, but probably 2 or 3T).


I trimmed the legs off the overalls. The legless top fit my then-two-year-old. With the pants, I cut the seams off. (For some reason I decided only to take a picture of the seams here).


From there (after a hiatus of about a year from the project), I cut the pants into 2" strips lengthwise. I got 8 strips out of them. I sewed them into two big circles, about twice the circumference of the shortalls. After I hemmed one side, I was ready to make them into ruffles. To gather the fabric, use two rows of very long (basting) stitches. Once the rows are in, you just pull the thread to gather the fabric into a ruffle. Once it's small enough, tie the ends of the thread together to make sure the gathers don't come undone on the other end as you redistribute them.
I used a 1.5" wide strip of scrap muslin between the two layers of ruffles, and I topstitched the denim above the top layer.


It ended up a little longer on her than I expected, but still very cute! The red, white, and blue color scheme was perfect for the day before the Fourth of July :D.

Fourth of July Candles

In keeping with our patriotic theme, these embellished candles could serve as a great 4th of July centerpiece. They would look nice with Jaime's pinwheel garland. You could even print out Jordan's graphic and apply it around a  blue candle using the same method as used to apply the stars.

To complete the candles, you will need:

1 tall white candle
1 medium red candle
18" of a blue plaid (or other blue and white design) ribbon, and 18" of 1/8" blue satin ribbon
2 star charms
blue tissue paper
hair dryer or heat gun (follow the directions for your gun and don't get burned!)

For the red candle:
It's pretty obvious-- just tie the ribbons around the middle of the candle. Tie the charms on the thin ribbon. Done!


For the white candle:
Cut  stars of various sizes out of tissue paper (I printed some stars from my computer for a pattern.)
If you have a star punch, use it!

To apply the stars, you can either lay the candle on its side and rotate it or stand it upright. Either way, be sure to put something under it to collect any drips. Start heating up one small area with either the blow dryer or the heat gun. The blow dryer could take a couple minutes for the wax to start melting.
Once the wax begins to melt a little, the surface of the candle should get  shiny. While it is shiny, apply a star and gently smooth it onto the surface. Continue heating the star until it adheres. A layer of wax will form over the stars. Continue applying stars on the rest of the candle. Sometimes the heat will blow off a star that you have applied. No worries, just stick it back on!
It's that easy!

Happy 4th of July!

PS-When burning the candles, make sure the tissue paper doesn't get near the flame.

Festive Nails

I love to paint my nails. To celebrate the fourth, why not have festive nails?! Ok, I LOVE to do designs on my nails. So that's what I did. It's really easy to do designs with a straight pin. 

Since it's the fourth, I wanted to try out doing fireworks. I haven't done fireworks before but why not try? I used a base color of blue. I did two different fireworks.
(Don't judge my dry hands :) )
The first I used the head of the pin. I unscrewed the nail polish, wiped off the excess and lightly touched the head of the pin to the nail polish brush. This gets just the right amount of polish on the pin. Now, touch the head of the pin lightly to the nail. If you push too hard, the middle of the circle won't transfer from the pin. I got fresh polish on the head for every dot and frequently wiped off the head. I alternated the rows of the burst in red and white and shazzam, firework. Now, let dry and put a clear top coat over it.

The second firework I used the tip. Just like the first, I unscrewed the nail polish, wiped off the excess and lightly touched the tip of the pin to the nail polish brush. I got paint on about 1/4" of the tip. This will create dashes. I lightly touched the nail with the polish. I got fresh polish on the pin for every dash and frequently wiped off the pin. I alternated the colors differently than the first firework as seen in the picture. I used the head for the center. And just like that, a different firework! Apply a clear top coat to this one as well.

Enjoy your fourth!!

Patriotic Pinwheels

So last week I was looking for a centerpiece I could make with my current craft stash so I wouldn't have to spend any money or go shopping. It just came to me: PINWHEELS. Then I thought Patriotic Pinwheels would be a great idea for the Fourth of July.

Photobucket

Pinwheels are VERY easy to make and fun to do while you watch mindless TV (Like The Singing Bee). Here is a very detailed process:

Photobucket
Cut your paper in to a square. Mine is 4 x 4

Photobucket
Fold the square into a triangle like so


Photobucket
Ta da!

Photobucket
Open it back up. You now have a crease running from one corner to another.

Photobucket
Now fold the opposite corners in to a triangle.

Photobucket
 Open it up and you have created diagonal creases in your square.

Photobucket
Using scissors, cut 2/3 of the way in, along each diagonal.

Photobucket

Each of the creases are now cut. Hard to get a picture of that.


Photobucket
Next, make a hole in the center of the square, about where the creases meet (I'm neither perfect at folding or sticking the the need in the right place, but it won't be an issue). I used a needle, but you can use a thumb tack or any type of scrapbook tool that punches holes.

Photobucket
Next make holes in every other point you've cut like so.

Photobucket
Grab a brad

Photobucket
Thread one of the holes you made on a point

Photobucket
 Repeat

Photobucket
 Repeat

Photobucket
Until you have all four points into the brad.

Photobucket
Push the brad to the back and through the hole you made in the center.

Photobucket

Photobucket

Then open the brad and secure it. 

Photobucket
Admire your work!

I got to where I was cutting 3 at a time (layering them) and that made things go much faster!

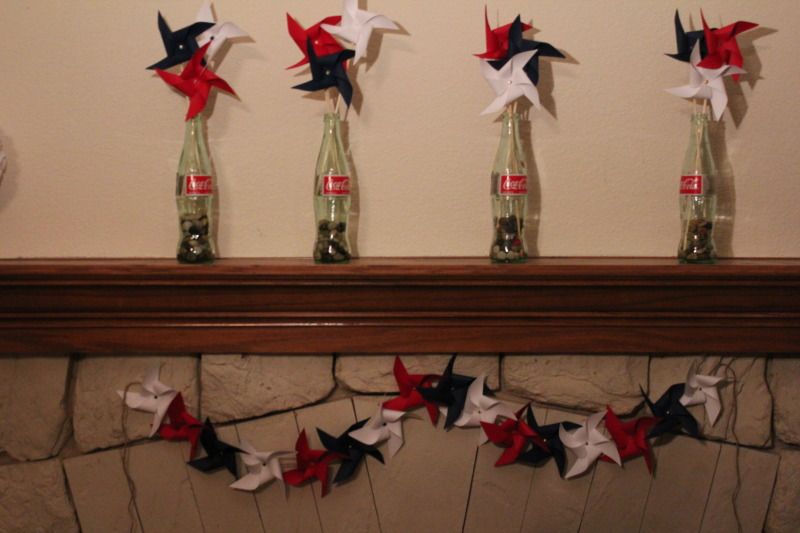
I decided to put my pinwheels on some skewers I had in the kitchen, since have more than 100. These won't actually work in the wind, they're just for pretty. I just hot glued the skewers to the back.

Photobucket

Photobucket
I used some old Coke bottles my husband gave me and then some pebbles I had to anchor the skewers.

I had some left over so I also made a garland by hot gluing them to some twine I had:

Photobucket
(Good pictures are not taken at 10pm)


I'm ready for the Fourth! How would you decorate with Pinwheels?

ETA: Don't forget about Teresa's GIVEAWAY!! Today is the last day to enter!
Related Posts Plugin for WordPress, Blogger...