Showing posts with label Christmas Cards. Show all posts

Hashtag alert and Progress Report: Wrapped and Done by Dec 1

Hey everyone, how is your holiday prep going? It's still my goal to be Wrapped and Done by December 1! We've been posting some on Instagram but we want to see what YOU are working on for your holiday prep! Please post using the hashtag #HolidayPrepYall so we can see what you're up to! Plus we will feature you on Instagram!


 Now, here's some of what I've been doing:

Ordering my Christmas cards! I just bought this Groupon to Staples, 100 cards for $19--that's the best deal I've seen ANYWHERE by FAR! But it's EVEN BETTER, knocked down to $8 for 100 because it's been shared with enough friends. There's also a deal for 50 cards Get the deal too before Sunday! Here's one I liked:

(Thanks Brooke, for sending me the link!)


Painting--making my own gift tags!


Wrapping


Bing-ing (Searching using Bing to earn rewards. I've earned $25 for Christmas presents so far. Read more here)


Ibotta-ing (Rebate app, I've earned $18.25 so far )


Shopkicking (App to scan products in store, I've earned $15 to Target so far)


Ordering: presents from Amazon using my Bing Rewards! Win!


(no picture because I can't ruin the surprise!)

Getting our pictures taken, here's my favorite face I made:


Things that still need to be done: Christmas cards addressed, holiday baking, holiday decorating (I refuse to do it until after Thanksgiving, but the day after is just fine), ordering, wrapping and sending more gifts.

So let's see YOUR photos!! Use the hashtag #HolidayPrepYall and we will re-gram it on Instagram!

Wrapped and Done by December One! Early Holiday Prep

No one wants to hear there are only 165 days until Christmas, right? Last year I decided I wanted to be prepped and done by December first in 2014. As in, decorated, cards sent, presents wrapped done. That way I could focus more on Christmas and serving others. I also wanted to simplify.


So I've already started. I know, your kids haven't even gone back to school and the super early Halloween decor is out at Hobby Lobby but hear me out! Don't you want a holiday where you are focused on what matters? Do you want to spread out the cost of the holiday expenses? Do you have two hours a week to start your preparations? I think you do!

So how do you get started? First make a list of the big projects you complete before Christmas. Here are some ideas: Gifts, Cards, Decorating, Baking, Scheduling, Traveling, Entertaining

Then break down the project like I did for cards:

Cards-this always takes a long time for me
1. Schedule a photo shoot with your favorite photographer. (Do it now! The fall the busiest time for photographers and slots full up. This is something you want to do early! Or, look over the year and select a family portrait to send with your card.)
2. Make a list of who you want to send Christmas cards to. Or look over your list from last year. Optional: pear down the list. 
3. Gather addresses/Verify addresses you already have. 
4. Purchase/make cards. If you make cards, start with PLENTY of time in advance!
5. Purchase stamps. (They are already available and easily ordered online and sent to your house!)
6. Stuff, address and stamp cards. I suggest doing this while watching your favorite movie or show.
7. Drop them in the mail at the end of November.

Then assign tasks due dates, breaking them down into smaller pieces, like this:

August 25: Make appointment with photographer
August: 30: List of addresses updated and completed
September 5: Purchase stamps
September 10: Photo shoot!
September 20: Order stamps
September 30: Select Prints, order cards.
October 10: Address cards.
October 15: Keep addressing cards (It takes me a long time!)
October 20: Stamp cards---you're done!
November 30: Drop cards in the mail!

I'm excited to try to read this goal! I'll be talking about other tips and ideas to make your holiday season simpler in upcoming posts!

Merry Christmas!


Christmas Card 2011

I know! I know! Enough already with Christmas. Actually, I think this is the Day of Epiphany and so I think we can still talk about Christmas.
Anyway... I have already confessed that I always make cards and feel like I have to live up to others' expectations. I also confessed that this year I was cutting myself some slack. SOOOO, this is the easy and inexpensive card I made this year.

This one is a little worse for wear. It was returned to sender after a couple weeks.
 Supplies:
12 X 12 cardstock. (I bought mine on sale at Joanne Fabric and Craft for 5 for $1.00)
A photo (You will need to trim the length of a 4 x 6 photo down to about 5.5".)
A coordinating sticker.

Directions:
On your computer, change the paper size in your page set up menu to something that is longer than 12". This will allow you to print all the way to the edges of the paper. Use landscape layout. You will need to experiment with placement. I used 12x12 paper I didn't like or taped together regular paper both cut to 8 x 12 to practice. You will make 2 copies of the card on each page.

For the outside, use the drawing tools to draw three parallel lines in red and green. I liked mine to touch each other. I later straightend the top green line. Once you get everything perfect, make a second copy on the page. I inserted text boxes everywhere I wanted text.

Decide on the the placement of your message and your return address. Practice! Practice! Practice! Maybe other people don't have to practice as much as I do. Don't tell me if you don't. I feel inadequate enough without any help!

Cut a 4x12 inch strip off each sheet of cardstock, then use the remaining 8 x 12 paper to print the backs of your cards.

Now... practice the inside. Use your practice pages to see where to fold your card. On the small flap on the listed the family members in the photo. Write your message on the right.
The more you practice the less paper you will waste.

Once I had printed all my 8 x 12 papers, I printed the cards on the leftover 4 x 12 strips. That way I got 3 cards from each sheet of cardstock.

For the sticker, I ran shiny gold paper through my sticker maker. Make sure it will keep the card closed. I only had repositionable adhesive stickers, so I ended up reinforcing the seal with glue.

In all, the cost for about 36 cards was less than $10.00, including photos.

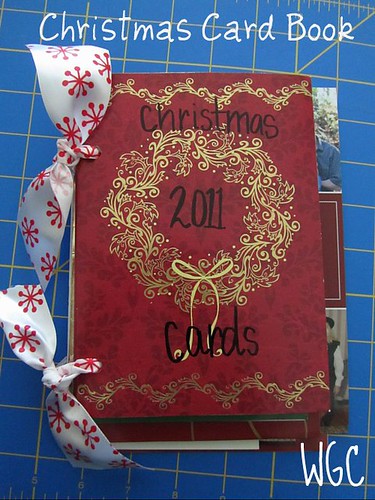
Christmas Card Book

I took down all my Christmas decorations yesterday and I had a stack of Christmas cards that we received. Since of course they come from family and close friends and many of them had pictures I wanted a way to save them so I made them into a book.
christmascardbook 002

So I used a regular 3 hole punch, ribbon, and glue. I lined the cards up by size and then I hole punched the cards with two holes each roughly centered on each card. I glued the pictures that were included into or on the back of the cards they came in.
christmascardbook 001
I took a larger simple card and put it in the front as I laced each card on the ribbon. I left a little space and tied them together. I wrote the year on the front and they will go away with the decorations to be enjoyed next year!


Related Posts Plugin for WordPress, Blogger...