Showing posts with label wayward. Show all posts

DIY Maternity Maxi Dress

Sorry for my long absence! But I have a good excuse. Well, I think it's good. So back in August, I was  asked to be one of my college roommate's bridesmaids. Well well well, what a predicament. The other 7 or so bridesmaids and I did not have something in common that would make dress buying much, much more difficult because I would be 21 weeks pregnant at her wedding! Luckily, the bridesmaids got to choose their own dresses which meant I would make my own dress. I decided to go with a maxi dress thinking it would be both easy to make and accommodating to my growing baby belly. This was far more wayward than I thought but I learned from my mistakes!

What you'll need:
2-2 1/2 yds jersey knit (depending on your height)
Thin elastic
Matching thread

Instructions:
1. Measure from under your bust, over your shoulder to mid back (equal to where your under the bust measurement is on your back). Measure down lengthwise on the fabric. This is the length of A and B. Mine was 30 inches.

2. Hem one side of each A and B pieces. This will be the neckline. Overlap A and B 4 inches right side on top of right side. Pin and sew.

3. Next, sew C to A and B, D to the opposite side, wrong sides together.
4. Fold along mid line of A and B top panel. You may need to trim both sides depending on how loose and flowy you want it. Sew sides of dress (wrong sides together) from bottom to a couple inches above where C and D meet A and B.
5. Measure where you would like to put on the elastic. I measured under the bust to accommodate baby. Cut the elastic 2 inches less than your measurement. Overlap the ends of the elastic about 3/4". Sew forward and back a couple of times. You'll need to put 4 pins in your elastic 4 equally apart: one in the middle front, middle back, and sides. This is markers to match while sewing.
6. Pin your middle front marker of the elastic to the middle front (middle of where A and B overlap), the back marker to the middle back, and sides to where C and D meet on the sides. Your elastic should be smaller than the fabric, this is on purpose! (I added a few extra pins due to how wayward everything was turning out for me. But I pinned in the middle of where the fabric was between pins to the middle between markers and match to fabric. You must be very careful if you are adding extra pins!)
7. Now sew with a zig zag stitch on the elastic to the wrong side of the dress, stretching it to meet the length of the fabric between pins. This will create gathering in the dress.

8. Cut and hem skirt to desired length, hem sleeves at length you want.
9. Optional: I sewed a small piece of where A and B overlap (6 inches from edge of waistline) for added modesty.

And here's my wayward adventure:

I measured wrong both the fabric and elastic, twisted the elastic while sewing, had to unpick thread so many times, etc, etc, etc! .

And here's the finished look!
Note: these were taken at 29 weeks not 21!! Hello belly button!


Hawaiin Shirt to A-Line Skirt

I love how my title sounded like a line from a poem. Good morning! Does anyone have some fun plans for the weekend? We're travelling some next week because it's spring break and I.am.so.excited. This is the first "kid vacation" we're taking and I can't wait to see PB's face when we get there! By kid vacation I mean one where we go to a certain place because we have kids. We're staying at a resort that has a mini water park. I'm ready to get some shopping in and some good eats!

I am completely ready for spring to get here! We have had some great weather but these dang cold fronts keep coming in from the north! To help encourage some warm weather I decided to make this skirt.

My husband was recently gifted this Hawaiian shirt. I took one look at it and decided he would most likely never wear it. He already has a couple and he hasn't worn them one time in the 7+ years I have known him BUT I liked the pattern and I thought it had great potential. I had visions of a  great high-waisted a-line skirt. I conceptualized and browsed through a few tutorials and this is what I came up with and it has POCKETS! This craft is somewhat wayward. I was making it up as I go so things aren't necessarily in their proper order but this is how I did it:


Need:
One Hawaiian shirt
1.5(ish) yards of lining fabric in coordinating color
A skirt that fits to see basic shape
 The first thing I did was take the pocket off the front. I then cut across the top to take away the collar and shoulders. I wanted the buttons in the back so I buttoned up the shirt and sewed along the left and right seams on either sides of the buttons. I flipped the sleeves in and sewed along the rim to make them face inside. I then flipped the skirt inside out and sewed the sleeves closed to make the pockets. I took the lining fabric and folded it in half top to bottom and side to side. I laid it under the existing skirt and traced along each side adding about half an inch on either side to make a waist band. I cut along the lines and sewed up each side.
 I then flipped it inside out and make sure it fit comparing it to the other skirt. I trimmed the extra fabric on the waist band depth and compared the top of the skirt to the width of the waist band. I added pleats in the front and back to match the sizes. I basted the pleats and then flipped the waist band inside out.

 I put the waist band and matched the corners. I pinned it and sewed along the top.


 I wanted the skirt to be a-line to I noticed the bottom needed to flare more. I used more of the lining fabric I folded it over and traced the line I wanted to skirt to follow. After trying on the skirt I adjusted these. I cut them and sewed the outer edge and then sewed the edge onto the skirt.

I then folded the piece of lining fabric in half and marked the edges of the skirt from the waistband down to make a lining for the skirt. I sewed the lining along the edge where the waistband and the skirt meet. I then decided to make it a tie closure in the back. I cut two 4"x15" (approximate) lengths of the lining fabric and sewed them into tubes and turned them right side out. I cut a 6" seam down the back and flipped them under and sewed them. I sewed the ties onto the waistband and tried it on. I made a couple of adjustments and trimmed off any extra fabric and strings.


 front
 back

Have you stolen permanently borrowed any of your husband's things to upcycle? I have another shirt I have my eye on of his :)

What Brave Brooke Has Been Up To

First of all I want to thank all of our readers from the bottom of my heart. You all are so loyal! You stuck around when the times got hard for us! So I was waiting to make this announcement and I never did but this is what I've been up to:

I was growing a baby ;)

Do you ever go through times in your life that you are just solitary? In the past year (mostly since moving) I feel like I have been regrouping. I didn't leave the house often and I just stayed inside and parented my 2 year-old and was happy with my life until I realized that I had become a turtle. Do you feel a little offended I didn't share my big news with you? Well I didn't share it with very many people until I was already half way done. Honestly, this pregnancy didn't come when we planned and I was bitter so I just kept it to myself and yet again retracted into the comfort of solitude. I was even quiet in my virtual life so please don't be offended. I just needed time. About 6 weeks ago I felt like I left my shell behind. I sought out friends and I tried to serve others and I started doing old hobbies again. It almost feels like a waste though, since after having the baby and the tail spin they put you through I will need to regroup again but for these two months I felt so alive and I needed that to recharge myself before retreating again (at least in my personal life. I won't put you through the silence again!)

Like I said, thank you for sticking around and thank you for your understanding. I am so excited to start this new direction for the blog. I feel this is a true reflection of my life and I hope you enjoy!

Welcome back to the Waywardness!

After a few weeks to rethink and restrategize, the Wayward Girls are back! And we're revamping everything!

Ready to check out the big changes?

A new look!

WGC has had the same awesome layout since we started two and a half years ago. (Yep, can you believe it?) If you're reading this on a reader, come check out our all-new design!

We'll miss the old

But in with the new!

A new focus!

We're happy to report that WGC will still feature the same great crafts and tutorials in the coming months. But we're even happier to share with you way more than that. If you've seen our new header, you'll notice that in addition to our old tagline, "We make bad look good," we've added a second slogan:

Crafting a better life!

In addition to posts on crafts, knitting, home decor, and food (always food!), we'll be adding more posts on lifestyle, homemaking, and tips & tricks.

We're adding a new "Tour" page to show our favorite crafts in our most popular categories. We've also updated our about page for the first time in . . . forever!

New ways to connect!

We've always had a Facebook page and a Twitter account, but we're going to be interacting there and posting new content more than ever. Plus, in addition to my account and Brooke's, we've added an account for WGC on Pinterest! We'll be sharing all kinds of cool crafts, kids' ideas, homemaking, tutorials, tips, tricks, recipes and more there, so be sure to follow us!


A sad goodbye

As we mentioned before, we've had a lot going on in our family in the past few months. We're sad to say that Mom, Jaime and Jasmine are just too busy to continue blogging with us right now. We'd be overjoyed to have them join us again, whether for a guest post or forever, but for now we'll miss them! Fortunately, their old posts will always stay on the site.

Stay with us this week for more big news and a giveaway!

Not so delightful S'mores Delight Pie

Two years ago, I embarked on a PieQuest. My PieQuest began with reading magazines. This recipe comes from Spirit magazine from Southwest Airlines but unfortunately, it didn’t quite turn out like it did in the picture.


S’mores Delight Pie is originally from Perfect Pies: The Best Sweet and Savory Recipes from America’s Pie-Baking Champion by Michele Stuart. Unfortunately, when I made it following the recipe instructions, it didn’t turn out even close to the intended result.

This pie is almost a s’more cream pie. The idea is a graham cracker crust coated with hot fudge sauce and filled with marshmallow-flavored-and-studded custard. On top, hot-fudge-dipped graham crackers, whipped cream/marshmallow cream and toasted mini marshmallows.

If that sounds like a lot of work—it is. The hot fudge sauce is made from scratch and requires 5 hours’ cooling. The custardy filling, which you can make while the hot fudge sauce cools, has to be refrigerated for an hour and a half before assembling the pie. And then you refrigerate for another 12 hours. And then you top it and broil it.

So basically this is an 18-hour pie. That might be worth it—once—if it turned out amazing. Or even turned out at all. It didn’t.

For starters, I don’t think the hot fudge sauce was supposed to actually be chilled before you poured it in the crust. The directions do say “pour” not “scrape out of the bottom of the bowl and spread,” as fully chilled hot fudge sauce requires.


Another problem with this recipe was in the “marshmallow vanilla cream.” How long do you think it would take just over six and a half cups of a cold liquid to heat to bubbling on medium heat in a medium saucepan, while whisking constantly? Here’s a hint: not four minutes.

However, the directions said, “Place saucepan over medium heat and cook, whisking constantly until the cream starts to bubble and thicken, about 4 minutes.” (And yes, my stove was already warm.) After 10 minutes of constant whisking, the milk had barely begun to froth. Was that what they meant by bubble?

I’ve made puddings before. I know what it means for something to bubble and thicken. This wasn’t it. And yet I’d diligently followed the directions, and I’d cooked it for two and a half times the recipe’s direction. Torn, I decided to pull the “marshmallow vanilla cream” from the stovetop. It was the wrong decision.

I cooled the filling with an ice bath and stuck it in the refrigerator for as much time as I had (another error: I only allotted an “insignificant” 14.5 hours to making this pie). Then I assembled the pie. Because the graham cracker crumb crust apparently isn’t enough graham, the hot fudge layer on the bottom of the cake is topped with graham crackers. Do you know what happens when you pour a not-thick-enough pie filling on top of graham crackers?

I’ll tell you: they float. I was too afraid to find out, but I worried that not only did the graham crackers float, but that they’d pulled up the hot fudge sauce and the graham cracker crust underneath. I closed my eyes, spread the hot fudge sauce on the top layer of graham crackers (again, chilled hot fudge sauce isn’t something you can dip a graham cracker in, at least not to coat it for a pie, so this looked pretty ugly already), and stuck it in the fridge to hope for the best.

The next day, I took a peek at the pie-fail I was hoping to bring to a potluck. I tilted it to one side—and decided to make cookies.

After nearly 24 hours in the refrigerator, I knew it was time to give up hope my s’more pie soup would magically turn into a cream pie. Unwilling to throw good food after bad, I decided to forgo the “fluff whipped cream” (another 30 minutes of effort and cream and marshmallow fluff) and just top with the mini marshmallows and broil.


It looks good here. I’m creative like that. Just take a look at this filling:


This is what we call a “Bake Fail.” I think “epic” is overused in Internet slang, but it might actually apply here. The only part of the pie that actually worked out was the store-bought crust. And you know what? That’s probably good, since the other recipe from this book featured in the magazine was a traditional pie crust: and it called for so much shortening that it crumbled at the slightest touch.

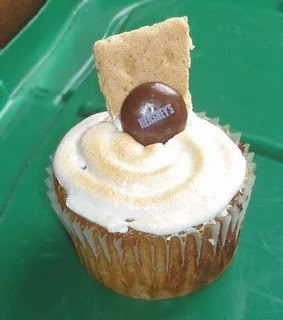
Could this pie work? Yes, if you have two days before you want to eat the pie, and you trust yourself more than the directions. But barring that, make this s’mores pie, which is faster (and tastier in my experience), or try this alternative: s'mores delight. Not only easier, but faster and foolproof. What’s not to love about this?


Wayward Pin Fail

Ever seen something on Pinterest you think you can do? Yeah, yesterday we decided we would make something we found. We (I'm at Jordan's house and decided to make fun things with her kids) decided to make unicorn cookies/ rainbow swirl cookies.
Well...they did not turn out as expected. I had Jordan's 3 older kids help make the dough, stir in the food coloring and roll out "snakes" of each color. I only figured out how to really swirl the colors after I had done most of the batch. And the colors didn't turn out well. Also, MORE FLOUR! It might be that whole higher elevation thing but wow...these were flat flat flat. At least they tasted good!

These were definitely WAYWARD!


Jaime Approved HOLIDAY Baking

This year I made three of my favorite things for gifts for my co workers:

Oreo truffles. About 80 of them!


A crowd favorite. I have been assigned to make these at Jasmine's wedding (in 10 days!)

Peanut Butter and Chocolate Puddle cups.


I made these for Thanksgiving last year. Weird contribution but it does not matter because they were amazing.

Three Ingredient Pumpkin Cookies, only I left out the chocolate chips.


I wanted one thing to not have chocolate. We made homemade pumpkin pie spice to go in them too!


And for my flop:


Don't these look amazing? Well I would suggest you have a real doughnut pan to make them. I was at my aunt's and using a plug in doughnut maker and it just didn't work. Then we tried to fry them. And that didn't work. So I made the pumpkin cookies instead. Next year I'll have that doughnut pan!


Now for my tips:

Make sure the treat boxes you buy are big enough! I accidentally bought tiny boxes so I have to pair the box with a plate. I ended up putting the Oreo truffles in a mini cupcake liner and then in the box.

2012-12-17220038
Tiny boxes make me weep
Plan ahead! I did plan ahead but I didn't count on the doughnuts not working out and had to scramble with the pumpkin cookies at the last minute.

Make sure you don't save your baking until the last minue. Because you just may end up boxing treats until 10:30 pm.

Apple braid: healthy makeover!

Last fall, I made a tasty apple braid. This fall, I decided to see if I could give the original recipe a healthy makeover.

It was an all-day endeavor, and there were tears shed. Literally. Actual tears.


The healthy makeover!

For the filling:
  • 3 medium Granny Smith apples, peeled, cored and cut into slices.
  • 3 Tablespoons Xylitol
  • 1 1/2 tsp cinnamon
  • 2 tsp lemon juice

For the 100% whole wheat bread, from Heavenly Homemakers--This makes two loaves, so either half the recipe or make one loaf of bread in addition to the apple braid.

  • 6 cups (give or take) whole wheat flour, divided
  • 1 ¾ cups warm water, divided
  • 1/3 cup honey
  • 1 package active dry yeast (2 1/4 teaspoon)
  • 1 teaspoon sea salt
  • 3 Tablespoons melted butter

For the drizzle:
  • 1 tbsp Agave Nectar
  • tiny dash imitation vanilla
Yep, there's no actual sugar in this recipe!

Begin the bread first, following Heavenly Homemakers' recipe through the first rise. In the last 15 minutes of the first rise, make the filling by combining the filling ingredients in a bowl. 

After the first rise is finished, preheat the oven to 350. Roll out half this amount of dough and cut the outer thirds in ribbons (being careful to keep them even because you don't want to end up with too many ribbons on either side).


Remember that whole wheat dough is that it generally doesn't have as much stretch as white bread dough, so the ribbons might need to be extra long to fit over the filling.

Lay the filling down the middle of the bread and overlap the ribbons to form the braid, pinching the dough in place. Since my dough was less elastic than the last time I made it, I actually just pinched them together in the middle. I tried to give this a chance for a second rise . . . didn't happen. It also didn't happen for the other loaf of bread I made from this dough. I'm VERY frustrated, after grinding my own freaking wheat, using yeast I just opened last month, spending four hours making the dough and six MORE hours trying to get it to rise the second time. . . .

Ahem. Anyway.

Bake the apple braid at 350 F for about 25 minutes or until golden brown.

Combine the drizzle ingredients, warm slightly and drizzle over the cooling braid. Cut into 10 slices.

So, how did the healthy makeover go?
As you can see, the analysis by CalorieCount.com shows there's almost no difference between the before and after in raw nutrition data. Calories, fat, saturated fat, cholesterol, sodium--it's all very close. However, the reduced sugars and especially the whole grains earned the after version a nutrition grade of B+, as opposed to C+, making this a dessert you don't have to feel too guilty about.


And most importantly, how did it taste?

I HAVE NO IDEA. 

Again, I'm super frustrated about this. I brought this to my friend's house, and my friends had pieces (and seemed to like them), but I was too full to eat any. So I brought it home and put it in the kitchen.

The same room as a bunch of bananas a neighbor gave us that afternoon.

The bananas were infested with fruit flies which took over my apple braid which I seriously spent six and a half hours making.

Wayward rage.

Ahem. Anyway.

So, if you try this, let me know how it tastes! I don't think I have six and a half hours to go through all this grief again any time soon.

All You Ever Wanted to Know about Wayward Girls' Crafts

Hello all you newcomers! Today we're participating in Blogelina's 100 Blog Comment Event. We wanted to tell you a little bit about Wayward Girls' Crafts as well as keep our faithful followers (hi guys!) entertained by letting you in on new information. Here we go!

Photobucket
Who are we?
We are four sisters and a mom who love to create. Jordan, Jaime, Brooke, Jasmine and Mom/Diana. We're Wayward and we know it. 

Photobucket
Front row: Brooke, Jordan, Jasmine, Jaime
Back row: Mom/Diana and Dad (Wayward, but not a Girl) 

Why "Wayward"?
The term Wayward Girls comes from a silly answering machine message from long ago. We applied it to our crafting method when we started our blog last year. What's so wayward about it? We are willing to tackle projects without really having a back-up plan and without really knowing what we're doing. We are up for trying to recreate something we've seen elsewhere and without a pattern. We're open with the mistakes we make along the way and we're happy about it. Check out more about waywardness here.


Photobucket Getting to know Just Jaime: Why did you all start Wayward Girls' Crafts?

Early last year I started exploring crafting blogs as I researched ideas for a baby shower for Brooke. I discovered a whole niche of blogs I never really thought about before. The wheels in my head started turning. I wanted to have a craft blog, but I knew the responsibility of posting every day (and having that many crafts completed!) was too much. I decided to invite my sisters and mom to craft too. It has become something that has helped us keep in touch and bond. It's always fun to have a project amongst a group of women and I love what we've done with it. I'll never regret starting WGC.

Jaime's favorite crafts (pictures are clickable!):  
Photobucket  Photobucket   Photobucket


Photobucket Getting to know Jasmine: What's a fun crafting memory you have of the Wayward Girls crafting together?

A fun memory I have of crafting with my sisters and mom (other than giving Barbies make-overs) would be when we had a crafting extravaganza with our aunts as well one Christmas season many years ago. We all brought crafting ideas and made a bunch of crafts. Most of them were ornaments. It was fun to bring together a whole lot of ideas, teach one another about a craft, learn from one another, and most importantly enjoy what we were doing. 

Jasmine's favorite crafts (pictures are clickable!):
Photobucket  Photobucket  Photobucket


Photobucket Getting to know Jordan: What's been the most useful thing you've learned from writing WGC?

To embrace the Waywardness! Like a lot of people, I can get so caught up in trying to do things perfectly, especially on the first try. My crafts--and my life--aren't perfect. Sometimes it feels like they go awry or fall short of my expectations more often than not. But blogging about my crafts has helped me to celebrate the failures as well as the successes, and given me the courage to keep going my own "wayward" way through life.

Jordan's favorite crafts (pictures are clickable!):

Photobucket  Photobucket 


Photobucket Getting to know Mom/Diana What do you get out of blogging?

I get so much! I enjoy that I'm kind of forced to be creative every week. I enjoy crafting but don't always spend my time that way. Because we all rely on each other, blogging together, I know I have to hold up my end of the deal to all our loyal readers. I really love what I've been able to create and share, and I love when people comment on something I've created, and I get to say, "Thanks, I made it myself!"

Mom/Diana's favorite crafts (pictures are clickable!):

Photobucket Photobucket Photobucket


Photobucket Getting to know Brave Brooke: What do you like best about Wayward Girls' Crafts?
The thing that I love most about Wayward Girls' Crafts is there is no illusion that I'm perfect. We try to help our readers feel that we make mistakes and we make the best out of them. It is okay when things don't go exactly as we planned and sometimes they don't work at all. 


Brooke's favorite crafts (pictures are clickable!):

Photobucket  Photobucket  Photobucket


So how do you get to be Wayward too? You can follow Wayward Girls' Crafts with Google Friend Connect or RSS Feed, like us on Facebook, follow us on Twitter, or join us on Saturdays for Wayward Weekend, a link up party for crafts and recipes. Thanks so much for stopping by!
Related Posts Plugin for WordPress, Blogger...