Twig Votive Holder

This is quick, elegant, inexpensive, and GREEN craft. It took me less than 30 minutes start to finish!

Of course, the original idea came from Pinterest. I am working with two other women to organize a Women's Day at our church. We expect about 300 women to come for classes on crafts, self-reliance, physical well-being, cooking, sewing, and spiritual topics. We selected this craft from Pinterest, and today I decided to give it a try to see if it will work.

Here's all you need: 

Oops, I see I cropped out a glue gun. You need that, too. You can use any jar or votive holder you have around. I selected a small glass that is about 3 inches tall and 3 inches in diameter.

Collect twigs from your yard. (Or come to my yard and collect them. We have millions!)
Use the shears to cut them to about the same size. After a while, decide it is easier just to break them, and stop using the shears. They should be fairly straight and without knots.

Spread a patch of hot glue about 1.5" x 1". Use the hotter setting so that you have more gluing time. Start gluing the sticks on the glass. Since I held it in my hand as I worked, I set it on the table after every patch of glue to slide any long sticks upward.
Continue all the way around the glass. It takes very little time! Sometimes I used tiny, short sticks to fill in empty spots. This is what the top view is like. 
I tried different types of ribbon when I was finished-grosgrain, satin, sheer-- but I didn't love them. I finally settled on some floral wire that looks like jute. Real jute would have been great, too.

Here's how it turned out:

Very rustic!

DIY Wallpaper Removal

When we did my bedroom redo we bought a wallpaper remover. It was pretty quick and easy. I just had a border around the top of my walls. We decided to redo our dining room at home. While my mom was at work and I was at home bored I decided to start tackling the wallpaper in there. We had covered half the wall many, many years ago in wallpaper. It was a pretty simple task but after spraying the bottom half of 4 walls my hand was very tired! While peeling off wallpaper, I found it best to start at the corner of the wallpaper or a seam. Sometimes a little scraping was needed to get under the slicked down edges but the wallpaper came off easily and in under 2 hours we were done. After, we washed the walls of any excess remover.


Olympic Gold Medals

Did you know that the Paralympics start today? 

Right before the start of the Olympics at the end of July we had an activity with our 8-11 year old girls at church, celebrating the games. Since it was also close to Pioneer Day we did Pioneer Olympics. We made whirligigs, did a stick pull, and jumped rope. Afterward we also had a medaling ceremony. I made clay medals for each of our girls. It took a while since we have over 20!

Here is how they turned out:
FIGs is the name of the organization
I made them out of gold Sculpey. Each medal was about 3/4 of a block. So each package made 5 medals. I kneaded the dough and flattened it into a round shape. I used the first one as an approximate size for each of the other ones. I used clear stamps to add the words and a flower at the bottom. I made a hole with a straw at the top and got some cute red polka-dotted ribbon. With permanent marker I wrote the date and activity on the back.

How did you (or will be) celebrate the games?

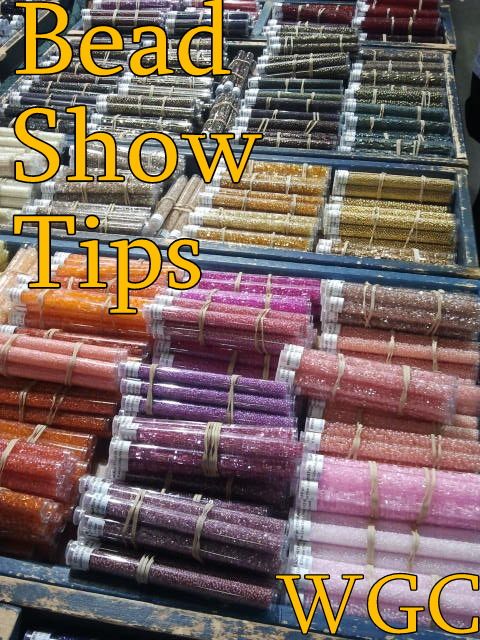
Bead Show Tips

Can I just say, I love bead shows? If you are a beader or jewelry maker or bead lover, you simply MUST shop bead shows! Why?
  • Amazing deals (I refused to pay more than $5 a strand and got some beautiful, quality beads)
  • Tons of selection
  •  Easy comparison: the stores are side by side! 
  • Haggling for a better deal is absolutely allowed 

My tips for attending a bead show:

Photobucket


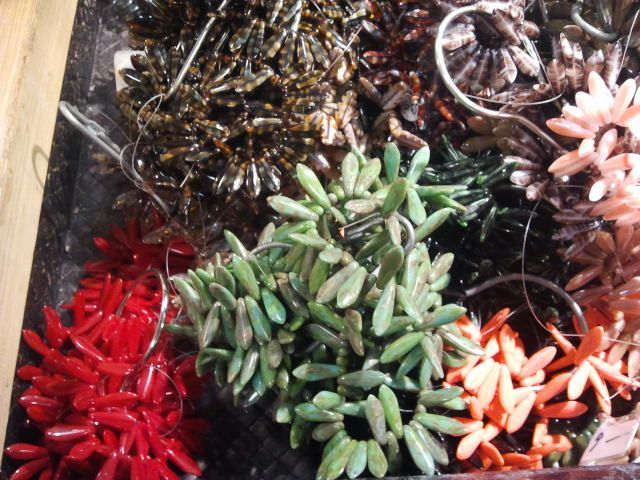
Make a strategy: Your strategy will be different depending on the size of the show and amount of time you have. My show was not very big, so I decided to stay about 2 hours, and look at all the vendors once before purchasing anything. If you attend a large show, you may want to plan for more time. You might also want to consider your options the first time, since remembering where you saw the best beads could be difficult. Making a list beforehand of what you're looking for (coloring, sizes, shapes, etc) really helps when you are inundated with beads. 


Uploaded from the Photobucket Android App

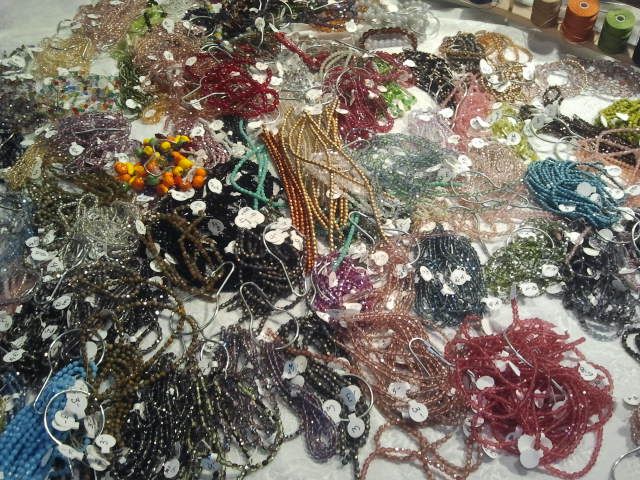
Bring the right equipment. The two most important items to bring are (1) cash and (2) good shoes.You're going to be walking so make sure you're comfortable. The right equipment also means if you are trying to find some beads to match your favorite shirt: wear your favorite shirt! If you are planning to purchase a large haul of beads, bring a wheeled cart. If you strategy is to take pictures of beads and write down where they are from, bring a camera and some paper.

Uploaded from the Photobucket Android App

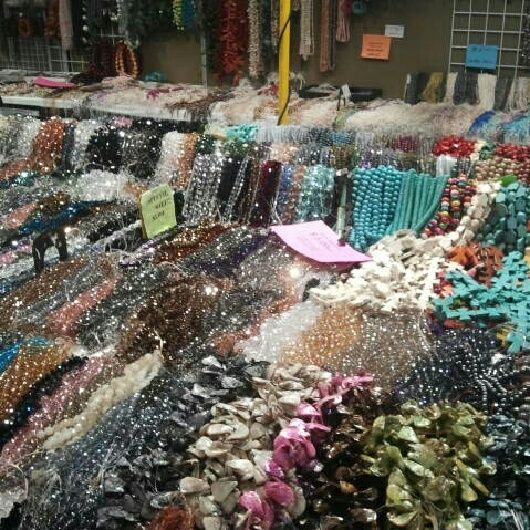
Bring a friend. I was so happy to meet up with an old co-worker who also likes to bead. We talked about what we were looking for and so we each had an extra set of eyes to find those items. I enjoyed being able to consider my purchases out loud with a trusted friend and it was fun to socialize too.

Uploaded from the Photobucket Android App

Research to cut costs. First I researched the show itself. I found if you brought a flier or 2 canned goods to donate, you got $1 off admission. I also researched the events center hosting the show. I found that covered parking was $7. Instead, I parked in a nearby neighborhood (legally!). By doing research I had $8 to spend at the bead show--that's at least 2  more strands of beads. 

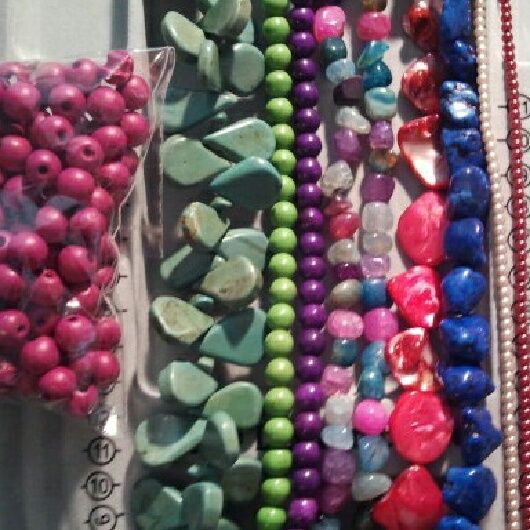
These are the beads I purchased: 

Uploaded from the Photobucket Android App

Be on the lookout for projects made with these!

Do you have any tips for attending shows?

Help! Command center revamp?

Last year for back to school, I converted an empty wall into a command center with some sheet metal and some magnetic supplies. We use it to post our menus (still planning them like this . . . most of the time), hold the kids' chore schedules and . . . fill up with clutter.

Here's what it looked like a year ago

(There's now more art up there.)


This is pretty similar, but a bit messier. Notice the photo clip holding a wedding announcement? We use this for checks to cash and receipts to reimburse these days.

Below the metal file are two photo clips for my older kids that hold their chore schedules.

This has never been a cutesy command center, but I've always felt like we could do more with it. So help me out:

How can we get more out of our command center??

"Quilted" Notebooks

I need a spiral notebook to write down stuff at work. Usually I just pick one up at the store and call it good, but this year I wanted something different. This is what I came up with: 
As usual, I learned a lot in making the first one, so look for updates in the future with better versions!
First I found some 6" x 9.5" notebooks at the office supply store. They did not have a glossy cover.
This one happens to be made from leftovers from harvesting sugar cane!

Select your fabric and apply Heat and Bond to the back of it following manufacturers' instructions.
For this design, cut a 2" square out of your favorite fabric. Find a pretty design and make a fussy cut!
Then cut a 2 3/4" square out of a contrasting fabric and a 4" square out of another. You will also need strips to fill in the rest of the cover.

Remove the paper from the fabric backing of the 2" and  2 3/4 " squares. Place the 3 squares together as shown.  Lightly press them to tack them in  place. Take the backing off the 4" square now.

Find the center of the notebook and center the square units on it. Now is time to iron it well. Add strips for borders as desired.
(Confession: This isn't the way I did it. This is the SMARTER way.)

This was my first effort. Though I liked the brownish fabric at first, it just didn't look good. I just cut some triangles out of white and ironed them on.

I covered the back and was done!

Delicious Feta Omelet

There are a bajillion ways to cook an egg. I love eggs. They're just so yummy. Here's a recipe for an easy and healthy omelet:
Ingredients:
3 eggs
Feta
Tomato
 Green onions

First, beat the eggs and add in some salt and pepper if desired. Then pour the eggs into the pan. The trick to an omelet is to move around the cooked eggs and tilt the pan to fill in the spaces so there's always a layer of egg on the pan.
Then just before the eggs are cooked (they won't be so slimy looking, that's how you know they're done) sprinkle some feta cheese around. I love feta so I added lots! I also used a feta and herb blend.
Next, slide the omelet onto a plate making sure it folds over in half. Then add diced tomatoes and chopped green onions.


Enjoy! Mmm I want another just thinking about it!


DIY Slushies

I was at a friend's house a few weeks ago and her husband made slusies for us by just putting soda in the freezer. I had some soda that had lost most of its carbonation so I made slushies with it. I didn't have as much room in my freezer so I just put some in a water bottle. Every half hour or so I went in a shook it. After about 2 hours it was a delicious slushie.


Fluffy Fringe Birthday Card

I'm not the best at sending out birthday cards. I'm at about 50% for the year thus far. But a few weeks ago I got a 3 day notice on my sister-in-law's birthday. So I whipped up a card using some inspiration from Pinterest.

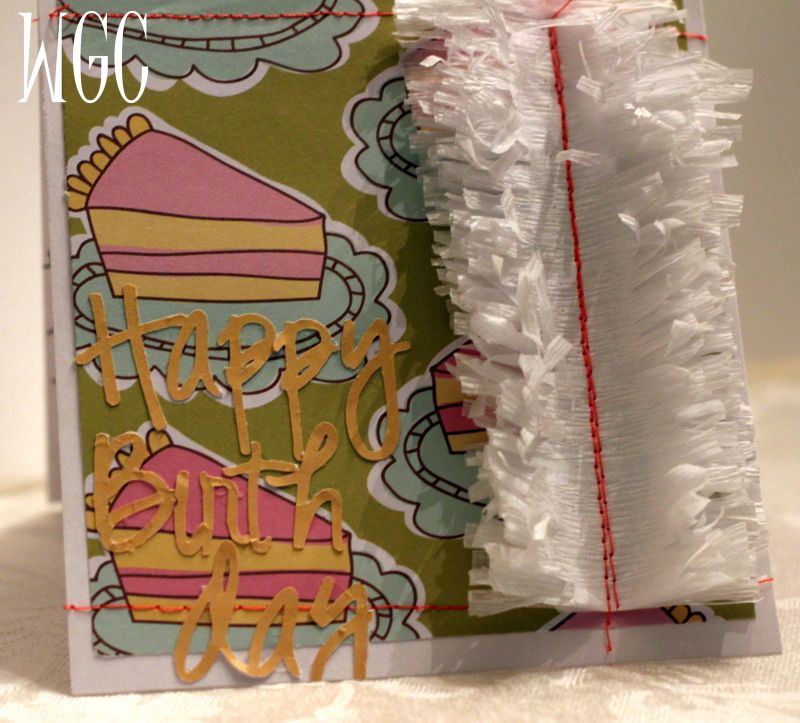
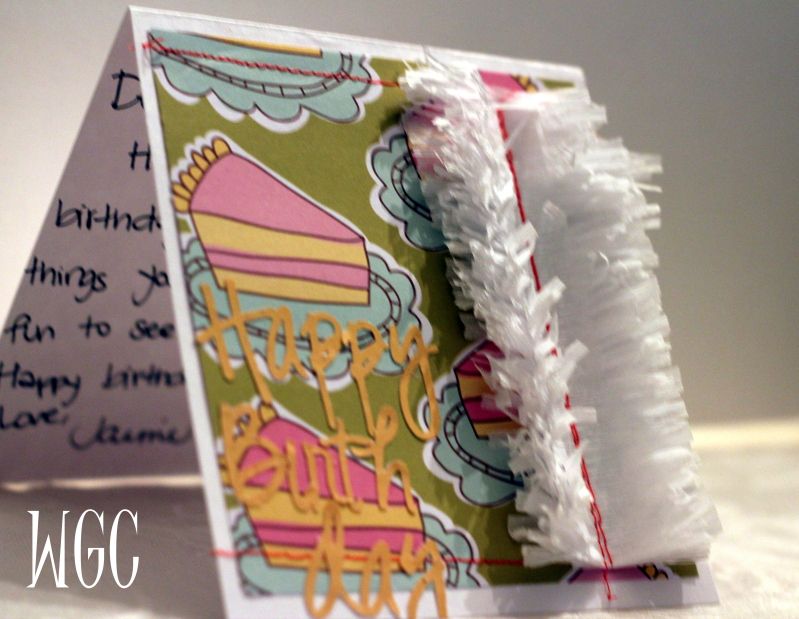
Here's my card:

Photobucket

Here's my inspiration:


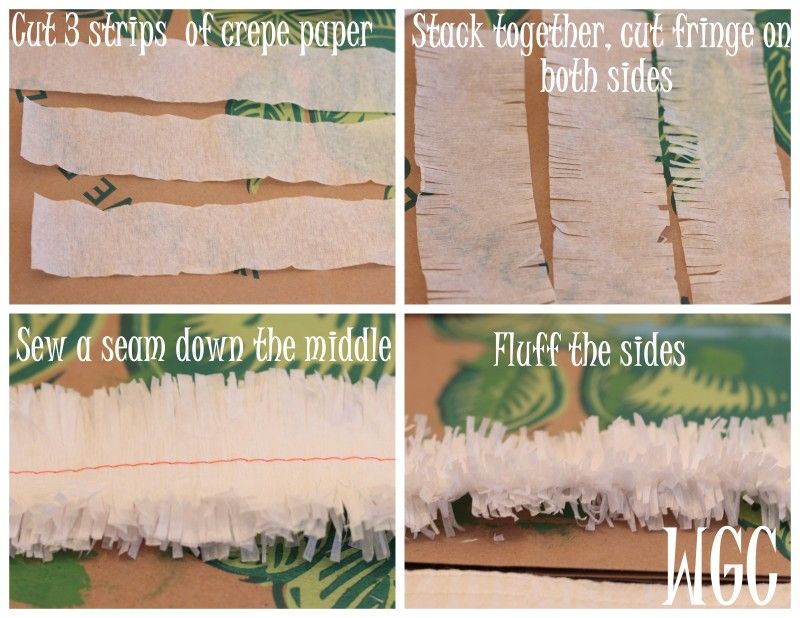
To make the fluffy fringe: I cut three equal lengths of crepe paper and stacked them on top of each other. Then I cut fringe on each side. Next, I fired up the sewing machine and sewed the crepe paper up the middle.

Photobucket 

For the rest of the card: I used some cake patterned scrapbook paper as the background and adhered it to white cardstock. I added some decorative stitches and then sewed the frill on. Finally, I used corresponding scrapbook paper for the sentiment, cut with my Silhouette Cameo. Sadly the scrapbook paper I used was really thin and tore a bit when coming off the cutting mat. Boo.

Photobucket
Fringe in action
When I wrote the message and gave it to my husband to sign (who else does this? Everyone?) He asked if I made the fluffy fringe. Then he said, "Niiiiice," Woohoo! Man compliment on my craft!

Easy school lunch planner (free download!)

We're heading back to school soon here, so I'm revamping our routines and chore charts to try to get us off on the right foot. My oldest will be entering first grade, and will have to bring his lunches for the first time.

He's very excited. Me? A little less so. Because I'll be the one doing all the making and packing. However, I think I've found a way that my six-year-old can help with making his lunch, and end up with something he wants to eat: an easy school lunch planner!


We sat down together and brainstormed some ideas for things to put in his lunch. I came up with the basic categories (main dish, fruit/vegetable, side, drink and dessert) and we listed several ideas in each. Next, I typed the foods and categories up and color coded them.

Next, I want to laminate and cut out the category cards and the food slips. The category cards could go on the front of organizing boxes, or they could go above hooks, and the food slips could be strung on metal rings to hang on the hooks.

The Ready? category is for the final check of questions: do you need a spoon or fork? Do you have your water bottle, sandwich and lunch box? There is also a Shopping category to use the food slips as a reminder to stock up.

Want the file? It's a totally free printable! Click here to view the PDF of this school lunch menu board! (Click on the printer icon on the gray bar above the document to print.)

Some more menu planning board ideas that you could adapt to this:


This way, you get your kids involved in picking and maybe even packing (and hopefully eating!) their own lunches.

How do you organize your kids' school lunches?

Craft Supply Storage

Where do keep your craft supplies? I am not lucky enough to have an entire room devoted just to crafts, so I have to find places to stash all my stuff throughout the house. I like being organized and finding inexpensive ways to do things.


One inexpensive place I have stored craft supplies for many years is in my girls' old lunchboxes. Here is one. We have a stack of these in a closet under our stairs. They are very portable. We have several Barbie versions and a metal Mickey Mouse one. They bring back happy memories and are very functional.

When we were rearranging our house a few years ago, I ended up with this shelving unit for sewing supplies that my husband had been using before. It is about 40" tall and 36" across. We originally purchased it at a discount store like Target or at Home Depot. As cheap as I am, I am sure it was less than $70. It keeps things hidden and tidy.


I bought this next unit at an office supply store for about $30. It is perfect for scrapbooking-- if you are using 8.5" x 11" paper.
Finally, I claimed a small, under the eaves closet to store my fabrics and quilting supplies. I LOVE clear plastic containers. Big Lots is a great place to buy them. I utilized a hat rack already in the closet to hang hoops. There are also acyrlic rulers at the very top of the rack. I have my cutting mats and other rulers hanging from a peg.
Even though it is a tall stack, I can find things very easily now.

Where do you keep your "stuff"?

Using Pinterest

Pinterest is a website where we can certainly get carried away very easily. When I joined I had to wait quite a while for them to get back to me and accept my request to join the site. I'm not sure if that's how it is now but maybe it is. So using Pinterest. Here's some overall tips:
  • Don't repin stuff you will never make, never read, or never look at again; it's just silly.
  • Do click on the pin to see where the original comes from and to see if it's something attainable or something you really can do.
  • Don't spend too much time on it (it's super easy to spend a lot of time on there but don't get carried away and waste time!)
  • Do have fun with it! Find fun stuff that you can actually make or create or whatever! 

Pinterest starts you out with some generic boards that are easy and good to have. You can also add your own touch to your account.
Ok here's how to create a board:
Click on the "Add +" button.

Then select "Create a Board"

Here you can name and categorize what your board will be. You can also add other pinners to the board. My sisters, mother and I all share a board which is really just full of our jokes and humor. Then just like that, you are ready to start pinning to that board!


Have any other tips for pinners?

Khaki to Blue Pants

I've had a pair of pants for an embarrassingly long time. There were light khaki and stretchy, therefore, they looked like I was wearing nothing. So since this trend of colored jeans is in I thought I would dye them. I wasn't sure it would work since they didn't start out white.

It worked quite well! I like the color they turned out although I feel it has faded a lot after washing them a couple times and although I followed all the instructions they bled on the first load I washed them with after washing them alone. After dyeing them the only thing that didn't dye was the zipper but no one sees that but me.

I used Aquamarine Rit Clothing Dye and followed the instructions on the bottle.

A few words of advice: make sure your gloves don't have a hole in them. Make sure all of your supplies are gathered before you start, and put on some music while you stir for 20+ minutes.
What do you think?
So dyeing khakis does work.


Do you have something to dye?
Related Posts Plugin for WordPress, Blogger...