Showing posts with label homemade. Show all posts

Homemade Frosted Animal Cookies


Our dad loves frosted animal cookies. The other day I came across a recipe to make jumbo frosted animal cookies. And then my dad told me he had a business trip in a nearby city and asked to visit for the weekend (of course!). I was planning dinners for the weekend and wanted a treat--that's when I realized the stars aligned for me to make homemade frosted animal cookies for my dad.


Homemade Frosted Animal Cookies
(Recipe adapted from Munchkin Munchies)


Ingredients:

2.5 cups all-purpose flour
1 tsp. baking powder
1/2 tsp. salt
1/4 tsp. ground nutmeg
3/4 cup (1.5 sticks) unsalted butter, softened
1 cup sugar
1 egg
1 tsp. vanilla extract
16 oz. buttercream icing (storebought)
red food coloring
rainbow sprinkles


Directions:

Combine flour, baking powder, salt, and nutmeg.

Using an electric mixer, beat the butter on high speed for 2 minutes. Reduce the speed to medium, and slowly add the sugar. Beat for 2 minutes, stopping periodically to scrape the sides of the bowl. Add egg and vanilla and beat for 1 minute, stopping the mixer once to scrape down the sides of the bowl.

Stop the mixer and add half of the flour mixture. Beat on low speed until most of the flour has been absorbed. Add the remaining flour and beat until all of the flour has been absorbed and the dough starts to pull away from the sides of the bowl, 2 to 3 minutes.

Turn the dough out onto a work surface. Shape dough into a disk shape and wrap in plastic wrap. Refrigerate for at least 2 hours or up to 2 days.


Once your dough is chilled, preheat an oven to 350°F.

Let the dough stand at room temperature for 5 minutes.  Roll out the dough to almost 1/2-inch thick on a lightly floured surface. Cut out shapes with cookie cutters and move them to baking sheets.


Bake the cookies until very light golden brown, about 15 minutes. Transfer the baking sheets to wire racks to cool for about 5 minutes. Transfer cookies to wire racks to cool completely.


Frosting:
Place the buttercream icing in a microwave-safe bowl from 15-30 seconds (until pourable). If it becomes too thin, add some powdered sugar. Divide icing into 2 bowls. Tint half of it pink and keep the other half white. With the cookies on a wire rack, place the rack over a baking sheet (or over wax paper).  Use a spoon to cover each cookie with the icing. Sprinkle with the rainbow sprinkles.


Makes about 16 cookies.

Crock Pot White Chili

I was at a church activity with Brooke the first time I ever tried white chili. I LOVED it. While I was visiting Jaime in October we attempted to make some. It was more soup than it was chili. Since it snowed several inches recently I put white chili on our weekly meal plan. I looked at many recipes and kind of merged some together. It still was on the soupy side but it was thicker. So I guess next time I make it I will achieve a thicker chili!

Ingredients:
1 lb Chicken (I prefer breast, it shreds very easy)
1 can of chicken broth
1 can of Great Northern Beans (drained)
1 or 2 cans of green chilies (with or without tomato, whatever you like!)
1 cup sour cream
1 medium onion, diced
2 or 3 garlic cloves (I like mine minced)
1/4 teaspoon cayenne pepper
Salt
Pepper
Oregano

Place the chicken (raw) in the bottom of the crock pot. Add the onion, beans, chilies, and garlic. Then add the spices. Call it wayward if you so desire but I eyeball spices all the time so do what you want! Except the cayenne pepper...that's hot and I don't do hot so that one I measured. It gave it the perfect amount of kick for me. My husband on the other hand probably would've liked it far more spicy! Let that cook on high for 3-4 hours. At around 2 1/2 hours shred or cube your chicken. It should either be cooked or almost all the way cooked by then. At 3 hours add the sour cream. If you want it thicker I saw some suggestions to put whipping cream in it. I didn't have any on hand so though. Serve once heated through. Garnish with green onion if desired. Serve it with some corn bread to make it a truly homemade meal!


Help! I Have an Ugly Couch

I have an ugly couch. We got it from the thrift store so it has to be ugly apparently. Why don't you cover it you ask? Well it's a recliner sofa and they just don't make slipcovers for those. So I would have to completely recover it. My schedule clears up quite a bit in August (I'm graduating in July!!) so I will have time then to do some recovering. But I want to get it ready now. So what are your thoughts? We're newly weds so spending a bunch of money on fabric isn't really an option. I was thinking maybe buy painter's canvas since it comes in huge sheets and dye it? I don't know...HELP!!

Saturday Breakfast Tradition: German Pancakes and Homemade Syrup

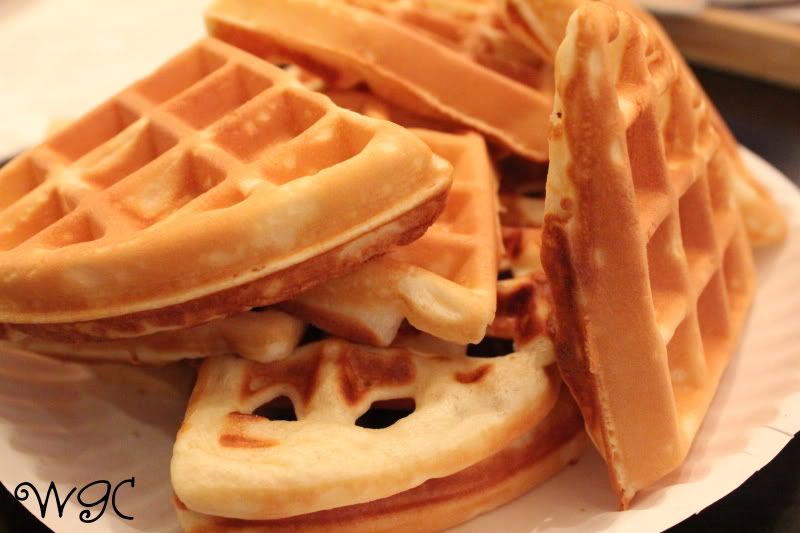
My husband loves cooking breakfast. When he cooks anything he tries to go above and beyond and make it great. We recently started a tradition in our house that on Saturday mornings we have something special for breakfast. It could be Krispy Kreme doughnuts, cinnamon rolls (or pop roll hack), pancakes, scones, waffles, eggs, bacon, or any combination. My hubby recently introduced German Pancakes to me and we have had them at least half a dozen times since. We have tried variations of this recipe and have found it is best to just keep it super simple!

German Pancakes
1/4 cup butter
1 cup flour
1 cup milk
6 eggs
1/8 tsp salt.

Preheat over to 350 degrees. Melt butter in 9 x 13 pan. Thoroughly mix together ingredients in blender and pour in pan. If you double the recipe use two pans! Bake for 30-40 minutes. Enjoy with syrup, powdered sugar, and/or fresh fruit. About 4 servings.
All set!
PB loves them!

We also enjoy this with this recipe for homemade syrup.

Homemade Syrup
1 cup white sugar
1 cup brown sugar
1 cup water
1 tablespoon maple flavoring

Boil sugar and water. Reduce to simmer for 10 minutes. Add maple flavoring and serve. Leftovers should be stored in the refrigerator. We usually put the rest in a mason jar. 

Here are some other great breakfast recipes from the Wayward Girls:


Happy Weekend!

Fried Mozzarella

This has nothing to do with the wedding but I just had to post this! Jaime and her husband were able to spend quite some time at home this year around Christmas and the wedding. One day while we were at the mall Christmas shopping, we decided to grab lunch at Maggiano's. Jaime and her husband ordered fried mozzarella and told me I'd love it. Well....they were right. I hope we get to eat this in Heaven it was so good!! My husband LOVES mozzarella and so do I. Last week I decided to buy some fresh mozzarella with no real plan for it. Yesterday, I thought of the perfect plan! I did some researching on the internet and had to experiment some on my own.

You'll need:
Thick (about a 1/2") slices of mozzarella
1/2 cup Flour
1/2 cup Bread crumbs (plain or Italian)
Italian seasoning (if bread crumbs are plain)
a few tablespoons Vegetable or olive oil

My block of mozzarella was already in a sort of rectangular shape so I just sliced it from top to bottom length wise. Mozzarella doesn't always like to be cut to it wasn't the easiest. But I got a good slice and cut it in half so my husband could have one triangle and I could have the other.

Mix the egg and a little bit of water in a bowl. Put the flour in a separate bowl. And in a third bowl, combine the bread crumbs and some Italian seasoning (we have ours in a grinder so it was fresher). Ok now here's where I didn't follow the recipe all too well and I went wayward. The recipe told me to pat the cheese in flour THEN in the egg wash. Well, what I did was dip the cheese in the egg wash then dipped it in flour. Then I dipped it in the egg wash again which wasn't too easy for it to stick to but I covered that sucker. Then I dipped it in the bread crumbs really patting the crumbs down making sure every inch of the cheese was covered.

Now, in 12-in skillet, add the oil at medium heat. You can heat this up while you're preparing your bowls. Carefully place the coated cheese in the pan. Fry each side for about 2-3 minutes or until golden brown. Do not melt the cheese completely. It will be very soft but not completely melted. If it completely melts it will come out of the breading and get all over your pan. Some cheese may come out and that's fine as long as it's not much :) Now serve with some warm marinara sauce (which I added after the picture) and dig in! SO yummy!


Homemade Gift Ideas

So going along with Jordan's post on Monday, I thought I would post what I'm planning on making this season. I'm keeping it pretty simple.

For our nieces and nephews I'm making one of these per family
Source

and this for our neighbors:


Mosquito Bite Remedy

I am SO sorry I have been slacking on blogging lately. I'm going to school during this summer and it's been crazy these past two weeks as we quickly approach finals.  I'm sorry!!

Mosquito and I have a love/hate relationship. They love me and I hate them. It's grand. When I was a kid I used to be covered in mosquito bites. I got one the other day randomly and I was quite annoyed with it. Strange, I know, most people like the constant itching. So I was complaining about how much my bug bite itched and how badly I wanted to scratch it when my roommate came to the rescue.
This is a great remedy that's super easy. All you need is equal parts water and baking soda.
 It should create a watery paste.


Apply it generously to the bug bite an voila, the itching subsides and it's rather soothing.
 Let it dry and it will come off on it's own or you can remove it with a wet wash cloth making sure not to disturb the bite.

7 Layer Dip

I don't know about you but I love 7 layer dip. When Jordan and I decided to make some we knew we were going to have to improvise some since we didn't have guacamole or tomatoes. There's also tons of ways to make 7 layer dip. Ours turned out delicious.

Ingredients:
Refried beans
Lots and lots of cheese (shredded)
Sour cream
Salsa
Onions
Chives
And anything else you want to throw in there

Really the amount of dip you want to make is up to you. It's a pretty flexible recipe with amounts. The foundation of the dip should be the beans. It's the thickest and holds up the best. You can place some cheese on top of the beans so it will melt when you heat it up. Heat up the beans in the microwave or oven.


Now layer on the salsa, sour cream, more cheese, **onions, chives!


Now serve it with some chips and enjoy!


**We fried the onions for a little bit. Be careful when frying onions a deep fryer or just in oil. The water content in onions is very high and the oil will splash or pop a lot!

Homemade Tortilla Chips

This weekend I visited my sister, Jordan. Over the weekend we decided to make 7 Layer Dip (no worries, that post will come soon.) After we had gone out for some errands we did NOT want to go back out even after we found no chips in the pantry. We did find some tortillas though. Jordan brought out the deep fryer and I cut up the tortillas. They were small (about 6 in. diameter) and the perfect size after cut into sixths or eighths. We cooked them in the fryer until they turned golden.

Jordan's son helped us put them in the oil. Be careful when dropping them into the oil!! It might splash if you drop them in too hard. We only fried about a dozen triangles at a time to avoid overlapping or sticking.

After they turn golden, remove them from the oil onto a plate with a paper towel on it. The paper towel absorbs the excess oil. Sprinkle some salt on them and let them cool. They are super yummy and perfect for dipping!


Caramel and Chocolate Drizzle Chex Mix

I'm a fan of food. Before my first semester of college, I experimented with baking and tried out some new things. One of those new things was homemade Caramel and Chocolate Drizzle Chex Mix (yes, I did just make that name up.) It's one of the recipes I've since repeated and still enjoy. I followed their recipe just for the caramel part and added in the chocolatey goodness.

Ingredients:
8 cups of Chex
3/4 cup packed brown sugar
6 tablespoons butter or margarine (but we all know butter tastes better)
3 tablespoons light corn syrup
1/4 teaspoon baking soda
Chocolate, however much and whatever kind is up to you but you can start with 1/4 of a cup

*You should have a cookie sheet lined with wax paper set aside along with the 8 cups of Chex in a microwaveable bowl.

Here's how we make the deliciousness! In a 2-cup microwaveable measuring cup (or a bowl), microwave brown sugar, butter and corn syrup uncovered on high for 1-2 minutes. Stir after every 1 minute, until melted and smooth. Stir in baking soda until dissolved. Pour over cereal and stir. This is sticky and won't cover everything but don't worry! Take the bowl of coated cereal and microwave on high for 3 minutes, also stirring after every 1 minute. I found that using 2 wooden spoons, greased, helped mix everything and reduced spilling.  Now spread the evenly coated Chex onto the cookie sheet lined with wax paper. Spread out the pieces to avoid large clumps. Break apart any large clumps.

In a small microwaveable bowl, heat the chocolate. Either dip the pieces in or drizzle over cereal with a spoon. Let everything set and cool. Then, enjoy!

(This is dipped instead of drizzle)

For more Chex Mix recipes check out their website.

Home Made Apple Pie

Happy Cinco de Mayo! I didn't realize it was Cinco de Mayo for a while today. So to celebrate, why not a good old fashion American delight?
I like to do things that require the least amount of ingredients! I found some recipes online and had some fun with them in making apple pie.

What you'll need:
  • 2 Mixing Bowls (one for the crust and one for the filling)
  • Rolling pin
  • Knife
  • Measuring spoons
  • Measuring Cups
  • Dough Blender
  • Cutting Board
  • 9 inch Pie Pan

Pie Filling:
  • 3/4 cup light brown sugar
  • 1/4 cup all-purpose flour
  • 3/4 teaspoon ground cinnamon, plus more for sprinkling
  • Freshly ground nutmeg, to taste
  • 7 medium apples, peeled, cored and thinly sliced
  • 1 lemon, zested and juiced

Mix together the brown sugar, flour, cinnamon, and nutmeg in a small bowl. In another bowl, sprinkle apples with the juice of 1 lemon and toss. Stir in the sugar mixture to evenly coat the apples.
**I found that thinner apple slices are better. They're better in the texture after baking and look more like a classic apple pie. Also, the more tart the apple is, the better. I recommend using Granny Smith apples.

Pie Crust:
  • 2 cups all-purpose flour
  • I teaspoon salt
  • 1 tablespoon sugar
  • 6 tablespoons butter
  • 6 tablespoons shortening
  • 6 to 8 tablespoons ice water


Preheat the oven to 400 degrees

In a large bowl mix the flour, salt and sugar. Then using a dough blender to mix in the butter, shortening and ice water.

Next, chill the dough.
**Great time to make the pie filling!

After the dough has chilled, cut it into two halves. One will be for the top and the other for the bottom. Set aside one half and roll out the other until it is about 1/8th of an inch thick.

Here’s the tricky part. Once you have rolled out one half of the dough, wrap it around the rolling pin to transfer it to the pie pan. Unwrap it into the pan. Shape and fit the dough into the pans making sure it covers the bottom and sides of the pan well. Take a fork and poke holes in the bottom of the pie crust so it cooks evenly.
**I found out this tip after I made my first pie. Saves in time and mess and it's super easy!

Now put the filling into the pie crust. Roll out the other half of the pie crust. You can do any sort of pattern you want with the crust. My lattice work isn't the best but practice makes perfect. We’re almost ready to bake!
**If you want to do an over under (lattice) crust, use a straight edge when you cut so your strips don't look like mine when you're done :)

Before you bake the pie, take tin foil and cover the edges of the pie. This makes sure the edges don’t burn. Bake for 50-60 minutes or until golden brown. Take off the tin foil 10 minutes before the pie is done.

And just like that, you have homemade apple pie!


Sources:
Filling, Crust

**Don't forget about this week's giveaway!

We've got the craft organizer up for grabs,

  1. Be a follower of the blog AND
  2. Comment on any new post this week (before the end of Sunday).

Every comment is another entry, and every post this week is eligible! The winner, to be drawn at random, will be announced next Monday!
Related Posts Plugin for WordPress, Blogger...