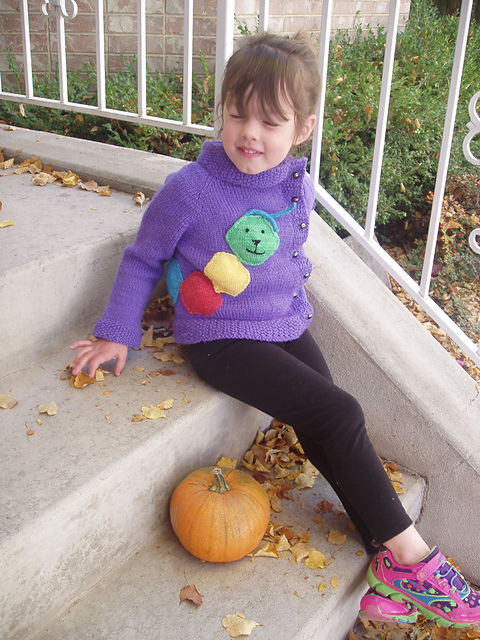
Last year I made sweaters for everyone in my family (except me...). My four-year-old's lovey is a multicolored caterpillar we call Cally. I wanted to incorporate it into her sweater to make it personal and unique for her: a Calli-Cardi!
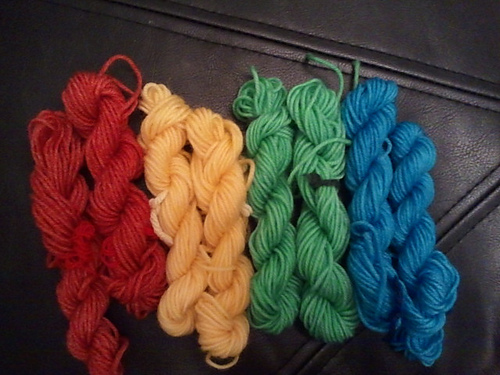
I looked for a cardigan with an off-center opening to maximize the room for the caterpillar on the front. As with my six-year-old's sweater, I knew I didn't want to buy five colors of yarn to only use a little of most of them so I dyed the caterpillar colors:
Each hank was about 14 yards; the eight of them together weighed about 36g.To dye them, I used food safe colors in Mason jars on the microwave (but that's another post!).
Red: one packet of cherry Kool-aid
Yellow: about five drops of yellow McCormick's food coloring (and white vinegar)
Green: about five drops of green McCormick's food coloring (and white vinegar)
Blue: one packet of mixed berry blue Kool-aid.
Originally I planned to work the caterpillar design as part of the sweater itself using the intarsia method of colorwork, but I realized that would be a big challenge, especially with two different weights (thicknesses) of yarn. So I made the cardigan normally and then knit hexagons to appliqué the caterpillar on.
I left an extra long tail on the end of each hexagon and used the tails to sew the caterpillar onto the sweater. I used backstitch in black yarn to make the caterpillar's face and short i-cords to make his antennae.
As you can see, she loves it!
For pattern notes, modifications and in-progress photos, see this project on Ravelry!
Cardigan Pattern: Peach Blossom Child Jacket by Jennifer Little
Cardigan Yarn: Cleckheaton Country Kids 8-ply (superwash wool in DK/8-ply weight) in purple
Caterpillar Pattern: Merit badge by Amanda Ochocki
Caterpillar Yarn: Knit Go Craft Super Soft Cashmere Wool in white (cream), hand dyed (claims to be DK weight but knit up more like fingering weight)

Showing posts with label Clothing. Show all posts
Showing posts with label Clothing. Show all posts

Calli-Cardi! Sweater with a caterpillar

Posted by
Jordan McCollum
at
10:59 AM
No comments
:
 Labels:
applique
,
Baby & Kids
,
cardigan
,
clothes
,
Clothing
,
Dye
,
dyeing clothing
,
Jordan
,
knitting
,
sweater

Sweater of many (custom!) colors
I've been way too quiet here on the blog lately, but not for lack of crafting! I've got a lot of things I keep meaning to share, but I'm so happy with this one, I had to make the time to blog.
Cast on: Sept 21
Finished: Oct 8
Pattern: Jolie Fleur from DROPS design.
Yarn: Knit Picks Wool of the Andes Sport in Rouge and White
That's right: the only two colors of yarn I purchased for this were the dark pink of the body and the white. The other colors were dyed on the white using McCormick food coloring and Kool Aid!
Dyeing yarn with these is not only easy (and awesome!) but completely food safe, so you can use your regular pots and pans, and it's okay to use them for food afterwards. (I actually used Mason jars in the microwave...) Kool Aid contains enough citric acid to "set" the food dyes on animal fibers (wool, alpaca, silk) and nylon. Food coloring requires additional acid, and I used vinegar. The only other thing you have to do is heat it enough and the yarn soaks the dye right up--but this is probably a post for another day!
I ran out of all the colors I'd dyed as well as the white and had to order and dye more. Fortunately, I'd kept careful notes of the dye formulas I'd used. Unfortunately, I lost those notes. But I was able to remember it pretty well!
I absolutely love how this turned out. But the best part is how much my daughter loves it. She came up to me while I was finishing it and spontaneously told me, "Thank you for working so hard on my sweater." And that makes it even more worth it.
Lots more information on the project and especially progress photos: Project on Ravelry
Cast on: Sept 21
Finished: Oct 8
Pattern: Jolie Fleur from DROPS design.
Yarn: Knit Picks Wool of the Andes Sport in Rouge and White
That's right: the only two colors of yarn I purchased for this were the dark pink of the body and the white. The other colors were dyed on the white using McCormick food coloring and Kool Aid!
- Light pink (it's in there): McCormick Neon Pink
- Yellow: McCormick Yellow
- Green: McCormick Green
- Blue: Ice Blue Raspberry Lemonade Kool Aid
- Purple: McCormick Neon Purple and McCormick Neon Blue, 2:1.
Dyeing yarn with these is not only easy (and awesome!) but completely food safe, so you can use your regular pots and pans, and it's okay to use them for food afterwards. (I actually used Mason jars in the microwave...) Kool Aid contains enough citric acid to "set" the food dyes on animal fibers (wool, alpaca, silk) and nylon. Food coloring requires additional acid, and I used vinegar. The only other thing you have to do is heat it enough and the yarn soaks the dye right up--but this is probably a post for another day!
I ran out of all the colors I'd dyed as well as the white and had to order and dye more. Fortunately, I'd kept careful notes of the dye formulas I'd used. Unfortunately, I lost those notes. But I was able to remember it pretty well!
I absolutely love how this turned out. But the best part is how much my daughter loves it. She came up to me while I was finishing it and spontaneously told me, "Thank you for working so hard on my sweater." And that makes it even more worth it.
Lots more information on the project and especially progress photos: Project on Ravelry

Posted by
Jordan McCollum
at
10:00 AM
2 comments
:
 Labels:
Baby & Kids
,
Clothing
,
Dye
,
dyeing clothing
,
Jordan
,
knitting

Legging Embellishments with DIY knee patches
I decided to tackle a few of the things in my "to mend" pile this week. On top was a cute pair of hot pink leggings with little holes in the knees. I debated cutting them off at the knee or putting on patches which won out in the end.
I found some brown and white polka dot fabric that looked so cute with the pink.
I found some brown and white polka dot fabric that looked so cute with the pink.
What I used:
Scrap fabric and paper
iron
Heat n Bond sewable adhesive
I first cut the shape I wanted out of the scrap paper to use as a pattern. I cut a piece of fabric and heat n bond slightly bigger than the pattern and ironed on the adhesive to the fabric. I then cut the shape out of the fabric. Ta da! Patches!
I ironed the patches onto the leggings. The heat slightly discolored the fabric but it went back to normal once it cooled. This was the tricky part. You can get heat n bond that is a little more heavy duty and may stay a little better but I used lite and it needed to be stitched around.
I used my seam ripper on seam on the inside of each leg about an inch above to an inch below the patch on either leg. With the other side of the pants pulled away I used a zig zag stitch and sewed around each patch twice. I then sewed up the open seams and voila!
How cute did these turn out?! Too bad they are in the size in between both my girls right now!!

Posted by
Brave Brooke
at
7:00 AM
1 comment
:
 Labels:
Baby & Kids
,
baby clothes
,
Brave Brooke
,
Clothing
,
patches

Oversized T-Shirt Upcycling
Today is my baby girl's birthday!! What a sweet blessing this little girl has been to us! Happiest of birthdays KZ!!
Remember how I've taken a couple of my husbands shirts and made them into shirts for me? See here and here.
Well I did it again! My husband needed a pack of black tshirts for work and he had a few left over from the package he bought so I used one to make into a shirt for me!
Here is a list of the things I did to the shirt. I'm sorry I don't have more photos of the process this shirt has been a work in progress for many months (like since February!!).
- Remove the pocket. You can't see it in the picture but this was done with a seam ripper.
- Trace around shape of existing shirt onto new shirt+seam and stretch allowance (which I never do enough of)
- Cut off collar and made new shape.
- Sew up new sides.
- Take existing black fabric and make collar. I didn't have quite enough from the cut edges so I had to use some from a different project. I cut the fabric about an inch wide to the shape of the collar. I sewed right sides together and flipped the fabric inside the shirt. I then sewed around the edge of the whole collar.
- I used the scraps from the tshirt to make flowers next to the collar.
- I added two box pleats to the collar to make it lay flat.
- I tried it on and it was too tight! I told you I never allowed enough seam and stretch allowance!
- I cut up the middle of the whole back of the shirt. I got 4" wide black lace and sewed it inside the cut. I tapered it at the top and sewed a hem on the bottom.
Step 9 is then I put on some dark lipstick and went to take pictures. I got all set up and then noticed my neighbor was also in his backyard. Hey there new neighbor! Don't mind me posing in my backyard!
Have you done any upcycling lately? Do you have any great plans for the weekend?
Tomorrow morning my husband is repelling down a HUGE building for the Special Olympics and in the afternoon (and on Sunday) we'll be watching General Conference!
Hope you have a great weekend!
p.s. I'll give you a dollar if you can spot the birthday girl in one of these pictures...j/k I won't be giving any dollars out but look back and see if you can spot her little blonde head in there :)
p.s. I'll give you a dollar if you can spot the birthday girl in one of these pictures...j/k I won't be giving any dollars out but look back and see if you can spot her little blonde head in there :)


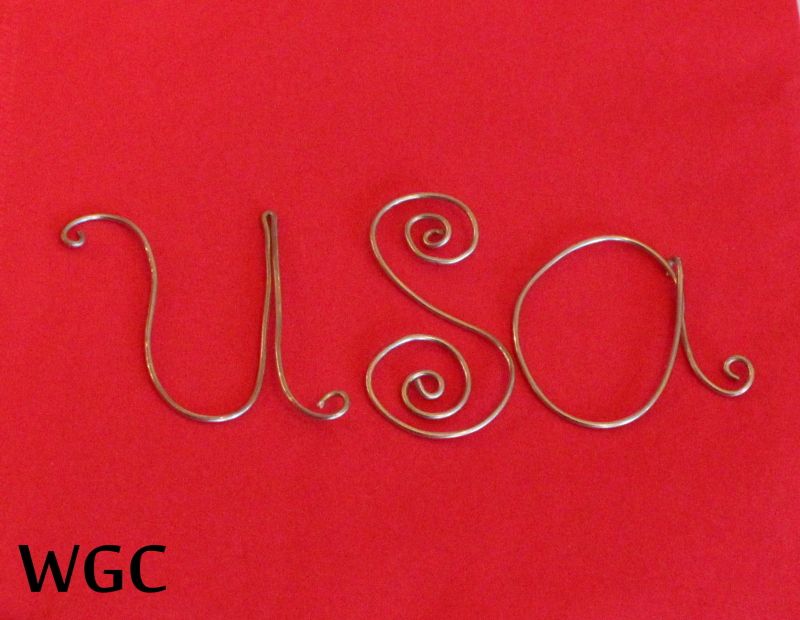
Independence Day crafts from WGC!
We're always very excited to celebrate Independence Day. Here are some of the Americana-themed crafts we've shared!
I think we'll be doing this for Make it Monday!
What will you make for Independence Day?

Posted by
Jordan McCollum
at
6:30 AM
No comments
:
 Labels:
baby
,
Baby & Kids
,
Clothing
,
Fourth of July
,
gathers
,
Holidays and Entertaining
,
home decor
,
Jordan
,
ruffles
,
sewing
,
tutorial
,
upcycle

Kids' Towel Coverup: the Wayward Way!
As part of my Summer Sewing Spree two years ago, I made . . .
I found this adorable terry towel coverup for kids, and I fully intended to sew something equally cute for my daughters. But a major time crunch hit and I ended up having to go the super-fast route. So here's thequick and dirty wayward way to make a cute, fast towel coverup for a child, boy or girl.
Step 1: Measure!
You'll need two (or three) measurements. The first is width around the chest (girls) or waist (boys). You'll want to add at least four inches for overlap. If you want to use elastic in the back (I recommend this for boys, but it doesn't seem to affect my girls'), you'll want to add more width to account for the gathering. Decide how long you want the elastic to be, then add that to the width. Remember this one, too! (Also keep in mind that the elastic will need to fall between the shoulder straps for girls.)
The second measurement is length--for girls, that's from underarm to however long you want the cover up to be (mid-thigh or knee length works well); for boys, that's from waist to the bottom of his swim trunks. (Which is often not his knees. Don't make the same mistake as me!)
Step 2: Materials!
You'll need:
Use your measurements to trim down a towel. Towels can be hard to cut, so I would use scissors or a rotary cutter to get through the hem, then rip the towel.
Many towels have decorative weaving near the ends. I cut out the towel between these lines, and save the weaving to form the straps. I also kept the top hem intact.
Step 4: Cut the fabric!
Add 4" to your width and 4" to the length of your rectangle (I added 2" to my length and used the selvage to form the long top edge on some of the pieces), then cut out a piece of fabric that size.
Step 5: Sew them together!
Center the towel on the fabric, wrong sides together (ff your towel has a wrong side). (If you're using the selvage on top, make sure the top edges of the fabrics align.) Fold over the edge of the fabric to meet the edge of the towel, and press. Then fold that folded edge of the fabric again, overlapping the edge of the towel:
Sew along the folded edge where it overlaps the towel (indicated by a dashed line above)--but do not sew the top edge of the fabric to the towel! (You can, however, sew the hem of just the fabric along the top if you're not using the selvage.)
Step 6: Place the elastic! (May be optional for girls; didn't really make a difference for mine)
Remember the elastic measurement we used in step 1? We need it again. Cut that length of elastic. If you want the finished product to have 4" elasticized, we need to work with 8" of fabric. Find the center of the towel & fabric, and measure out 4" (or whatever your chosen # is) on either side. Mark both of these points.
Pin either end of the elastic between the towel and the fabric at the points you've marked. Sew in the elastic (more details here).
Step 7 (girls only): Place the straps!
Either cut 2" strips from the towel remnant, or get the decorative woven strips you saved earlier. If you placed elastic in, pin the straps between the fabric and towel on either side of the elastic. Otherwise, you might want to have your child try on the cover up to determine the best placement and length for the straps.
Measure the strap length twice!
Sew the straps in place between the towel and the fabric. (You can use a reinforced box stitch pattern for this if you'd like.)
Step 8: Velcro/snaps and finish!
If you're very picky, you might want to sew the Velcro or snaps on the front flap to only the towel, so that the sewing lines don't show through. But let's face it, if you were very picky, you wouldn't be doing it the wayward way, would you?
Place the Velcro or snaps on the front flaps. Remember that the inner flap will have the Velcro on the outside (fabric side)! Sew in place. Sew any unfinished edges along the top. And voila!
Wayward Kids' Towel Coverups!
I found this adorable terry towel coverup for kids, and I fully intended to sew something equally cute for my daughters. But a major time crunch hit and I ended up having to go the super-fast route. So here's the
Step 1: Measure!
You'll need two (or three) measurements. The first is width around the chest (girls) or waist (boys). You'll want to add at least four inches for overlap. If you want to use elastic in the back (I recommend this for boys, but it doesn't seem to affect my girls'), you'll want to add more width to account for the gathering. Decide how long you want the elastic to be, then add that to the width. Remember this one, too! (Also keep in mind that the elastic will need to fall between the shoulder straps for girls.)
The second measurement is length--for girls, that's from underarm to however long you want the cover up to be (mid-thigh or knee length works well); for boys, that's from waist to the bottom of his swim trunks. (Which is often not his knees. Don't make the same mistake as me!)
Step 2: Materials!
You'll need:
- A towel at least as big as the rectangle formed from your measurements.
- A piece of cute fabric 4" wider and 2-4" longer than your measurements.
- Sewable Velcro (or snaps)
- Elastic (may be optional for girls' coverups; at least 3/8" wide)
- Thread
- Pins
- Scissors or rotary cutter
- Iron
- Sewing machine
Use your measurements to trim down a towel. Towels can be hard to cut, so I would use scissors or a rotary cutter to get through the hem, then rip the towel.
Many towels have decorative weaving near the ends. I cut out the towel between these lines, and save the weaving to form the straps. I also kept the top hem intact.
Step 4: Cut the fabric!
Add 4" to your width and 4" to the length of your rectangle (I added 2" to my length and used the selvage to form the long top edge on some of the pieces), then cut out a piece of fabric that size.
Step 5: Sew them together!
Center the towel on the fabric, wrong sides together (ff your towel has a wrong side). (If you're using the selvage on top, make sure the top edges of the fabrics align.) Fold over the edge of the fabric to meet the edge of the towel, and press. Then fold that folded edge of the fabric again, overlapping the edge of the towel:
Sew along the folded edge where it overlaps the towel (indicated by a dashed line above)--but do not sew the top edge of the fabric to the towel! (You can, however, sew the hem of just the fabric along the top if you're not using the selvage.)
Step 6: Place the elastic! (May be optional for girls; didn't really make a difference for mine)
Remember the elastic measurement we used in step 1? We need it again. Cut that length of elastic. If you want the finished product to have 4" elasticized, we need to work with 8" of fabric. Find the center of the towel & fabric, and measure out 4" (or whatever your chosen # is) on either side. Mark both of these points.
Pin either end of the elastic between the towel and the fabric at the points you've marked. Sew in the elastic (more details here).
 |
| Last year's coverup almost fits this year... |
Either cut 2" strips from the towel remnant, or get the decorative woven strips you saved earlier. If you placed elastic in, pin the straps between the fabric and towel on either side of the elastic. Otherwise, you might want to have your child try on the cover up to determine the best placement and length for the straps.
Measure the strap length twice!
Sew the straps in place between the towel and the fabric. (You can use a reinforced box stitch pattern for this if you'd like.)
Step 8: Velcro/snaps and finish!
If you're very picky, you might want to sew the Velcro or snaps on the front flap to only the towel, so that the sewing lines don't show through. But let's face it, if you were very picky, you wouldn't be doing it the wayward way, would you?
Place the Velcro or snaps on the front flaps. Remember that the inner flap will have the Velcro on the outside (fabric side)! Sew in place. Sew any unfinished edges along the top. And voila!

Posted by
Jordan McCollum
at
7:00 AM
1 comment
:
 Labels:
Baby & Kids
,
bath
,
beach
,
clothes
,
Clothing
,
cover up
,
Holidays and Entertaining
,
Jordan
,
kids
,
sewing
,
summer
,
towel
,
tutorial

Heart Stamped Shirt
Last weekend was my big Valentine's Day party! Last year I dyed my own pants. This year I decided to decorate a shirt using fabric ink.
Materials:
Shirt
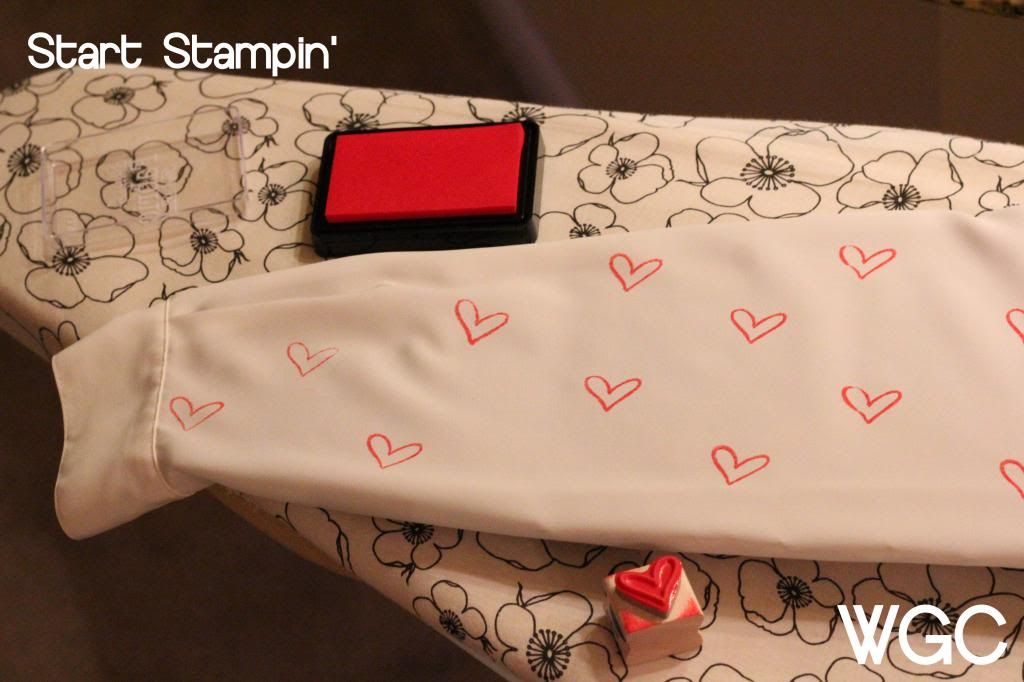
Stamp
Fabric Ink Pad (Mine was from Hobby Lobby, $3.99)
Cardboard
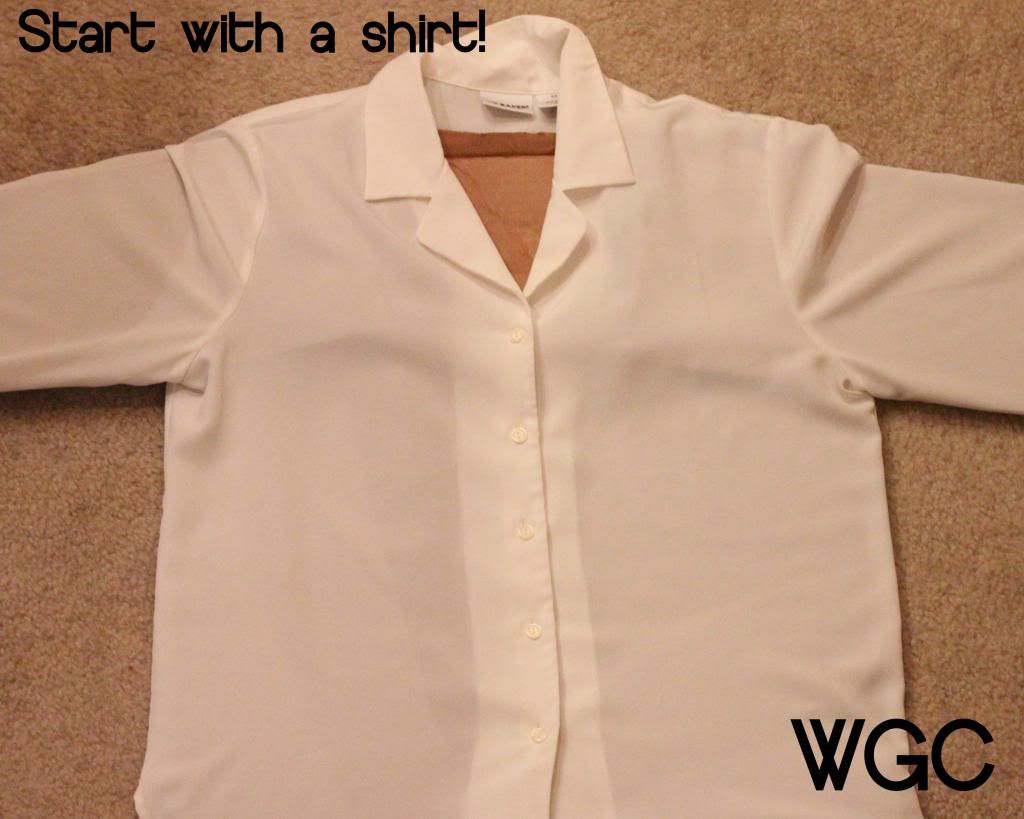
First step, get a shirt. I picked up this beauty at Goodwill:
This is how I wore it to the party.
Materials:
Shirt
Stamp
Fabric Ink Pad (Mine was from Hobby Lobby, $3.99)
Cardboard
First step, get a shirt. I picked up this beauty at Goodwill:
This shirt is 100% polyester, although the ink says it works best with natural fibers.
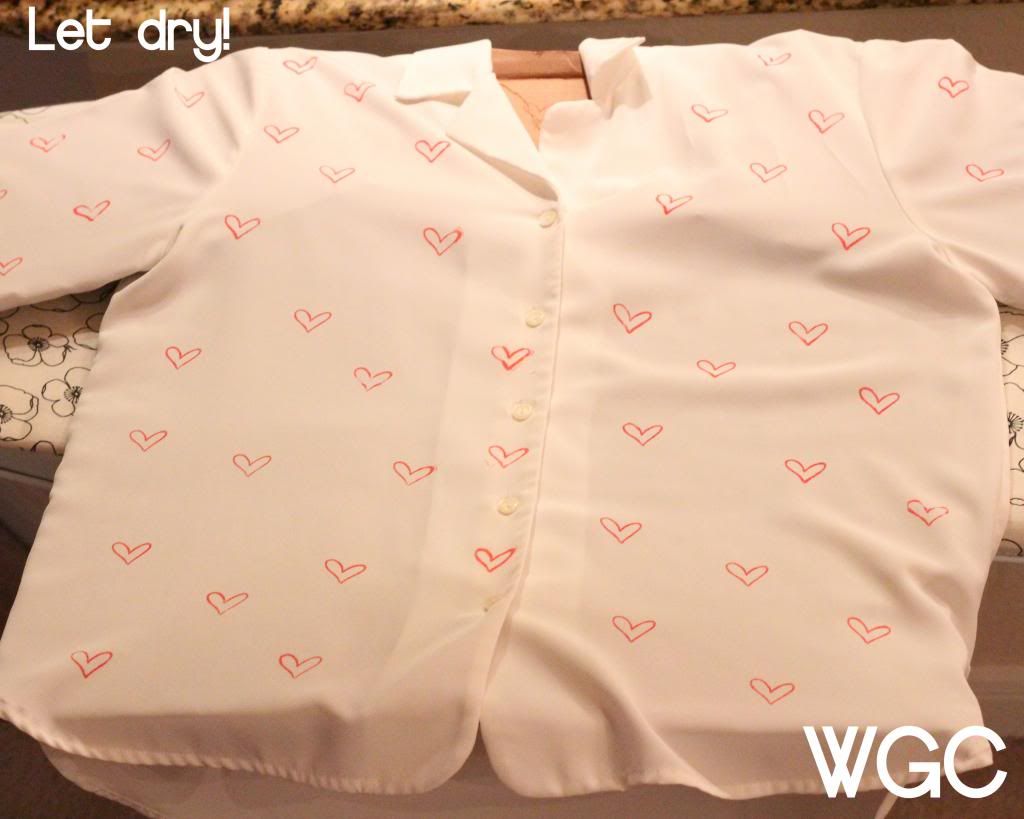
As you can see, I placed cardboard in the shirt and sleeves to separate the layers. This is an important step! If you don't do it, you'll be stamping through both sides.
I flew by the seat of my pants on this (and always, I'm wayward) and just started on the sleeve. If I were to do it again, I'd start on the back side. It went quickly and I was quite excited with the results.
I let the shirt dry overnight and then used a hot, dry iron to "set" the stamping, as recommended on the back of the stamp pad. Then I flipped the shirt over and completed the same thing on the back side.
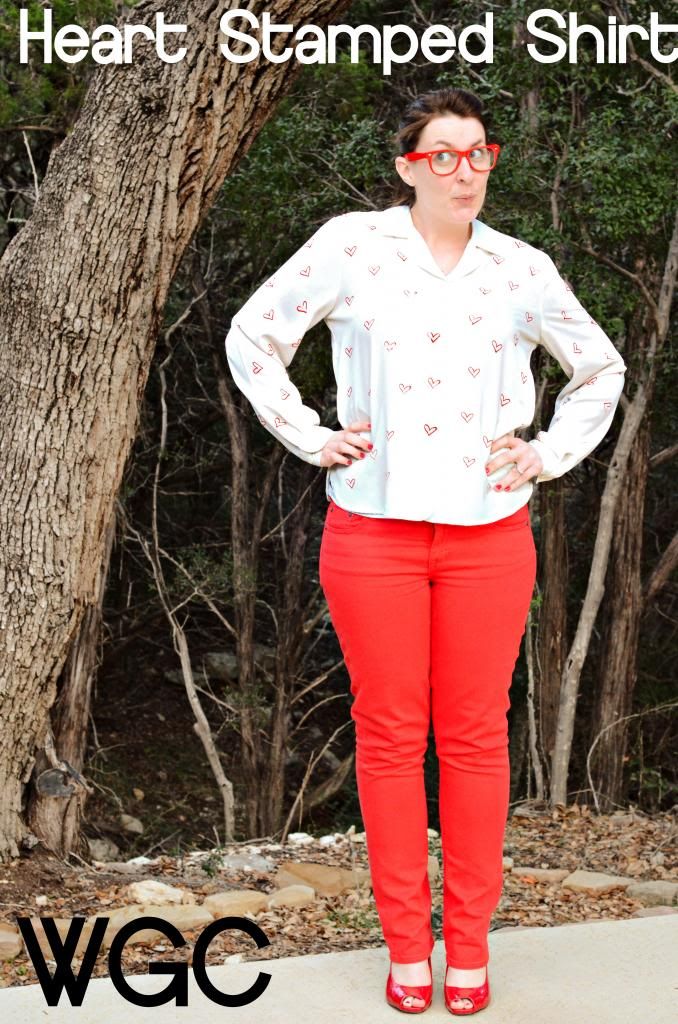
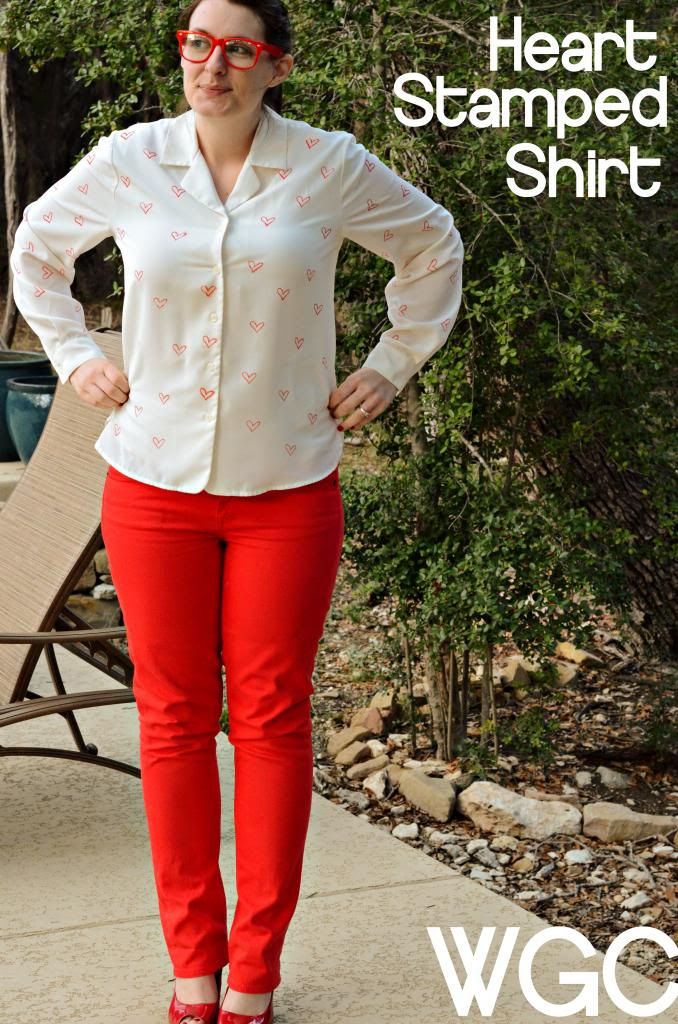
This is how it turned out!
This is how it turned out!
This is how I wore it to the party.
make animated gifs like this at MakeAGif
Not bad, eh? Best compliments: people didn't believe I'd done design! I had to show them my little mess ups to prove it to them.
The possibilities are endless for shirts! I'm thinking about having a little craft night with friends to do it all over again!

Posted by
Just Jaime
at
6:30 AM
6 comments
:
 Labels:
clothes
,
Clothing
,
fabric stamp
,
fabric stamping
,
Just Jaime
,
shirt
,
stamps
,
tutorial

Kids' Towel Coverup: the Wayward Way!
As part of my Summer Sewing Spree last year, I made sunhats for my daughters, a sunhat for me and . . .
I found this adorable terry towel coverup for kids, and I fully intended to sew something equally cute for my daughters. But a major time crunch hit and I ended up having to go the super-fast route. So here's thequick and dirty wayward way to make a cute, fast towel coverup for a child, boy or girl.
Step 1: Measure!
You'll need two (or three) measurements. The first is width around the chest (girls) or waist (boys). You'll want to add at least four inches for overlap. If you want to use elastic in the back (I recommend this for boys, but it doesn't seem to affect my girls'), you'll want to add more width to account for the gathering. Decide how long you want the elastic to be and double that for the fabric, then add that to the width. Remember this one, too! (Also keep in mind that the elastic will need to fall between the shoulder straps for girls.)
The second measurement is length--for girls, that's from underarm to however long you want the cover up to be (mid-thigh or knee length works well); for boys, that's from waist to the bottom of his swim trunks. (Which is often not his knees. Don't make the same mistake as me!)
Step 2: Materials!
You'll need:
Use your measurements to trim down a towel. Towels can be hard to cut, so I would use scissors or a rotary cutter to get through the hem, then rip the towel.
Many towels have decorative weaving near the ends. I cut out the towel between these lines, and save the weaving to form the straps. I also kept the top hem intact.
Step 4: Cut the fabric!
Add 4" to your width and 4" to the length of your rectangle (I added 2" to my length and used the selvage to form the long top edge on some of the pieces), then cut out a piece of fabric that size.
Step 5: Sew them together!
Center the towel on the fabric, wrong sides together (ff your towel has a wrong side). (If you're using the selvage on top, make sure the top edges of the fabrics align.) Fold over the edge of the fabric to meet the edge of the towel, and press. Then fold that folded edge of the fabric again, overlapping the edge of the towel:
Sew along the folded edge where it overlaps the towel (indicated by a dashed line above)--but do not sew the top edge of the fabric to the towel! (You can, however, sew the hem of just the fabric along the top if you're not using the selvage.)
Step 6: Place the elastic! (May be optional for girls; didn't really make a difference for mine)
Remember the elastic measurement we used in step 1? We need it again. Cut that length of elastic. If you want the finished product to have 4" elasticized, we need to work with 8" of fabric. Find the center of the towel & fabric, and measure out 4" (or whatever your chosen # is) on either side. Mark both of these points.
Pin either end of the elastic between the towel and the fabric at the points you've marked. Sew in the elastic (more details here).
Step 7 (girls only): Place the straps!
Either cut 2" strips from the towel remnant, or get the decorative woven strips you saved earlier. If you placed elastic in, pin the straps between the fabric and towel on either side of the elastic. Otherwise, you might want to have your child try on the cover up to determine the best placement and length for the straps.
Measure the strap length twice!
Sew the straps in place between the towel and the fabric. (You can use a reinforced box stitch pattern for this if you'd like.)
Step 8: Velcro/snaps and finish!
If you're very picky, you might want to sew the Velcro or snaps on the front flap to only the towel, so that the sewing lines don't show through. But let's face it, if you were very picky, you wouldn't be doing it the wayward way, would you?
Place the Velcro or snaps on the front flaps. Remember that the inner flap will have the Velcro on the outside (fabric side)! Sew in place. Sew any unfinished edges along the top. And voila!
Wayward Kids' Towel Coverups!
I found this adorable terry towel coverup for kids, and I fully intended to sew something equally cute for my daughters. But a major time crunch hit and I ended up having to go the super-fast route. So here's the
Step 1: Measure!
You'll need two (or three) measurements. The first is width around the chest (girls) or waist (boys). You'll want to add at least four inches for overlap. If you want to use elastic in the back (I recommend this for boys, but it doesn't seem to affect my girls'), you'll want to add more width to account for the gathering. Decide how long you want the elastic to be and double that for the fabric, then add that to the width. Remember this one, too! (Also keep in mind that the elastic will need to fall between the shoulder straps for girls.)
The second measurement is length--for girls, that's from underarm to however long you want the cover up to be (mid-thigh or knee length works well); for boys, that's from waist to the bottom of his swim trunks. (Which is often not his knees. Don't make the same mistake as me!)
Step 2: Materials!
You'll need:
- A towel at least as big as the rectangle formed from your measurements.
- A piece of cute fabric 4" wider and 2-4" longer than your measurements.
- Sewable Velcro (or snaps)
- Elastic (may be optional for girls' coverups; at least 3/8" wide)
- Thread
- Pins
- Scissors or rotary cutter
- Iron
- Sewing machine
Use your measurements to trim down a towel. Towels can be hard to cut, so I would use scissors or a rotary cutter to get through the hem, then rip the towel.
Many towels have decorative weaving near the ends. I cut out the towel between these lines, and save the weaving to form the straps. I also kept the top hem intact.
Step 4: Cut the fabric!
Add 4" to your width and 4" to the length of your rectangle (I added 2" to my length and used the selvage to form the long top edge on some of the pieces), then cut out a piece of fabric that size.
Step 5: Sew them together!
Center the towel on the fabric, wrong sides together (ff your towel has a wrong side). (If you're using the selvage on top, make sure the top edges of the fabrics align.) Fold over the edge of the fabric to meet the edge of the towel, and press. Then fold that folded edge of the fabric again, overlapping the edge of the towel:
Sew along the folded edge where it overlaps the towel (indicated by a dashed line above)--but do not sew the top edge of the fabric to the towel! (You can, however, sew the hem of just the fabric along the top if you're not using the selvage.)
Step 6: Place the elastic! (May be optional for girls; didn't really make a difference for mine)
Remember the elastic measurement we used in step 1? We need it again. Cut that length of elastic. If you want the finished product to have 4" elasticized, we need to work with 8" of fabric. Find the center of the towel & fabric, and measure out 4" (or whatever your chosen # is) on either side. Mark both of these points.
Pin either end of the elastic between the towel and the fabric at the points you've marked. Sew in the elastic (more details here).
 |
| Last year's coverup almost fits this year... |
Either cut 2" strips from the towel remnant, or get the decorative woven strips you saved earlier. If you placed elastic in, pin the straps between the fabric and towel on either side of the elastic. Otherwise, you might want to have your child try on the cover up to determine the best placement and length for the straps.
Measure the strap length twice!
Sew the straps in place between the towel and the fabric. (You can use a reinforced box stitch pattern for this if you'd like.)
Step 8: Velcro/snaps and finish!
If you're very picky, you might want to sew the Velcro or snaps on the front flap to only the towel, so that the sewing lines don't show through. But let's face it, if you were very picky, you wouldn't be doing it the wayward way, would you?
Place the Velcro or snaps on the front flaps. Remember that the inner flap will have the Velcro on the outside (fabric side)! Sew in place. Sew any unfinished edges along the top. And voila!

Posted by
Jordan McCollum
at
10:37 AM
3 comments
:
 Labels:
Baby & Kids
,
bath
,
beach
,
clothes
,
Clothing
,
cover up
,
Holidays and Entertaining
,
Jordan
,
kids
,
sewing
,
summer
,
towel
,
tutorial

Modest makeover: 50¢ shirred maxi dress!
I seldom get up early enough to go yard saling, but a few weeks ago, our church and our school were holding yard sales just a couple blocks apart, so our family made an effort to hit them both. One of the things we picked up was a cute shirred-top dress. The back tag was ripped out, but I suspect it's not really supposed to be a little girl's maxi dress (probably a medium girl's knee-length dress?).
It was a little big for my daughter (and I wouldn't let her wear a strapless dress to church)(especially not one that would fall down!), so I wanted to add sleeves to help it fit her better.
Matching the fabric wasn't an issue: the tiered skirt also had another layer of the same fabric underneath.
I had my daughter try on the dress, and I measured from the side seam to what seemed like a good point in the front to get the width, about 4 inches. I made sure that width would cover her shoulders, too. Using a rotary cutter, I cut 4 inches off the bottom part of the underlayer of the skirt. The fabric is a gauzy-type cotton weave, so I did a fake overlock stitch (a zigzag stitch along the edge) to minimize fraying.
I took my extra fabric and cut it in four pieces. Then I failed to pin right sides together and totally messed up sewing those pieces together. (Hooray! Wayward! As if breaking yet another needle wasn't wayward enough!) I wanted to make a double-wide fabric so I could gather it to help match the dress, and I would use the presewn rolled hems instead of having to sew my own. But I wasn't careful about which way the hems were facing, and three of them ended up facing out. (Seriously?!)
 I gathered the ends of the sleeves and sewed them along the top edge of the front, then had another fitting with my daughter to get them the right length before sewing them in the back. (I mean, I wish I'd done it that way. I really kept it all pinned during the fitting and it was a big hassle.)
My daughter is happy with the result (but she wasn't happy I interrupted her during her favorite show to take pictures!). When I wash it, the gathers will take on the same wrinkly appearance as the rest of the dress. I love that they totally look like they belong, and it was WAY easier than cutting out a real sleeve pattern and all that entails.
Best of all, total bill for the project: $0.50!
What are your weekend thrifting finds?
It was a little big for my daughter (and I wouldn't let her wear a strapless dress to church)(especially not one that would fall down!), so I wanted to add sleeves to help it fit her better.
Matching the fabric wasn't an issue: the tiered skirt also had another layer of the same fabric underneath.
I had my daughter try on the dress, and I measured from the side seam to what seemed like a good point in the front to get the width, about 4 inches. I made sure that width would cover her shoulders, too. Using a rotary cutter, I cut 4 inches off the bottom part of the underlayer of the skirt. The fabric is a gauzy-type cotton weave, so I did a fake overlock stitch (a zigzag stitch along the edge) to minimize fraying.
I took my extra fabric and cut it in four pieces. Then I failed to pin right sides together and totally messed up sewing those pieces together. (Hooray! Wayward! As if breaking yet another needle wasn't wayward enough!) I wanted to make a double-wide fabric so I could gather it to help match the dress, and I would use the presewn rolled hems instead of having to sew my own. But I wasn't careful about which way the hems were facing, and three of them ended up facing out. (Seriously?!)
 I gathered the ends of the sleeves and sewed them along the top edge of the front, then had another fitting with my daughter to get them the right length before sewing them in the back. (I mean, I wish I'd done it that way. I really kept it all pinned during the fitting and it was a big hassle.)
My daughter is happy with the result (but she wasn't happy I interrupted her during her favorite show to take pictures!). When I wash it, the gathers will take on the same wrinkly appearance as the rest of the dress. I love that they totally look like they belong, and it was WAY easier than cutting out a real sleeve pattern and all that entails.
Best of all, total bill for the project: $0.50!
What are your weekend thrifting finds?
Subscribe to:
Posts
(
Atom
)

