Showing posts with label home decor. Show all posts

Dollar Store Craft: custom geometric vases

A few months ago, I found some great glass vases at the Dollar Store. I filled them with free seasonal decor. When we moved, I had to find a new place for my vases, and the best place was in the living room. But I needed five more vases.

Rather than filling them all again, I decided I wanted to paint them to match our new living room decor. I picked up some acrylic paint and masking tape ($2 and $1, respectively) and sat down to make some awesome designs with the tape. 

I turned this into a kids' craft, too, because I laid out the newspaper and let my kids loose with the foam brushes!


Some tips on getting this right:
  • Use (at least) two coats of paint, and allow the paint to dry fully between coats.
  • Apply the second coat carefully and quickly, and lay it on thick. Try not to paint an area more than once. If you don't, the paint will ripple and pull off!
  • You can use the acrylic enamel made for glass--it'll be dishwasher safe and it might work better, but I don't know how well it works with masking tape.
  • Be careful when pulling off the tape! The acrylic doesn't want to adhere, especially at the point of diamonds or triangles. If I did it over again, I wouldn't do those shapes. A razor blade can be helpful in holding down the paint while you pull off the tape. (Or you can do what I did and use your fingernails. Wayward!).


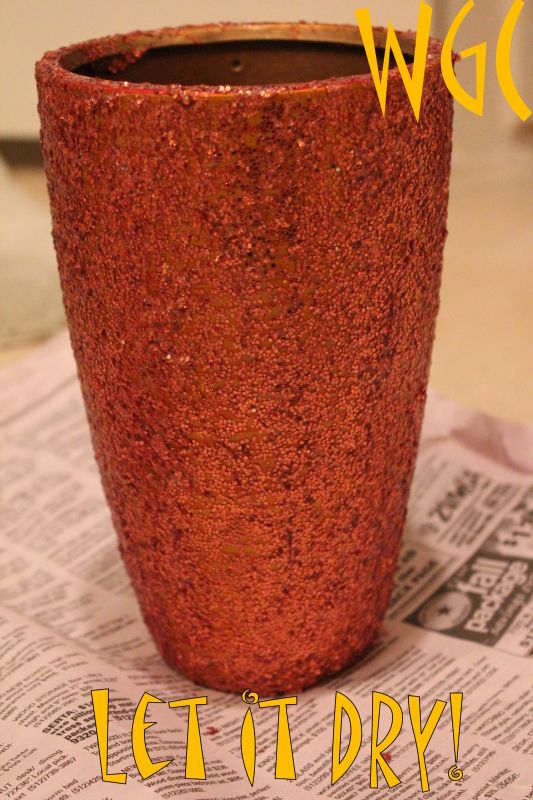
I still have three plain vases. What should I do? I was going to leave them blank, but my husband thinks they look . . . well, blank. My two ideas would be to borrow a page from Jaime's book and do a glitter vase, or to fill them with something cool. Glass beads? Autumn leaves? Colored water? (Ha--asking for trouble with four kids 8 & under!)

What do you think??

Christmas Parade of Homes 2013: Day 1

First of all I want to express my gratitude to the women who let me photograph their homes. They let me turn on and off lights, move things around, and generally disrupt their schedule. They sat and talked with me and played with and held my children. They were so kind and generous to let me come into their homes!

I learned something I wasn't expecting to, while visiting with them. They shared what they liked about their homes and why they celebrate Christmas the way they do. They shared their traditions and what I found their homes I wasn't expecting. I kind of expected everyone to celebrate holidays the same way I do- that's the only way I know how to celebrate holidays. Everyone's homes are filled to the brim with traditions. We usually celebrate like our parents and the things that mean the most to us have the most history.

This is my sweet friend Aleesha's house:

What a great mantle! Those are homemade stockings :)


This is her favorite ornament. Her husband made it for her the first year they were married. Isn't that so sweet!?

This is the detailing on her tree skirt. 

Her tree smelled delicious!

She had evergreen branches used all over. They smelled so good!

Cute table runner. Don't poinsettias just remind you of the holidays?

Don't you love the colors in her kitchen?!

Her village piece was on her piano- mine, too! 

Come back every day this week and see more decor including my house!

Adding Privacy to Front Door Sidelights

Note: Please forgive the horrible pictures in this post it is really hard to take a picture of windows. 

Our front door has sidelights on the two sides and across the top. This adds a lot of light but also leaves a lot of windows for little neighborhood children eyes to peek in. Can you see them now with their hands cupped around the sides of their eyes peeking in the windows?
Ahhh! I spelled SiDelights wrong! Sorry you'll have to forgive me!
I saw this pin and thought it was a great solution. She gets her tutorial from this post. (original tutorial)
Both posts are great! Here are some additional tips that I found while I was doing this tutorial:
  • After cutting out the shapes they will curl up. I put mine inside of a big book to help flatten them.
  • Use small scissors.
  • These shapes are a tessellation. They will fit together as you cut. The pattern found in the original tutorial is not quite perfect. To get your shapes to fit together a little better, before you start, make sure the top and bottom are the same. I wish I had done this.
  • It's not going to be perfect. If you look close at any of the pictures you can tell the area in between is not uniform. You and I are the only ones that will look that close.
  • When peeling the backing off the paper bend the shape curved with the paper on the inside of the curve (see picture) to help from creasing the contact paper while peeling. 
  • Enlist some help because seriously cutting 76 of these bad boys was time consuming! 
  • I cut a strip of paper 1/2" wide to help with spacing after a while I just eyeballed it. 


I kept mine the original size of the pattern unlike one of the tutorials. 

What do you think? 

Fall Initial for the Front Door

Recently I was Skyping one of my best friends and she was showing me her new house. As she walked in her front door I saw we both had A's on our front door (we happen to share the same last name). So basically what I'm trying to say is all the cool kids are doing it. Her A was painted turquoise and on a super cute burlap wreath.

Here is how I made mine:

I used 2MM Jute cording, a 12" A I got on sale for a great price, and two 2 stems of fall flowers.


 Tips for wrapping:
1: I started out by gluing the jute close to the bottom with hot glue
2: I wrapped it around one time and then I put glue (this is hard to see in the picture) on the bottom edge so you can't see any white. If I could do this again I probably would have painted the letter before hand.
3: I continued to wrap and put glue along the edge as I went.
4: I wrapped up the bottom of the A, cut and glued down the jute, and wrapped the jute around the cross of the A.
 For the flowers I wanted to be able to change them out so I glued them close together on a piece of stiff dark stiff felt. I glued the leaves onto the side.
 I glued a piece of jute on the back of the felt and tied it into the A. 


Isn't it cute?!

After I put up my fall decor I added the A to my wreath but I can change it out at any time. I think when it hangs alone I need to add a beefier bow at the top.

Have you tried adding jute to anything this fall?

Fall Decor

For the past three year I have shared with you guys my fall mantle (both can be seen here) and I feel like each year it gets better. This year I decided to add a bit more of that lovely fall feel to my autumn decorations with some burlap.

I've had this burlap for quite some time. They sell burlap in many different shades. I'm not sure what you're supposed to do with burlap but it's very stinky so when I got it home I washed it delicately in a bucket with some soap and then rinsed it. A good amount of dye came out (but I don't feel like it changed the color of the fabric) and so did the majority of the smell.


I added the burlap in two places. I used some vases and cut pieces about 4" wide x the circumference. I glued them on the back and wrapped some twine around about 10 times. I made a bow and glued it onto the side.


I also added the burlap as a table runner on both surfaces. I love the texture and richness the burlap adds.

How are you decorating for fall? 

The coolest part of my new house

The winner of the Mommy Magic Kit, drawn at random, is Kristen!
Kristen, please send us your mailing address (waywardgirlscrafts at gmail.com).
 
We mentioned back in June that I was moving to a new house. It's been four months and we're still getting settled, but I just have to share my favorite part of my new house.

Now, I have a lot of favorite parts, things I didn't have in my old house: the gas stove, the granite countertops, the office, the door to the master bath.

(No joke.)

But aesthetically, if I had to pick one thing I looooove most about my house, it would be this.

Okay, but first, the before

When we looked at the house, the main floor (the living room, semi-formal dining room & kitchen) was a nice, neutral beige. Lovely vaulted ceilings. Red accent wall.


That's not my house.

I saw a red wall and . . . well, I wasn't sure what I wanted at first. I don't like to do what everyone else does, and I've seen too many red walls (not that this doesn't look nice). But blue was the only other color that really spoke to me, and even that kind of left me cold.

(Get it? Because it's a cool color?)

Finally, I figured out exactly what I wanted to do. I checked around on Pinterest to make sure I wasn't totally insane--you know, just the fun kind of crazy--and then we took the plunge.

The after!

I saw a red wall and I wanted it . . .


PAINTED BLACK.

Yes, I have a massive wall in my house that is solid black. Sherwin + Williams Tricorn Black in satin sheen. (Coincidentally, a couple months after we had it painted, I stumbled across another blogger in Utah who has a S+W Tricorn Black wall in satin sheen in her dining room. What are the odds?!)

At first, you hear "black accent wall" and you think, "Goth." "Cavelike." "Ugh."

In case you can't tell from the pictures, let me tell ya: it's awesome. I have big (albeit indefinite) plans for that accent wall. I'm thinking it'd make a great backdrop for a gallery wall, with some giant photos of our family as well as smaller photos in frames painted to match our living room colors.

And when we change those living room colors? Black's neutral! I just have to repaint the frames!

You have to understand: I can do pretty much anything, but when it comes to home decor, I'm totally inept. I've spent probably years watching Trading Spaces and HGTV, and I know what looks good--but I couldn't put it together for the life of me. I have no discernible sense of style. I can't accessorize my way out of a HomeGoods store, were there one within 50 miles.

So, dude, a black wall? I feel so . . . avant garde. So chic. So freaking awesome!

What do you think? Have you ever taken a chance in your home design and LOVED it? Could you paint a wall black?

Help! I Have an Ugly Couch

I have an ugly couch. We got it from the thrift store so it has to be ugly apparently. Why don't you cover it you ask? Well it's a recliner sofa and they just don't make slipcovers for those. So I would have to completely recover it. My schedule clears up quite a bit in August (I'm graduating in July!!) so I will have time then to do some recovering. But I want to get it ready now. So what are your thoughts? We're newly weds so spending a bunch of money on fabric isn't really an option. I was thinking maybe buy painter's canvas since it comes in huge sheets and dye it? I don't know...HELP!!

Pintesting: alcohol for a microfiber couch

Right before we found out I was pregnant with my first baby, we bought a house. To furnish said house, we bought a microfiber couch and loveseat.

In off-white.

Yeeeeah.

Allegedly the couches were treated with some sort of protectant that meant you could only use water on the seats. But using water to clean your cushions leads to watermarks, which look even worse than the stains themselves:


The spot-cleaning with water solution is pretty much worse than the problem here.

Naturally, even though I'm not much of a deep cleaner, I had to repin this cleaning idea.


The basic idea: use rubbing alcohol instead of water.


Alcohol dries faster than water (the technical term for this chemical property is "volatility." Now you know), so the alcohol won't leave those big watermarks. Once it's dry, you take a scrub brush to the fabric to lift the fibers again.

Results!


A lot better, but obviously not perfect. I might have been able to get better results with more alcohol and more scrubbing, but it's very hard to tell how much scrubbing you still need to do when the entire cushion is wet! And if you're getting the entire cushion wet . . . hm.

Verdict:

My other solution to this problem was to liberally wet the entire couch top of the cushion: no edges, no watermarks, right?

Frankly, my solution was a bit easier. Both methods require considerable elbow grease, but my hands got tired from working the sprayer (a very wet rag is sufficient to clean the couches with water). Plus alcohol fumes are NOT fun. Alcohol does dry a lot faster (the above pictures were taken about an hour after the before shots, and the couch was dry enough that we put the cushions back on).

Also, neither method is effective on stains like pen, candy or permanent marker, and neither really helped with the very dirty arms of the couch.

And of course, a year later, the couch is just as bad—worse in places where my youngest has decided to express her artistic side. :\

Pintesting success:

I don't want to be all bad news. I tried this pin this weekend, and as you'd probably expect, the results were perfect:
Source: Laura on Pinterest

Line a bowl with foil before draining meat for easy cleanup! My husband thought this was so clever, he had to tell me twice!
Related Posts Plugin for WordPress, Blogger...