So what's going on with WGC?

The wayward girls have indeed been wayward this week. We apologize for our lack of posts! The NC contingent of the WGC have been involved in some big events. Last Saturday, I, along with 2 other women, spearheaded Women's Day at our church. We had about 300 women spend Saturday with us, making crafts, taking classes, and having lunch. It was all-consuming, and I have been in recovery mode this week. We had some great classes, including a couple that I showcased here earlier. Other craft classes included:
Painted glass bottles taught by Stephanie A.

These cute ties for boys taught by Melissa B.

A fruit bag made from a T-shirt taught by Liz. C

These ideas for embellishing kids' clothes by Kristie A

A crochet potholders.
 
It was a great day. We will be posting directions for many of these crafts at the website: durhamstakewomensday.com

Brooke and Jasmine have both been equally busy. They taught a class on hair styles at Women's Day. Expect to see the results here soon.
Brooke also had the very exciting experience of MOVING this week. She has been very busy and is likely unpacking right this very minute. Jasmine and I have spent some time helping her.
This morning, Jasmine left for a much awaited trip out to Utah. She met up with Jordan and they will be heading north to visit a very special friend!

So that's what's going on with us!

Cereal-ously Fun Post Cards!

One day I was at my aunt's house, looking at all the fun things you can send through the mail on Giver's Log with her teenage daughters. My aunt then said that one of the coolest things she ever got in the mail was a post card made from a cereal box. I LOVED this idea and wanted to send some fun post cards to my nephew and niece (Jordan's kids). Another thing I loved about it? The cost: it's free!

What you do:

Photobucket

Take a cereal box, and cut it up in to a rectangle. Make sure to cut it between the minimum and maximum sizes set by the Post Office:
  • Minimum: 5" long by 3 &1/2" high 
  • Maximum: 11" long by 6 & 1/8" high 
Photobucket

On the back, write out your message. Then address it and stamp it. 

Photobucket 

And send!

Photobucket

Here's proof my niece (4 years old) and nephew (6 years old) liked 'em

Photobucket

 These would be equally fun for kids to make!

Photobucket 

Other boxes to cut up and send: Mac and Cheese, Brownie or Cake mix, Tampon box (if you're feeling brave/funny/stupid with your menstruating friend), Toothpaste box (post card from the tooth fairy?). Tissue boxes for sick or sad friends, or a shoe box for shoe lover. Tons of possibilities and all of 'em are free! 

How to freeze pies

We're coming up on Fall and the holidays. It's pie time!


Sorry, no advice on fitting them  inside!
For any holiday where pies are the traditional dessert, it can take a lot of prep time—time you probably want to spend making sure that turkey doesn’t turn the texture of sawdust. Freezing pies in advance is one way to cut down on the stress of Thanksgiving.


Not all pies can be frozen, of course. Cooked custard pies don’t freeze well. Fruit pies, however, like the perennial favorite apple, are great to freeze. So prep them now and you can simply pop them in the oven the day of: don’t thaw.

Here are a few tips and baking time adjustments to make sure your pies taste just as amazing as they would if you’d slaved all morning peeling, pitting and chopping.

Freezing unbaked pies
Some say that freezing an unbaked pie makes the crust soggy between the moisture of the freezer and the fruit. Others, however, report success with freezing unbaked pies.

Purdue University says you can freeze raw pumpkin pies: don’t bake the crust, pour in the cold custard filling, wrap well with plastic wrap and freeze. Make double sure it’s level in the freezer! When you’re ready, take off the plastic, pop it in the oven without thawing at 400°F for 10 minutes. Then reduce to 325°F to finish baking. Remember that even unfrozen pumpkin pies can take an hour to bake, so watch it carefully.

For fruit pies,
  • If you’re using a fruit that browns (like apples), don’t forget to include lemon juice in your filling to prevent too much discoloration.
  • Wrap well in plastic wrap before placing in the freezer.
  • Purdue says to add an extra Tbsp thickener to the filling and don’t cut steam vents before freezing.
  • Again from Purdue: when you’re ready to bake, do not thaw. Unwrap, cut the steam vents and put the pan on a cookie sheet (always a good idea!). Bake at 450°F for 15 to 20 minutes, then 375°F for 20 to 30 minutes, or until the top crust is brown.
  • You might also consider just making the filling in advance and freezing it. Thaw just until you can get it in the crust and it’s ready to use!
Freezing baked pies
Again, don’t freeze a baked custard pie, like a pumpkin pie. The texture just doesn’t hold up in the freezer.
When you’re freezing a pie you’ve already baked, make sure you:
  • Cool the pie completely before freezing.
  • Wrap well with plastic wrap.
  • To reheat them, Purdue recommends unwrapping the pies to let them stand at room temperature for 15 minutes. Then bake at 350°F until warm, approximately 30 minutes.
All frozen pies keep about 4 months in the freezer. Purdue also recommends using a crust with a higher fat content if you’re going to be freezing it.

My recommendation? Freeze unbaked pies. It’s less work than essentially baking them twice, and the after-freezer baking time is almost exactly the same whether you baked it first or not. Plus, your risk of a crust made soggy by trapped condensation from the first baking is a lot lower.

What do you think? Do you freeze pies? Baked or unbaked?

No-Slip Shoes

I have a problem! Many of my shoes slip off my heels. I am trying to look all professional and suddenly I walk right out of my shoes. Yikes!
I really liked these cute shoes, but I couldn't stay in them.

I have tried various things, including purchasing a product made for this, but hadn't found the best answer.UNTIL NOW!
Look what I did last week.

I already had these things on hand. The carpet tape is about 1.25" wide and has a strong double sided adhesive.

I got a piece of tape about 3" long and applied it firmly to the rubbering, no-slip shelve liner.
I cut the mat to fit, rounded the edges, and applied it to my shoes.
It worked. I stayed in my shoes all day, and the heel inserts were soft and comfy.

Low Calorie Wrap

I LOVE this wrap. It's super yummy and quick to make. AND it's only around 200 calories! Yes, 200 calories people.
Ingredients:
Flour Tortilla
Lite Ranch Dressing
Feta
Turkey
Lettuce


Starting with a flour tortilla (120 calories) add some lite ranch dressing (half a serving is 40 calories and plenty of dressing). Spread that around.
In the center of the tortilla, add some feta. A full serving is 80 calories and is a tablespoon; I halved that since feta is a strong flavor and it was just enough.
Next, layer on some turkey (30 calories) or other lunch meat like roast beef or ham which are both yummy in this wrap, too.
On top of that, add some lettuce (2 calories...if that!)

Now roll it up and enjoy your delicious wrap!

Just Jaime's Guest Posting!


Hi guys! Today I'm guest posting at Blissful Bucket List! I am excited to have been invited by Sarah, a fun lady I met when were teens. Now, I get to guest post on her blog.  Check out my post and see what the heck this is:


Seriously, what is it? 

Ready for Fall Fun Decor

Last year I shared my fall decor on a budget:

Photobucket 

This year I changed it up, adding a few things I snagged at the end of the season last year and incorporating a few items I already had.


Photobucket

From Left to Right:

-BOMA Owl from Canada. A souvenir from the many trips my dad took there when he worked for a Canadian based company when I was a kid.

Photobucket

-Glitter Vase by me, filled with some clippings care of my apartment complex's dying bushes (free!)

Photobucket

-Candle from Hobby Lobby, purchased at the end of the season for 90% off
-Harry Potter and the Half-Blood Prince from my personal library. Thought it went well with the theme and loved the pop of color.
-Metal gourd from Hobby Lobby, 90% off

Photobucket

-Frame from last year's display (Goodwill), still got Kristen Duke's freebie in it
-Candle from HL, same sale
-Candle from Dollar Tree
-Beautiful quilted Fall Table Runner, by my mom, Diana. I love it!

How have you started decorating yet?

A month of Pinterest menu planning Monday

This year I've been working on my menu planning. I've done pretty well, usually using a couple of my favorite cookbooks. But this month, I decided to use a different recipe source: Pinterest!

Let's be honest: most of the recipes I pin only get that far. It was time to change that. I turned to my Savory Recipe board . . . which didn't have quite as many recipes as I thought. But I did have a couple collections of recipes pinned, so I managed to find enough to fill up my calendar.

In the last week, we've enjoyed:


Chicken curry (scroll down on the page)
To make this fresh, I added coconut milk and chicken broth to make the sauce (about 10 oz a piece). I omitted the mango because . . . weird, and the mangoes at my grocery store weren't looking so happy, and skipped the zucchini because my husband doesn't like zucchini, and again, weird.

I also adapted this for the pressure cooker using these basic instructions.


It was my first time using my pressure cooker. I don't know why it is that when I try to take a picture of soup, all I can see is steam, but when I try to take a picture of steam, I get nothing. Sigh.


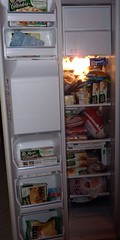
And I froze half of raw the meal to use for a slow cooker meal later.

[Sorry, no picture]
Spinach salad with cranberries, candied almonds, red onions and chicken (a leftover from another meal)


Black bean & corn salsa + chicken quesadillas (tortillas, cheese & chopped chicken [again, leftover])


We round out our weeks with homemade pizza on Fridays (crust recipe from Fast Easy Bread), breakfast for dinner on Saturdays and leftovers!


Upcoming meals:
This menu plan is tasty and will give us at least 3 "free" meals for the freezer! Better still, I have dinner planned from Sept 10 through October 6, with lots of ideas for the next four weeks (prime soup season!).

Do you make what you pin on Pinterest? Are you ready for a challenge?

Update on the room redo

We got the chair rail in our dining room. I think it really classed up the joint! Thanks to Jasmine for taking down the wallpaper and helping paint and Ben for putting in the chair rail. The whole thing was about $120 with lots of paint left over. Now for pictures on the wall!


Bubble Marble Card Stock

This is a fun, easy craft that even the kids will enjoy. Take a small amount of soap (preferably uncolored; scented doesn't matter) and add a small amount of water into a bowl. Size changes the pattern so it's up to you as to how large of a bowl you would like to use. I used a regular sized disposable bowl.
Add a few drops of food coloring and mix the color in.
With a straw, blow bubbles in the soapy mixture to fill the bowl a little over the rim. I stirred the bubbles to make them smaller so the color and pattern would look differently.
Taking card stock, lightly press the paper face down onto the bubbles not getting the paper in the water and lift up. You can repeat this as many times as you want adding different layers of bubbles.
Don't overdo it though, then it'll just look like a mess. Some bubbles may stay on the paper. You can let them pop on their own or blow them off.
Set aside to dry. Dry time is short and varies as to how many times you dipped it in the bubbles.

Young Toddler Distraction- from the Dollar Store

Thanks for all of your great input last week! I loved reading all the comments! I have the perfect old purse for PB to use and I'm gathering up old keys and credit cards. That is still a work in progress. I think that would be great to take to church. She has started to try to go through other people's bags when she is thwarted by the zipper on mine.


I did finish up a basket of things that I collected. Your comments really inspired me to look at her daily activities and what she loves to do which are:

  1. Make a mess
  2. Pretend (or for real) write. She carries anything pen-like around the house with books or pads of paper and pretends to write. I call her my little reporter.
  3. Shake and throw things
  4. Take lids off of containers
So I made the activities accordingly. So I got all of the things at the Dollar Store. I spent $9 and I used a bunch of stuff from around the house- especially the recycling bin. Here is what I bought:
  • Balloons
  • Cheap Playdough
  • Puff balls
  • Counting foam cubes 
  • a coloring book
  • A "glow slate" (see picture)
  • Cheap crayons
  • Colorful mini popsicle sticks
  • A bin to put it all in 
Here is what I made with them:


For her mess making spirit. I cut up scrap fabric into "wipies" and put the puffs and squares in there too. One of her favorite things is to pull all the wipies out of the container.
For my little reporter. I cut the top off of the glow slate and hot glued a ribbon with the pen attached. I got the cheap crayons because they are less likely to write on things that are not the coloring book.

I took the cheap playdough and stuffed two of the little containers worth into a balloon. I put another balloon over that and tied them off. The can stack the containers or take the lids off and throw the playdough 

My grandma gave me the container for the popsicle sticks. It is a Crystal Light packet container. She kept one at her house filled with old fashion clothes pins. I used a small water bottle and filled it with glitter, beads, and rhinestones. I hot glued the top on. It took a lot of hot glue because I didn't get it on right.


Tonight PB gets to play with her basket for the first time. I am in charge of an activity tonight where I need her very occupied. I'll let you know how it goes! Thanks again for all of your comments last week!

Autumn Orange Glitter Vase

Last year I made this glitter vase for my fall decor. It has held up great in storage and looks awesome still. This was originally shared on Craft Junkie Too last year. 

On Monday I headed to my local Goodwill. I love that place, even if it is dirty and was especially smelly on Monday. Anyways, I spotted this beauty:

Photobucket

I loved the orange stripes and the price, 99 cents! The problem was that the paint came off really easily. As in, I rubbed it with my finger and off it came. I wanted to keep the color but had to fill in a bunch of scratches. I recruited a friend to help me figure out a way to salvage the color. We brainstormed forever but couldn't find a solution. Finally, I decided on glitter.I got way too much orange glitter at Hobby Lobby, but now I've started my glitter collection I guess. Then I got to work.

Materials:
Vase
Glitter
Modge Podge
Container for Modge Podge mixture
Newspaper to prevent messes


Photobucket

Tools:
Paint Brush

After prepping your area with newspaper, pour some Modge Podge into your container

Photobucket

Step 2 is to pour in a LOT of glitter

Photobucket

Step 3: swirl the mixture around until it’s the thickness you want. I waited to use my paint brush to mix it until I had a lot of glitter in there. A LOT.

Photobucket

Finally, paint that sucker. Like I said, I wanted it to be really thick. And it was really thick.

Photobucket

Here it is drying. It took several hours to dry. Once the white disappeared, I saw a few places I needed to fill in. Easily done!

Photobucket


I LOVE the statement that it makes. Very bold. Very orange. Very bling. Perfect for fall. I love a piece that isn't just Halloween and can stay out until Thanksgiving.

Photobucket

Here's how I styled it for 2011.


On the table:

Photobucket

And 2012:

Photobucket

Tune in next week to see the whole tablescape! 
Related Posts Plugin for WordPress, Blogger...