

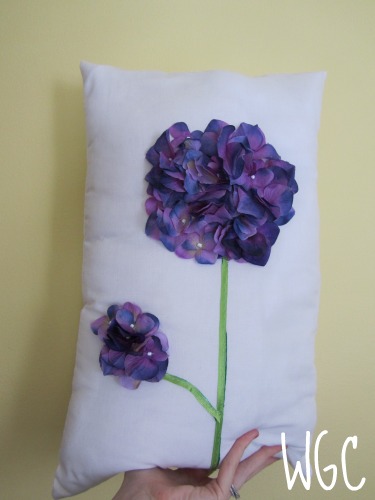
Hydrangea Pillow
Needed:
Silk flower
Seed Beads
Green Ribbon
Old Pillow Case
Filler
1. I used an old pillow case and sewed a small pillow out of it. The dimensions of the pillow are 12" x 19.5". At this point only cut the side wait to sew it. Take the petals off of the stem of the hydrangea.I just had to sew the left side because I used the existing seams of the pillow.
2. With a fabric pencil I drew a circle and started sewing the petals around the perimeter. Start the the knot in the back and come up through the hole in the 2 petals stacked, lace on a bead, and come back through the hole. I did this three times per petal. Move toward the middle and fill in where needed.

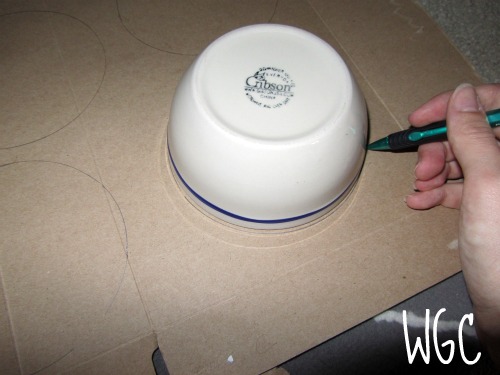
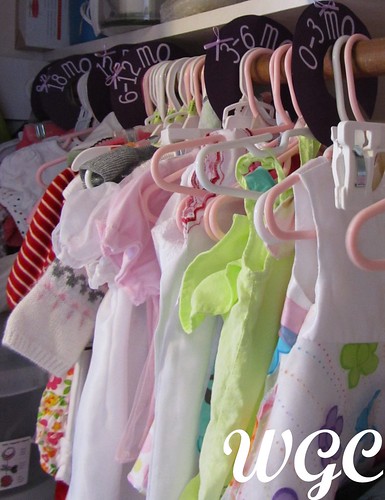
Fabric Dividers
Needed:
Cardboard (I used a cereal box)
Scrapbooking Paper
Letters
Ribbon
1. I used some paper to draw a template using a cereal bowl. I used a smaller circle for the inner circle. I folded the paper into 4ths and cut out a section. I traced the cereal bowl onto the cardboard and used the template for the inner circle and cut out.
3. I cut out the letters with my cricut and glued each one on along with a pretty little bow.
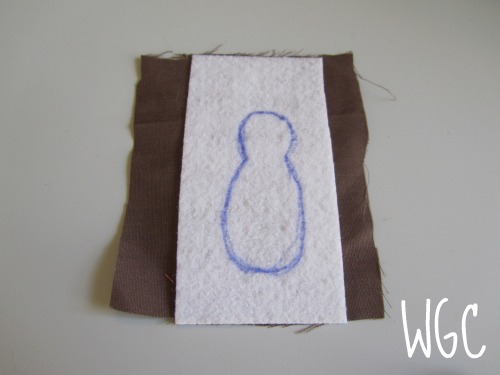
Thanksgiving Bow:
Needed:
Ribbons (I used pink, yellow, and orange. 3.5" of the pink and 12" of the orange and yellow)
Stiff Interfacing
Brown Fabric
Fabric Paint
Small orange felt beak
1. I cut out the shape of the turkey body out of interfacing. I cut the fabric just bigger than the body and glued it on the front. I then cut slits around the edge of the body so it would lay flat while I glued it around the edge.


2. I cut the ribbon in pink 1x 3.5" orange 2 x 3.5" and 2 x 2.5" and yellow 2 x 3.5" and 2 x 2.5" lengths. I looped them and hot glued them.
3. I glued them onto the back of the turkey with the small loops in the middle of the large loops.
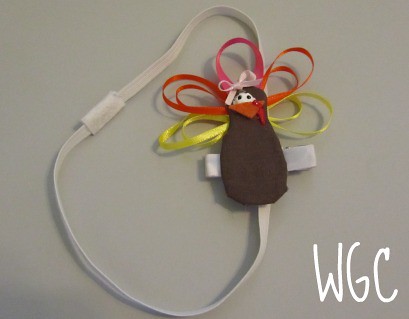
4. I glued on the small orange beak, made a waddle with red paint and the eyes with white and black paint. I made a loop with the interfacing on the back so it can be put on the interchangeable clip and onto a headband because she still doesn't have anything more than a fuzzy head :) After all this I smeared the eye so I put a bow on the Turkey because she's a girl.
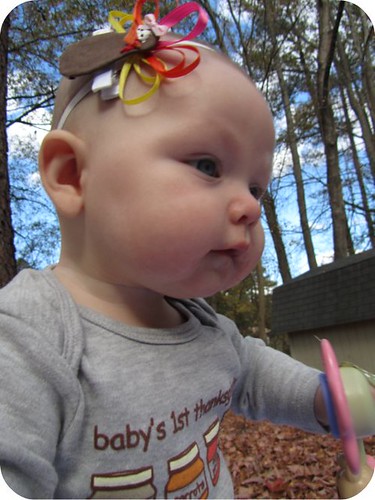
Here is her whole Thanksgiving Day outfit: Isn't she a cutie!? Her onsie is courtesy of her Aunt Jaime.She was being a total stinker and wasn't smiling.


6 comments :
The bow is adorable and so is PB!
I would have never thought of doing a pillow like that! PB's bow is adorable
Oh my goodness,such a beautiful, adorable baby.
Your pillow is gorgeous and great idea for organizing the clothing sizes....I should do that for MY clothes, teehee.
Great tutorials! You definitely have a little sweetheart on your hands!
Happy Thanksgiving to you and your families!
Oh my gosh how cute is that bow!!! Thanks so much for sharing the awesome tutorials. I want to make a hydrangea pillow now. Wow!
Post a Comment