Guest post: Teresa from Creative Cowgirl + GIVEAWAY

Month by Month My First Year Onesie Tutorial


Howdy there! My name is Teresa and I blog at Creative Cowgirl. I am super excited to be blog swapping here at Wayward Girls' Crafts. I love all sorts of crafts from scrapbooking to paper crafting to sewing. You can read more about me and my blog by clicking on my blog button.


I am a Mommy of three adorable kiddos ages 7, 2 and 5 months. I find that time has been going by so fast with my newest little one and I wanted to be sure that I was documenting her growing as much as I did with my other two.


Today, I am sharing with you a fun gift for the new mom since the Wayward Girls are welcoming a new addition to their family!


I picked out a digital scrapbooking kit from Designer Digitals and using Photoshop Elements came up with 12 months of tags for me to add to my daughter’s onesies. I used a 3.5” square but you can use a circle or even a fancier shape like a dinosaur or a star.


Month by Month Onsie Promo Page copy
I saved each image as a jpeg and imported it into my Silhouette Studio software. I then mirrored the image before printing. Using the “print and cut” feature. I printed each one out on printable iron-on transfer paper and then ironed them on to her onsies.


Start by heating up your iron and prepare your iron on a hard surface. Pressure is your friend.
DSC_0298
Lay down an old pillow case and iron out all the wrinkles.
DSC_0299
Then lay out your onsie and iron it to get the moisture and wrinkles out and place your iron on printed side down.
DSC_0301
Then iron using the cotton setting and press down as hard as possible. The instructions said to iron for about one minute. Then let it cool. Slowly peel one corner of the paper and peel it back.
DSC_0303
You will have a personalized onsie in minutes!
DSC_0305
I then did a bit of sewing…to fancy it up. I made a little flower out of Hawaiian ribbon I had and then sewed ribbon on the edge of the neckline.
DSC_0309
These are great for a baby shower gift. You can just package up the transfers and print out some cute directions and let the new Mommy iron it on the onsie, that way the size is correct.
Then she can start snapping away with her camera…
DSC_0315
DSC_0326
DSC_0342
I would love to share a set of these with one of Wayward Girls' Crafts' readers. All you have to do is leave a comment here with your best baby advice. I know new and seasoned Moms can always use some hints!

If you would like extra chances to win subscribe to Wayward Girls' Crafts and subscribe to the at Creative Cowgirl Blog. Be sure to leave a comment after you have done each.

Thanks so much to the Wayward Girls and congrats on the new addition!

Winner will be announced next week. You can enter through Tuesday, June 28, 2011.

$2 Flower Wreath

I share this tutorial on Maggie's blog, Chica Es Artistica , last week. 

I've never really made a wreath before. I've seen lots of people share them on blogs and Pinterest  so I thought I'd give it a go myself. I give you, the $2 Flower Wreath!


Materials:


Floral wreath from the Dollar Tree
White acrylic paint
Paint Brush
Glue gun
Cardstock (I used Core'dinations Glitter Silk, Opulent Opal)
I thought about adding a pink flower I'd already made, but I decided to leave it off 

Let's get started!


First paint that green wreath! Paint it whatever color of cardstock you're using. Make sure to paint both sides. Give the first side time to dry before you flip it over. It doesn't have to be perfect but it will show through, so it needs to be fully covered. 

Next punch out a BUNCH of hydrangeas. I used one and half full pages of cardstock to cover my wreath. Give the flowers a little shape by slightly folding up the petals as seen below: 


Use your glue gun to adhere the flowers all over. Try not to burn your fingers too badly.


And you're done. A cute wreath for just $2!  I got the idea from the pomander flower spheres we made for Brooke's shower.

What crafts have you made that have inspired other crafts?  

Perfect S'more Cupcakes (+ giveaway winner and update on Sister Saturday Challenge)

For my son's fifth birthday a few months ago, I wanted to make s'more cupcakes. (To be honest, this was completely for me and the other moms, since my son wouldn't eat marshmallows that were "aww mewty!" Thus he did not appreciate the joy of s'mores, though he did enjoy lighting a marshmallow on fire while camping this weekend.) Since summer officially begins this week, I thought this was the perfect time to share! What says summer better than s'mores?


I've had a s'more cupcake at our local cupcake shop, but I wasn't impressed. I think it's a texture thing: you just can't replicate the experience of warm melted chocolate, even with chocolate cake. And a crispy-gooey marshmallow is nothing like a boiled meringue frosting.


So I sent Jasmine off to do some digging for me, and she came up with a couple s'more cupcake inspirations. I found a quick graham cracker cake recipe on All Recipes—and then I did what I wanted. (Hello! Wayward!)

To start, I made a milk chocolate ganache by bringing 1/4c heavy cream to a boil, then taking that off the heat and adding 1/2c milk chocolate chips. Once the chocolate chips were fully melted, I poured that into my small mixing bowl to cool and refrigerate.


For the cake, I crushed one cellophane package of graham crackers into fine crumbs (about 1 1/4 c crumbs, but I think 1 1/2 c would be better):


Baby helped me dispose of the extra graham cracker pieces.


I added the crumbs an 18.25 oz dry yellow cake mix:


Since we're at a high altitude, I figured this would be okay. And since I didn't feel like getting out a whole 'nother egg carton just for the third egg, I only added two eggs with the other indicated wet ingredients.

I took a page from Cupcake Wars and used an ice cream scoop to fill the cups.


Yes, baking is an exacting science, and an exacting scientist, I am not. Luckily for me, this time it turned out even better than okay: the cake was moist and delicious!


By now the ganache was cool (I started it in the morning and baked the cupcakes in the afternoon). I took it out of the refrigerator and whipped it in my mixer.

Then I scooped the middles out of the cupcakes with a serrated spoon which called itself a "tomato corer":

Holy cupcakes!

And filled with the whipped ganache:

I used a plastic baggie with a corner snipped off for both the ganache and the frosting: marshmallow crème.


I'd show you how I piped it on, but 1.) it took both hands and 2.) it's not impressive.

Now, marshmallow crème will run together after it sits a few minutes, so I recommend only "frosting" a few at a time (at most 6, less if you're going slowly). Once you have a small batch frosted, pop 'em under the broiler:


I like to keep my oven open while I do this because I do tend to burn things under the broiler.

But if you burn these, it's okay! The burnt marshmallow pops off like a lid:


And you can try again.


These actually keep pretty well in airtight containers overnight. The delicious golden brown crunchiness of the marshmallow will dissolve but it keeps the coloring and the shape. But nothing beats a warm, fresh one! (Reheating under the broiler made the frosting crack, but it tasted amazing!)

Next time, I might even brave making a cake from scratch.

Recipe

Whipped chocolate ganache filling
1/4 c heavy cream
1/2 c milk chocolate chips
Boil cream. Add chocolate chips. Stir until chocolate chips are fully melted and mixture is deep brown. Pour into bowl. Cool and refrigerate. Once cold, beat with electric mixer until you reach the desired consistency (like frosting).

Graham cracker cake
Add 1 1/2 fine graham cracker crumbs to yellow cake mix. (May omit 1 egg.)

This recipe was prepared at high altitude

How would you make s'more cupcakes?


And a few updates:

The first ever Saturday Sister Spotlight was so much fun! I loved getting to know the Three Sisterz better—and I loved seeing how they took up the Saturday Sister Challenge! You can see all their watermelon-inspired crafts in the challenge update here!

And the winner of my ribbon runner from last week, chosen completely at random, I swear, is . . .

Flannery of Three Sisterz!


Send me your address, Flannery, and I'll get that in the mail to you this week!

Saturday Sister Spotlight 1: Three Sisterz!

When we started this blog, I (naively) believed that a sister craft blog was pretty unique. (Okay, sisters+Mom is pretty unique, but still.) I'm happy to be wrong. I find new sister craft blogs all the time and, knowing the bond of sisters—and craftiness—I always feel a special kinship to these blogs. I tried to think of a way to connect with these other blogs, and with Jaime's help, we came up with Saturday Sister Spotlight right about the time we found our first spotlightee (or they found us).


And our first honoree is:


In case you didn't guess, Three Sisterz is the bloggy home of three crafting sisters: Courtenay, Flannery and Molly:
Molly, Courtenay & Flannery
Courtenay
The oldest (or wisest) sister.  We call her our "Creative Director."  Teacher by trade.  Mother of 3 beautiful girls.  Married to her college sweetheart.

Flannery
The middle sister.  Our IT Director and brilliant writer.   She's a nerdy librarian.  Mother to 3 spunky girls.  Met her hubby in a bar.

Molly
The baby.  The crafty sister & wannabe photographer.  Oncology nurse by day.  Mother to a baby boy & a troublesome boxer.  Met her husband on Match.com

I dug through their blog to find some of their best crafts and tutorials—so be sure to check out:
Courtenay's chicken chili:

Flannery's bib necklace from vintage jewelry:

and Molly's preppy baby step stool:

Clearly the sisters have some talents! So we decided to take this spotlight to the next level with . . .


A Saturday Sister Spotlight Challenge!

We challenged the Three Sisterz to create crafts around a theme of our choosing, and with summer upon us, that theme is . . . WATERMELON!

So stay tuned to Three Sisterz to where they take that theme!

UPDATES:
Flannery has posted her craft: a watermelon-inspired pillow!


Molly joins in the fun: watermelon-inspired creamsicles!

Courtenay finishes us off with a watermelon appliqué tee!

What awesome crafts, Three Sisterz! Thank you so much for taking the challenge—it's been a blast!

100 calorie potato chips!


I have been struggling to figure out how to honor the number 100 for this week. I was thinking about making a tutorial on making frosting roses in 100 seconds. Well, after 100 takes and 100 tears, I discarded that idea. My brain is a little scrambled right now-- lots going on here, so I finally came up with this.

I promise to step it up soon. School just got out yesterday and right after I get back from Mexico, I plan to try out some more heavy duty crafts! In the meantime, here is my salute to 100.

A single serving of regular potato chips (1 ounce) contains 152 calories and 9.8 grams of fat. I estimate that you could have about 3.5 ounces of these easy homemade potato chips for about 100 calories with very little fat!

You will need potatoes, sprayable oil or Pam (I bought a spray bottle for my oil and LOVE it!), a peeler or mandoline, and freezer paper.

1. Wash your potatoes. You can peel them if you want, but I usually don't.


2. Take out the glass tray from your microwave. Cut a piece of freezer paper to fit the tray exactly. Lay the paper on the tray. Spray it lightly with oil.

3. Slice your potato very thinly using the peeler or the mandoline. (Sometimes I just use a knife to do it.) You are trying to make them look like potato chips.

4. Lay all of the potato  pieces out on the freezer paper. They should not overlap. Lightly salt the chips. You can use other seasonings as desired. You could also give them a light spray with oil, but it isn't essential.

5. Put the tray back in the microwave and cook on high for 4 minutes. It will probably take longer, but it would be a good idea to check them. Cook for additional minutes as needed. When they are done, they will be golden brown and crispy. They will slide right off the paper.


6. Enjoy!

Note:  a small potato is about 5 ounces. The whole potato would be 131 calories

100 Marshmallow Fondant

If you couldn't tell from past posts, I like food and I like to make food. To celebrate 100 followers, my 100 items is marshmallows! Have you ever seen those beautifully iced cakes that look like they're not even cakes? Fondant makes the cake look so good. I found an easy and kind of tasty way to make fondant using marshmallows, powder sugar, water, and some good ol' shortening.

My mom and I found this website with the recipe a couple years ago and have loved experimenting with it. Click here for the link and recipe.

The website explains it better than I can so I'll let you readers explore the making. Now for dying the fondant, that's where the fun comes in. My mom and I had to experiment with how to do this without dying our hands. We found that if you take a baggy and put a section of the fondant in the baggy along with some food coloring (look on the packaging to see how to get a certain shade.) Knead the fondant in the baggy until the color is even. The fondant should absorb the food color and it shouldn't spread to your hands once you take the fondant out of the baggy. Roll it out, cut it out, twist it, do whatever you want to create your very own fancy cake.  First, ice the cake (also known as dirty icing) then put the fondant over it. You can use water to attach stripes, shapes, or whatever you want.

This is the cake Jordan and I made for Rebecca's 2nd birthday. Instead of frosting we used apricot jam on butter pecan cake. Super delicious!

Ok...so I didn't count the marshmallows but we can just say we did ;)

____________________________________________________________________________

Just Jaime is guest posting at Chica es Aristica today

Photobucket


She is sharing this $2 Wreath. Go take a look =)

Guest Post: Angela from Love Sweet Love


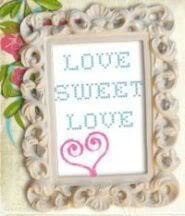
As you may remember, Brooke had her baby girl last week. Both Brooke and her little one are doing well. Our first guest poster is my in-real-life-before-we-both-blogged-friend, Angela. Go check out her amazing blog, Love Sweet Love when you have the chance. She's got TONS of holiday ideas for kids and fun decorating projects. Love her!


Hello fellow Wayward Girls lovers, I am Angela the voice behind the blog Love Sweet Love! I am so honored to be here today guest posting for the sweet Brooke as she is having her first precious little baby! I am also honored to know Mrs. Jaime personally. Like we've taken a Jazz dance class together, stayed up till 2 am talking and were part of a super exclusive group called JAM back in Orem, UT :) Wayward Girls and Love Sweet Love started about the same time, and it's been so fun to watch them grow and now I get to be apart of it!

I use my little corner of the blogging universe to share my creative ideas that involve easy DIY projects for the home, craft ideas for kids, thrift store makeovers, and holiday decorating (the reason I started blogging!). My life is over-flowing with Sweet Love and I needed a place to share it!! If you pop over for a visit you'll notice that every one of my blog posts has the words Sweet Love in there somewhere (kind of like a Where's Waldo type thing with words :) ) just to keep things fun!


Today I wanted to share with you a simple, fun tutorial on how to make a set of 'FAMILY' blocks. You could use this tutorial to create a set for any holiday/season to add fun decor to your holiday decorating!


Just to give you an example of other ideas, here are some blocks I've done for different holidays:
Valentines:

St. Patrick's: (this is actually just on the backside of the LOVE blocks)


Easter/Spring:


Ready to make some of your own?! Start with 6 wood blocks. Mine are cut from a 2x4 so they are each 2"x 3".


Give them a light coat of spray paint (I chose black) and then a light sanding to give them somewhat of a worn look.


If you don't want to hang the blocks, just skip the next 2 steps and you can make them to be free-standing and they'd still be super cute! If you do want to hang them, decide how long you want them to hang from your rod (mine is a $1.50 silver curtain rod from Walmart that I spray painted black) and cut 6 pieces of ribbon. Each of my ribbon's are 8 inches.


Next, I used a staple gun to staple the ribbon directly to the block-one staple on the back and front of the block.


Then you'll want to pick a few sheets of coordinating scrapbook paper. My living room colors are deep reds, browns, and creams so I chose these:


Cut your papers to be the same size as the front of each block.


I've done this part using mod-podge previously, but this time I decided to just try it with a glue stick and it worked great-even better then the mod-podge because I didn't have to deal with the air bubbles you sometimes get from it. Just cover the back side of your paper with glue and stick it on to the wood!


After all my papers were glued to the block, I very lightly sanded the edge of each block.


I just wanted my blocks to give a slightly worn look, not full blown antique.


Next, I used my cricut to cut vinyl letters to attach to the blocks. You could also use scrapbook stickers if you don't have a cricut. Then I covered each block with a light layer of mod-podge to seal everything together.


Now Embellish, Embellish, Embellish!!!


And that's it, you're done!


I love the look of the hanging blocks, but wouldn't they look so great stacked together on a mantle or in your TV hutch?!


I loved spending my day here with you today. Thank you so much to ALL the Wayward Girls for the opportunity to be apart of your FUN blog! Come visit me over at Love Sweet Love anytime!
Related Posts Plugin for WordPress, Blogger...